

Introduction: Elevate Your Seafood Game with Minimal Effort
Imagine serving a dish so elegant, so buttery, and so delicious that your dinner guests think they’re dining at a five-star coastal restaurant. Now imagine creating that same dish in just 20 minutes with only a handful of ingredients. That’s the magic of Garlic Butter Baked Scallops—a recipe that delivers maximum flavor with minimal fuss.
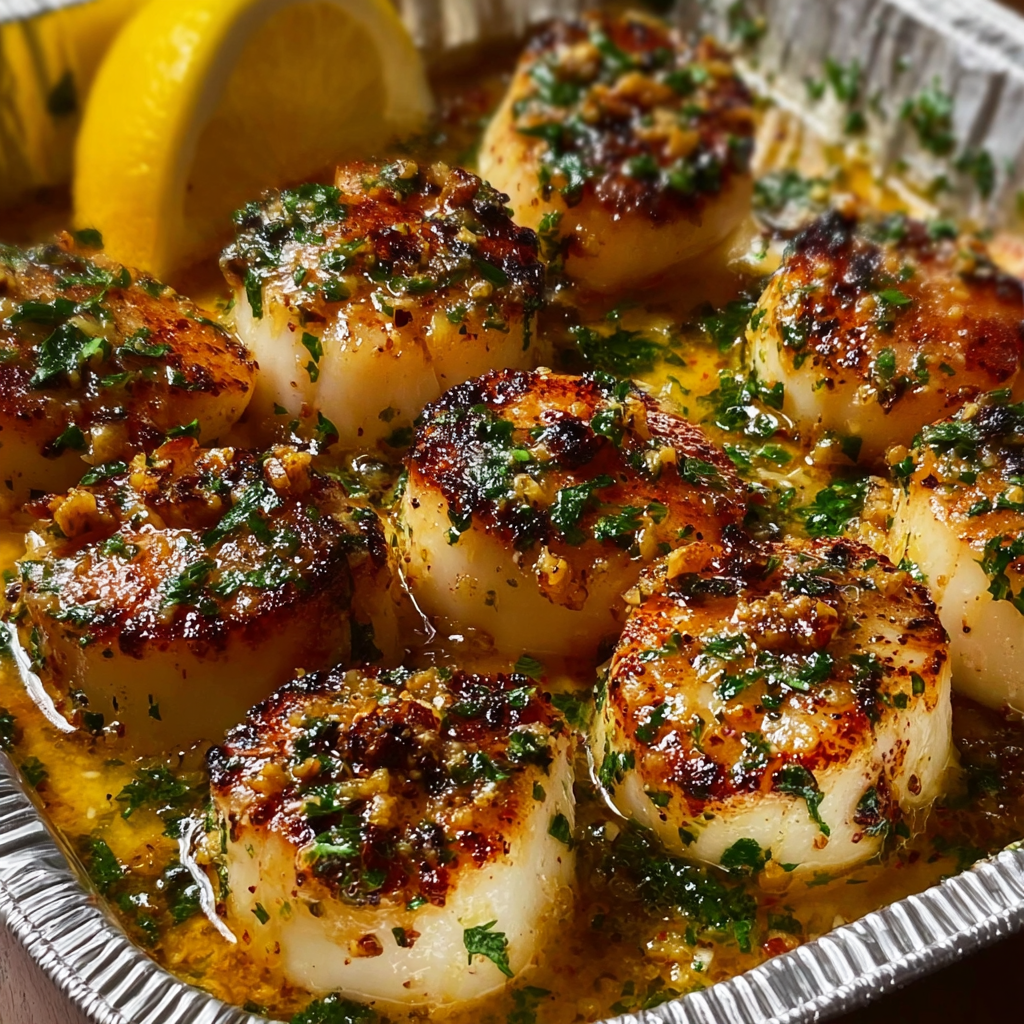
Scallops have a reputation for being intimidating to cook at home, but this baked version eliminates the guesswork. No need to worry about perfect searing or timing—the oven does all the work while you bask in the aromatic glory of butter, garlic, and fresh herbs. The result? Tender, succulent scallops with golden-brown caramelized tops, swimming in a pool of garlicky butter that begs to be soaked up with crusty bread.
Whether you’re planning a romantic date night, celebrating a special occasion, impressing dinner guests, or simply treating yourself to restaurant-quality seafood at home, these garlic butter scallops are your answer. They’re quick enough for a weeknight yet impressive enough for the fanciest celebration.
Let’s dive into creating this show-stopping seafood sensation that will have everyone asking for your secret!
Why You’ll Love These Garlic Butter Scallops
Restaurant Quality: Tastes like a $40 appetizer from an upscale steakhouse but costs a fraction to make.
Lightning Fast: Ready in just 20 minutes from start to finish—perfect for busy weeknights.
Beginner-Friendly: No complicated techniques or special equipment needed. If you can melt butter and use an oven, you can make this.
Minimal Ingredients: Just 7 main ingredients, most of which you probably have in your kitchen.
Impressive Presentation: Looks stunning on the plate with those golden-brown tops and herb-flecked butter sauce.
Versatile: Serve as an elegant appetizer or as a main course with your favorite sides.
Foolproof: Baking is more forgiving than pan-searing, making it nearly impossible to overcook.
Flavor Bomb: The garlic butter infuses every bite with rich, savory, aromatic deliciousness.
Ingredients You’ll Need
For the Scallops:
- 1.5 lbs large sea scallops (about 12-15 scallops, dry-packed preferred)
- 6 tablespoons unsalted butter, melted
- 6 cloves garlic, minced (about 2 tablespoons)
- 2 tablespoons fresh lemon juice (about 1 lemon)
- 1/4 cup fresh parsley, finely chopped
- 1/2 teaspoon salt (adjust to taste)
- 1/4 teaspoon black pepper
- 1/4 teaspoon red pepper flakes (optional, for heat)
- 1/4 teaspoon paprika (for color and subtle flavor)
For Serving:
- Lemon wedges (for garnish and squeezing)
- Extra fresh parsley, chopped
- Crusty bread (for soaking up that incredible butter)
- Additional melted butter (optional, for extra indulgence)
Optional Additions:
- White wine (2 tablespoons for the sauce)
- Parmesan cheese, grated (2 tablespoons for topping)
- Panko breadcrumbs (1/4 cup for a crispy topping)
- Fresh thyme or basil (for herb variation)
Step-by-Step Instructions
Step 1: Prepare Your Scallops (5 minutes)
Choose quality scallops: Look for “dry-packed” sea scallops at your seafood counter. These haven’t been treated with preservatives and will brown better. They should smell fresh and ocean-like, never fishy.
Pat completely dry: This is crucial! Use paper towels to thoroughly pat each scallop dry on all sides. Moisture is the enemy of browning—dry scallops = golden caramelization.
Remove the muscle: Check each scallop for the small, tough side muscle (a small rectangular tag on the side). Gently pull it off with your fingers. It’s edible but chewy.
Season lightly: Sprinkle both sides with a pinch of salt and black pepper. Don’t overdo it—the garlic butter adds plenty of flavor.
Pro Tip: Let scallops sit at room temperature for 10-15 minutes before cooking for more even cooking throughout.
Step 2: Make the Garlic Butter Sauce (5 minutes)
Preheat your oven to 425°F (220°C). Position the rack in the upper third of the oven for optimal browning.
In a small saucepan or microwave-safe bowl, melt the 6 tablespoons of butter. Once melted, add:
- Minced garlic (6 cloves)
- Fresh lemon juice (2 tablespoons)
- Paprika (1/4 teaspoon)
- Red pepper flakes (if using)
- Half of the chopped parsley (save the rest for garnish)
Stir well to combine. The garlic will infuse the butter with incredible flavor.
Optional Enhancement: For even more flavor, sauté the minced garlic in the butter for 1-2 minutes over low heat until fragrant but not browned. This mellows the garlic and adds depth.
Step 3: Arrange Scallops in Baking Dish (2 minutes)
Choose an oven-safe baking dish that fits your scallops in a single layer without crowding. Options include:
- Aluminum foil pan (like in the photo—disposable and easy cleanup)
- Cast iron skillet (retains heat beautifully)
- Ceramic or glass baking dish
- Individual gratin dishes (for elegant single servings)
Arrange the scallops in the dish with a little space between each one. They should lie flat and not touch.
Pour about half of the garlic butter mixture into the bottom of the pan, creating a pool for the scallops to sit in.
Place scallops on top of the butter, then drizzle the remaining garlic butter over each scallop, making sure each one is generously coated.
Pro Tip: Tilt the pan slightly to ensure butter covers the bottom evenly—this prevents sticking and creates more sauce.
Step 4: Bake to Golden Perfection (10-12 minutes)
Place the baking dish on the upper rack of your preheated 425°F oven.
Bake for 10-12 minutes, depending on the size of your scallops:
- Small scallops (under 1 inch): 8-10 minutes
- Large scallops (1.5-2 inches): 10-12 minutes
- Jumbo scallops (over 2 inches): 12-14 minutes
Doneness indicators:
- Scallops should be opaque throughout
- Slightly firm to the touch but still springy (not rubbery)
- Internal temperature reaches 130-135°F
- Tops are golden brown with some caramelization
- Edges are just beginning to turn golden
Critical Tip: Don’t overbake! Scallops go from perfectly tender to rubbery in just 1-2 minutes. They’ll continue cooking slightly after removing from the oven.
Step 5: Optional Broil for Extra Browning (1-2 minutes)
If you want more caramelization and golden-brown color on top, switch the oven to BROIL on high for the last 1-2 minutes of cooking.
Watch carefully! Broiling happens fast. You want golden-brown spots, not burned garlic.
Remove immediately when you see the desired color.
Step 6: Garnish and Serve (2 minutes)
Remove the baking dish from the oven (careful—it’s very hot!).
Immediately garnish with:
- Remaining fresh parsley, chopped
- Fresh lemon wedges arranged around the scallops
- Optional: A sprinkle of grated Parmesan or extra red pepper flakes
Baste the scallops: Use a spoon to drizzle the hot garlic butter from the bottom of the pan over each scallop. This adds extra moisture and flavor.
Serve immediately while piping hot. The butter should be bubbling and aromatic.
Tips and Tricks for Perfect Scallops Every Time
Dry is Key: Cannot stress this enough—pat scallops completely dry with paper towels. Moisture prevents browning and creates steaming instead of caramelization.
Don’t Overcrowd: Scallops need space around them for even cooking and browning. If necessary, use two baking dishes.
Room Temperature: Let scallops sit out for 10-15 minutes before cooking. Cold scallops cook unevenly.
Fresh Garlic: Pre-minced jarred garlic doesn’t compare to fresh. Take the extra minute to mince fresh cloves.
Quality Butter: Use real butter, not margarine. European-style butter with higher fat content is even better.
Timing is Everything: Set a timer! Overcooked scallops become rubbery and chewy. Better slightly undercooked than overcooked.
Save That Butter: The garlic butter left in the pan is liquid gold—serve it with crusty bread for dipping or drizzle over pasta, rice, or vegetables.
Fresh Herbs: While dried herbs can work in a pinch, fresh parsley makes a huge difference in both flavor and appearance.
Lemon Brightness: Fresh lemon juice cuts through the richness of the butter and enhances the seafood flavor. Don’t skip it!
Nutritional Information (Per Serving, based on 4 servings)
- Calories: 285
- Protein: 24g
- Carbohydrates: 5g
- Fat: 19g
- Saturated Fat: 11g
- Cholesterol: 95mg
- Sodium: 520mg
- Fiber: 0g
- Sugar: 0g
- Omega-3 Fatty Acids: 340mg
Note: Scallops are low in calories but high in protein, making this a relatively healthy indulgence. Nutritional values are approximate.
Delicious Variations to Try
Parmesan Crusted: Top each scallop with 1 tablespoon grated Parmesan before baking for a cheesy, golden crust.
Crispy Breadcrumb Topping: Mix 1/4 cup panko breadcrumbs with 2 tablespoons melted butter and sprinkle over scallops before baking.
Bacon Wrapped: Wrap each scallop with half a strip of thin bacon before baking. Secure with toothpicks.
White Wine Butter: Add 2-3 tablespoons white wine to the garlic butter for a more sophisticated sauce.
Cajun Style: Replace paprika with Cajun seasoning for a spicy kick.
Herb Garden: Add fresh thyme, basil, or dill to the butter mixture for different herb profiles.
Asian-Inspired: Replace butter with sesame oil, add ginger and soy sauce, garnish with green onions and sesame seeds.
Creamy Scallops: Add 2 tablespoons heavy cream to the butter sauce for extra richness.
Lemon Herb: Double the lemon juice and add lemon zest for extra citrus brightness.

Storage and Reheating Instructions
Best Fresh: Scallops are best enjoyed immediately after cooking while tender and hot.
Refrigerator Storage: Store leftover scallops and butter sauce in an airtight container for up to 2 days.
Freezing: Not recommended—scallops become rubbery when frozen and reheated.
Reheating:
- Oven (best method): 350°F for 5-7 minutes until just warmed through
- Microwave: 30-45 seconds on 50% power (be careful not to overcook)
- Stovetop: Warm gently in a pan with the butter sauce over low heat
Pro Tip: Add a splash of fresh lemon juice and butter when reheating to refresh the flavors.
Serving Suggestions
These garlic butter scallops are incredibly versatile. Here’s how to serve them:
As an Appetizer (serves 6-8):
Serve 2-3 scallops per person with:
- Crusty bread or garlic bread for soaking up butter
- Lemon wedges
- Small salad with vinaigrette
As a Main Course (serves 3-4):
Serve 4-5 scallops per person with:
Starches:
- Garlic mashed potatoes or cauliflower mash
- Risotto (lemon or mushroom)
- Pasta (angel hair or linguine) tossed in the garlic butter
- Polenta or grits
- Rice pilaf or wild rice
Vegetables:
- Roasted asparagus with lemon
- Sautéed green beans with almonds
- Grilled zucchini and squash
- Roasted Brussels sprouts
- Steamed broccoli with butter
Salads:
- Caesar salad with shaved Parmesan
- Arugula salad with lemon vinaigrette
- Mixed greens with balsamic dressing
Wine Pairings:
- White: Chardonnay, Sauvignon Blanc, Pinot Grigio, Albariño
- Champagne: Prosecco or Cava for celebration
- Rosé: Dry Provence-style rosé
Frequently Asked Questions (FAQs)
Q: What’s the difference between bay scallops and sea scallops? A: Sea scallops are much larger (1.5-2 inches) and meatier—perfect for this recipe. Bay scallops are tiny (pea-sized) and better for soups or pasta dishes.
Q: What does “dry-packed” mean? A: Dry-packed scallops haven’t been treated with sodium tripolyphosphate (STP), a preservative that makes scallops absorb water. Wet-packed scallops are harder to brown and can taste soapy.
Q: How do I know if my scallops are fresh? A: Fresh scallops should smell sweet and briny like the ocean, never fishy or ammonia-like. They should be slightly translucent and firm, not slimy or falling apart.
Q: Can I use frozen scallops? A: Yes! Thaw completely in the refrigerator overnight, then pat very dry. Frozen scallops often contain more moisture, so extra drying is crucial.
Q: Why are my scallops rubbery? A: Overcooking is the #1 cause. Scallops cook quickly—10-12 minutes max in a 425°F oven. They should be opaque but still slightly translucent in the very center.
Q: Can I make this ahead? A: Not recommended. Scallops are best cooked just before serving. However, you can prep the garlic butter mixture up to 2 days ahead and refrigerate.
Q: What if I don’t have an oven-safe dish? A: Use any oven-safe pan: cast iron skillet, glass baking dish, or even a lined baking sheet.
Q: Can I add other seafood? A: Absolutely! Shrimp, lobster tail pieces, or chunks of firm white fish all work beautifully with this garlic butter treatment.
Q: Is this dish gluten-free? A: Yes, completely gluten-free as written! Skip the breadcrumb topping variation if you’re strictly gluten-free.
Q: How many scallops per person? A: As an appetizer: 2-3 scallops. As a main course: 4-5 large scallops per person.
The Science Behind Perfect Scallops
Understanding the science helps you achieve better results:
Protein Coagulation: Scallops are almost pure protein. When heated, proteins coagulate (firm up). Overcooking causes proteins to squeeze out moisture, resulting in rubbery texture.
Maillard Reaction: The golden-brown color comes from the Maillard reaction—a chemical reaction between amino acids and sugars that creates hundreds of flavor compounds. This requires high heat and dry surface.
Moisture is the Enemy: Water on the scallop’s surface creates steam, preventing browning. This is why patting dry is so critical.
Carry-Over Cooking: Scallops continue cooking after leaving the oven from residual heat. Remove them when they’re almost done, not completely done.
Temperature Sweet Spot: The ideal internal temperature is 130-135°F. Above 140°F, scallops become tough and rubbery.
Conclusion: Restaurant Elegance Made Easy
These Garlic Butter Baked Scallops prove that restaurant-quality doesn’t have to mean restaurant-complicated. With just 20 minutes and a handful of simple ingredients, you can create a dish that rivals anything from an upscale seafood restaurant.
The beauty of this recipe lies in its simplicity—the butter, garlic, and lemon enhance the natural sweetness of the scallops without overwhelming them. The baking method is forgiving and foolproof, making it accessible even for beginner cooks. Yet the results are impressive enough to serve at your most special occasions.
Whether you’re planning a romantic dinner for two, hosting a dinner party, celebrating a milestone, or simply indulging in a weeknight treat, these scallops deliver elegance, flavor, and satisfaction. The golden-brown tops, the aromatic garlic butter, the tender texture—every element comes together to create pure seafood perfection.
So grab those scallops, melt that butter, and prepare to impress. Your taste buds (and your dinner guests) are in for an unforgettable treat!
Bon appétit! 🧈🧄🦪✨


