
Introduction: A Cozy Hug in Cake Form
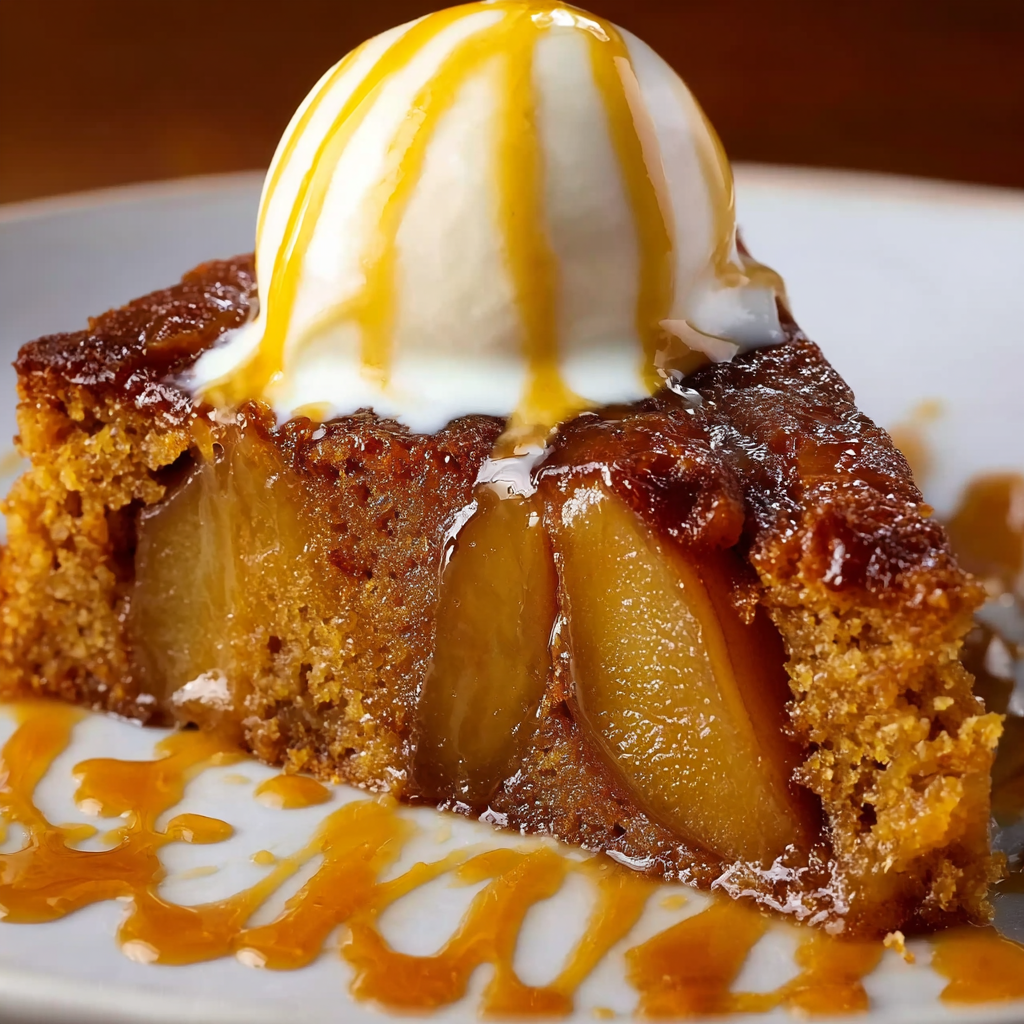
There are few desserts as comforting and soul-warming as a Sticky Pear and Ginger Cake fresh from the oven, topped with a scoop of melting vanilla ice cream. This British-inspired dessert combines the warm spice of ginger with the delicate sweetness of caramelized pears, all held together in an incredibly moist, sticky cake that’s more like a pudding than a traditional cake.
This isn’t just any cake—it’s the kind of dessert that makes cold evenings feel cozy, that turns a simple dinner into a special occasion, and that has everyone asking for seconds (and the recipe!). The magic lies in the sticky toffee-like sauce that soaks into every bite, the tender pears that add pockets of fruit sweetness, and that perfect balance of warming spices that makes your kitchen smell like a holiday bakery.
Whether you’re looking for the perfect fall or winter dessert, need a show-stopping finale for a dinner party, want to use up ripe pears, or simply crave something warm and comforting with your tea, this sticky ginger cake delivers on every front. It’s easier to make than it looks, feeds a crowd, and tastes even better the next day (if it lasts that long).
Let’s dive into creating this British bakery classic that will have your home smelling incredible and your guests begging for the recipe!
Why You’ll Love This Sticky Pear and Ginger Cake
Restaurant-Quality Dessert: Looks and tastes like something from a high-end British pub or tearoom.
Incredibly Moist: The sticky sauce and pears keep this cake moist for days—it actually improves with time!
Perfect Fall/Winter Treat: Those warming spices are perfect for cold weather comfort.
Make-Ahead Friendly: Can be baked a day ahead and reheated before serving.
Not Too Sweet: Balanced sweetness with warming spices—sophisticated enough for adults, comforting for everyone.
Versatile Serving: Delicious warm with ice cream, room temperature with whipped cream, or cold with tea.
Uses Simple Ingredients: No exotic ingredients—just pantry staples and fresh pears.
Impressive Presentation: That caramelized top and melting ice cream make it Instagram-worthy.
Great for Entertaining: Can feed 10-12 people from one cake.
Ingredients You’ll Need
For the Cake:
- 2 cups all-purpose flour
- 2 teaspoons baking powder
- 1 teaspoon baking soda
- 2 teaspoons ground ginger
- 1 teaspoon ground cinnamon
- 1/2 teaspoon ground nutmeg
- 1/4 teaspoon ground cloves
- 1/2 teaspoon salt
- 3/4 cup unsalted butter, softened
- 3/4 cup dark brown sugar, packed
- 1/2 cup molasses (or golden syrup/treacle for authentic British flavor)
- 3 large eggs, room temperature
- 1 cup whole milk, room temperature
- 3-4 ripe but firm pears (Bartlett or Bosc), peeled, cored, and sliced
- 1 tablespoon fresh ginger, finely grated (optional, for extra ginger punch)
For the Sticky Toffee Sauce:
- 1 cup dark brown sugar, packed
- 1/2 cup unsalted butter
- 1 cup heavy cream
- 2 tablespoons molasses (or golden syrup)
- 1 teaspoon vanilla extract
- Pinch of salt
For Serving:
- Vanilla ice cream (essential!)
- Whipped cream (as an alternative)
- Extra caramel sauce for drizzling
- Candied ginger pieces (optional garnish)
Step-by-Step Instructions
Step 1: Prepare Your Pan and Preheat (5 minutes)
Preheat your oven to 350°F (175°C).
Grease a 9×13-inch baking pan or a 9-inch square pan generously with butter. Line the bottom with parchment paper for easy removal.
Alternatively, use a 9-inch round springform pan for more elegant presentation.
Pro Tip: Dust the buttered pan with a tablespoon of flour, tapping out the excess. This ensures the cake releases perfectly.
Step 2: Prepare the Pears (10 minutes)
Peel the pears using a vegetable peeler.
Core them using an apple corer or cut them in quarters and remove the core with a knife.
Slice into 1/4-inch thick slices. You’ll need about 3 cups of sliced pears.
Toss the pear slices with 1 tablespoon lemon juice to prevent browning and 2 tablespoons sugar to draw out some moisture.
Set aside while you make the batter.
Pro Tip: Use pears that are ripe but still firm. Too soft and they’ll turn mushy; too hard and they won’t cook through.
Step 3: Mix the Dry Ingredients (5 minutes)
In a medium bowl, whisk together:
- Flour
- Baking powder
- Baking soda
- Ground ginger
- Cinnamon
- Nutmeg
- Cloves
- Salt
Whisk until everything is evenly distributed. Set aside.
Pro Tip: Sifting the dry ingredients creates a lighter crumb, but whisking works fine if you don’t have a sifter.
Step 4: Cream Butter and Sugar (5 minutes)
In a large mixing bowl (or stand mixer with paddle attachment), beat together:
- Softened butter
- Dark brown sugar
Beat on medium-high speed for 3-4 minutes until light, fluffy, and pale in color. The mixture should look almost mousse-like.
Add the molasses and beat for another minute until fully incorporated. The mixture will darken.
Pro Tip: Room temperature butter (65-68°F) creams better than cold or too-soft butter. It should give slightly when pressed but hold its shape.
Step 5: Add Eggs and Ginger (3 minutes)
Add the eggs one at a time, beating well after each addition (about 30 seconds each). The mixture should look smooth and emulsified.
Add the fresh grated ginger (if using) and mix until combined.
Don’t worry if the mixture looks slightly curdled—it will come together when you add the flour.
Pro Tip: Room temperature eggs incorporate more smoothly and create more volume than cold eggs.
Step 6: Combine Wet and Dry Ingredients (5 minutes)
With the mixer on low speed, add the dry ingredients in three additions, alternating with the milk in two additions:
- 1/3 of flour mixture
- 1/2 of milk
- 1/3 of flour mixture
- 1/2 of milk
- Final 1/3 of flour mixture
Mix just until combined after each addition. Do not overmix—this develops gluten and creates a tough cake.
The batter should be smooth, thick, and pourable, similar to a thick pancake batter.
Pro Tip: End with flour mixture to help prevent overmixing and keep the cake tender.
Step 7: Assemble the Cake (5 minutes)
Pour half of the batter into the prepared pan, spreading it evenly.
Arrange half of the pear slices over the batter in an even layer.
Pour the remaining batter over the pears, spreading gently to cover.
Top with the remaining pear slices, arranging them in a decorative pattern if desired (concentric circles for round pans, rows for rectangular pans).
Gently press the top pear slices into the batter slightly so they don’t burn.
Optional: Sprinkle the top with 2 tablespoons of coarse sugar (like demerara) for extra crunch.
Step 8: Bake to Perfection (45-55 minutes)
Place the pan in the preheated oven on the center rack.
Bake for 45-55 minutes (timing depends on pan size—deeper pans take longer).
Doneness indicators:
- Top is deeply golden brown with caramelized edges
- Cake springs back when gently pressed in the center
- Toothpick inserted in the center comes out with just a few moist crumbs (not wet batter)
- Internal temperature reaches 200-205°F
- Edges pull slightly away from the pan
Pro Tip: If the top is browning too quickly, tent loosely with foil for the last 15 minutes.
Remove from oven and let cool in the pan for 10 minutes before poking holes and adding sauce.

Step 9: Make the Sticky Toffee Sauce (10 minutes)
While the cake bakes, make the sauce.
In a medium saucepan over medium heat, combine:
- Brown sugar
- Butter
- Heavy cream
- Molasses
Bring to a simmer, stirring constantly until the butter melts and sugar dissolves.
Let it simmer gently for 5-7 minutes, stirring occasionally, until the sauce thickens slightly and turns a deep amber color.
Remove from heat and stir in:
- Vanilla extract
- Pinch of salt
The sauce should coat the back of a spoon and have a pourable consistency.
Pro Tip: Make extra sauce—you’ll want it for drizzling at serving time!
Step 10: Soak the Cake (5 minutes)
After the cake has cooled for 10 minutes, poke holes all over the top using a skewer, chopstick, or the handle of a wooden spoon. Make about 20-30 holes evenly distributed.
Pour half of the warm sticky sauce slowly over the cake, letting it soak into the holes. It should absorb gradually.
Let the cake cool completely in the pan (about 1 hour) so the sauce can fully soak in.
Pro Tip: The cake will seem very wet—this is correct! It firms up as it cools and creates that signature sticky texture.
Step 11: Serve with Glory (2 minutes)
To serve warm (highly recommended!):
- Reheat individual slices in the microwave for 30-40 seconds
- Or warm the whole cake in a 300°F oven for 10-15 minutes
Cut into squares or wedges.
Place each slice on a plate and:
- Top with a generous scoop of vanilla ice cream (it should start melting immediately on the warm cake)
- Drizzle with the remaining warm sticky sauce
- Optional garnish: candied ginger pieces or fresh pear slices
Alternative serving: Room temperature with whipped cream or crème fraîche
Tips and Tricks for Perfect Results
Pear Choices: Bartlett and Bosc pears hold their shape best when baked. Avoid overly ripe pears that will turn mushy.
Molasses Matters: Dark molasses gives the deepest flavor. Light molasses or golden syrup work but are milder. Avoid blackstrap molasses—it’s too bitter.
Don’t Skimp on Spices: Fresh spices make a huge difference. If your ground ginger is over a year old, replace it.
The Hole-Poking: This step is crucial! The holes allow the sauce to penetrate deep into the cake, creating that signature stickiness.
Sauce Thickness: The sauce should be pourable when warm. If too thick, thin with a tablespoon of cream or milk.
Make-Ahead Magic: This cake actually improves after 24 hours as the flavors meld and the sauce fully absorbs.
Storage: Keep covered at room temperature for 2 days, or refrigerated for up to 5 days. Reheat before serving.
Freezing: Freeze unglazed cake (wrapped tightly) for up to 3 months. Thaw, then make fresh sauce to pour over.
Pan Size Conversions: 9×13 pan = 45-50 minutes; 9-inch square = 50-55 minutes; 9-inch round = 55-60 minutes.

Nutritional Information (Per Serving, based on 12 servings)
- Calories: 485
- Protein: 5g
- Carbohydrates: 68g
- Fat: 23g
- Saturated Fat: 14g
- Cholesterol: 105mg
- Sodium: 320mg
- Fiber: 2g
- Sugar: 48g
Note: This is an indulgent dessert. Nutritional values do not include ice cream.
Delicious Variations to Try
Apple Ginger Cake: Replace pears with thinly sliced apples (Granny Smith or Honeycrisp).
Sticky Date Version: Replace pears with chopped dates for classic sticky toffee pudding vibes.
Triple Ginger: Add 1/2 cup chopped crystallized ginger to the batter for intense ginger flavor.
Bourbon Sauce: Add 2 tablespoons bourbon to the toffee sauce for grown-up sophistication.
Cardamom Twist: Replace half the ginger with ground cardamom for an Indian-inspired version.
Chocolate Drizzle: Drizzle with melted dark chocolate alongside the caramel for extra decadence.
Pecan Topping: Sprinkle chopped pecans over the top before baking for crunch.
Orange Ginger: Add orange zest to the batter and use orange juice in place of some of the milk.
Gluten-Free: Use 1:1 gluten-free flour blend (add 1/2 tsp xanthan gum if not included).
Vegan Version: Use vegan butter, flax eggs, and coconut cream in both cake and sauce.
Storage and Reheating Instructions
Room Temperature: Store covered for up to 2 days. The cake stays incredibly moist.
Refrigerator: Store covered for up to 5 days. Bring to room temperature or reheat before serving.
Freezing:
- Wrap individual slices tightly in plastic wrap, then foil
- Freeze for up to 3 months
- Thaw in refrigerator overnight
- Reheat before serving
Reheating:
- Microwave: Individual slices for 30-40 seconds until warm
- Oven: Wrap in foil, heat at 300°F for 15-20 minutes
- Pro tip: Drizzle with extra sauce when reheating to refresh
The Sauce: Store separately in an airtight container in the refrigerator for up to 1 week. Reheat gently before serving.
Serving Suggestions for Different Occasions
Casual Family Dinner: Serve warm with vanilla ice cream, simple presentation.
Dinner Party: Individual portions plated elegantly with artistic caramel drizzles, candied ginger garnish, and a mint sprig.
Holiday Dessert: Serve in a large dish family-style, letting guests help themselves with bowls of whipped cream and ice cream on the side.
Afternoon Tea: Cut into small squares, serve at room temperature with tea or coffee.
Brunch Dessert: Serve with coffee ice cream or mascarpone instead of vanilla.
Pairings:
- Tea: Earl Grey, Chai, or English Breakfast
- Coffee: Rich espresso or latte
- Wine: Late-harvest Riesling, tawny port, or dessert sherry
- Spirits: Brandy, bourbon, or aged rum
Frequently Asked Questions (FAQs)
Q: Can I use canned pears? A: Fresh is best, but drained canned pears work in a pinch. Pat them very dry and expect a softer texture.
Q: What if I don’t have molasses? A: Use golden syrup, dark corn syrup, or honey (though the flavor will be different). Molasses gives the authentic dark color and depth.
Q: Why is my cake dry? A: Likely overbaked or not enough sauce. Make sure to poke plenty of holes and use all the sauce. The cake should feel almost wet when you pour the sauce on.
Q: Can I make this in a bundt pan? A: Yes! Bake for 50-60 minutes. The sauce will pool in the center beautifully. Let cool completely before inverting.
Q: Is this similar to sticky toffee pudding? A: Very similar! This version adds pears and ginger. Traditional sticky toffee pudding uses dates.
Q: Can I reduce the sugar? A: You can reduce by about 1/4 cup in the cake, but the sauce needs its full sugar content to properly thicken and caramelize.
Q: How do I know when it’s done baking? A: Toothpick test (moist crumbs, not wet batter), springy top, and internal temp of 200-205°F.
Q: Can I make mini cakes? A: Yes! Use a muffin tin, reduce baking time to 20-25 minutes. Poke holes and add sauce to each.
Q: What’s the best way to cut clean slices? A: Use a sharp knife dipped in hot water and wiped clean between cuts.
Q: Can kids eat this? A: Absolutely! It’s not overly spicy—the ginger is warming and mild. Most kids love it!
The History of Sticky Cakes
Sticky ginger cake and sticky toffee pudding are beloved British classics. Sticky toffee pudding originated in the Lake District in the 1970s, though some claim it has earlier origins. The addition of warming spices like ginger reflects Britain’s historical spice trade connections.
These “puddings” (British term for desserts) are designed to be incredibly moist and comforting—perfect for the cold, damp British climate. The tradition of serving warm cake with cold ice cream creates that irresistible temperature contrast that makes each bite memorable.
This pear and ginger variation adds a fruity element while maintaining all the comforting qualities that have made these cakes a staple in British homes and restaurants for decades.
Conclusion: Comfort in Every Bite
This Sticky Pear and Ginger Cake is more than just dessert—it’s an experience. From the moment it comes out of the oven filling your home with the scent of warm spices, to that first bite where the sticky sauce mingles with melting ice cream, this cake delivers pure comfort and joy.
The beauty of this recipe lies in its perfect balance: the warming spices aren’t overwhelming, the sweetness is tempered by the fruit, and that sticky toffee sauce ties everything together in the most delicious way possible. It’s sophisticated enough for dinner parties yet comforting enough for a cozy night in.
Whether you’re celebrating a special occasion, looking for the perfect fall or winter dessert, or simply want to treat yourself to something truly special, this cake delivers on every front. Make it once, and it will become a treasured recipe you return to again and again.
So preheat that oven, grab some pears, and prepare to create a dessert that will have everyone asking for seconds and begging for the recipe. Your kitchen is about to smell amazing, and your taste buds are in for an unforgettable treat!
Happy baking! 🍐🫚🍰✨


