
This taco rice casserole transforms familiar Mexican-inspired flavors into a layered, freezer-friendly dish that feeds a crowd with minimal effort and maximum convenience. By building on a foundation of fluffy rice, layering seasoned ground beef mixed with vegetables and beans, and finishing with a generous blanket of melted cheddar cheese, you create a complete meal-in-one-pan that requires no additional sides or accompaniments. The genius of this recipe lies in its double-batch approach that produces two complete casseroles from a single cooking session, allowing you to serve one immediately while storing the second in the freezer for those hectic evenings when cooking from scratch feels impossible.
Why You’ll Love This Recipe
Strategic Freezer Meal Planning – Making two casseroles simultaneously means you invest time once but reap the benefits twice, creating a future meal that requires nothing more than thawing and reheating when life gets overwhelming.
Complete Meal Simplicity – The combination of protein, grains, vegetables, and cheese in a single dish eliminates the need to prepare multiple side dishes or worry about rounding out the meal nutritionally.
Budget-Friendly Bulk Cooking – Ground beef, rice, canned beans, and basic seasonings keep the per-serving cost remarkably low while still feeding twelve people generously or providing multiple meals for smaller families.
Customization-Ready Base – The straightforward recipe welcomes additions, substitutions, and modifications based on dietary needs, ingredient availability, or family preferences without compromising the core structure.
Minimal Active Cooking Time – Most of the work involves simple assembly rather than complex techniques, with the oven doing the heavy lifting while you attend to other tasks or simply relax.
Crowd-Pleasing Universal Appeal – The familiar taco flavors and comforting casserole format appeal to both children and adults, making this recipe ideal for potlucks, family gatherings, or feeding picky eaters.
Ingredients You’ll Need
Main Ingredients
2 pounds ground beef – Provides the protein foundation and should be 80/20 or 85/15 lean-to-fat ratio to ensure enough flavor and moisture without creating excessive grease that pools in the casserole.
1 onion, chopped – Adds aromatic sweetness and savory depth to the beef mixture while contributing moisture that keeps the filling from becoming dry or crumbly.
2 cups corn – Brings natural sweetness and pop of texture that contrasts with the softer beans and ground beef, using either frozen, canned (drained), or fresh kernels.
2 cans black beans, drained and rinsed (15 oz each) – Contributes plant-based protein, fiber, and creamy texture that extends the meat while adding nutritional value and making the dish more substantial.
2 cans diced tomatoes with green chilis (10 oz each) – Provides moisture, acidity, and mild heat throughout the casserole while the green chilis add subtle spice that enhances the taco flavor profile.
1 package taco seasoning (or 4 tablespoons homemade) – Delivers the signature blend of cumin, chili powder, paprika, and other spices that create authentic taco flavor throughout the beef mixture.
1 tsp salt – Seasons the entire casserole and helps balance the various components, though you should taste before adding since canned ingredients and taco seasoning already contribute sodium.
4 cups cooked rice – Creates the starchy base layer that absorbs flavors from the meat mixture above while providing bulk that makes the casserole filling and satisfying.
3 cups shredded cheddar cheese – Melts into a golden, bubbly topping that adds richness and creates that essential cheese pull when serving, with sharp cheddar providing more pronounced flavor than mild varieties.
Step-by-Step Instructions
Brown the Ground Beef with Onions Place the ground beef in a large skillet or Dutch oven over medium-high heat, breaking it apart with a wooden spoon as it cooks. Add the chopped onions to the skillet once the beef begins to brown, continuing to cook and stir for 8-10 minutes until the beef shows no pink and the onions soften and become translucent, then drain excess fat if necessary.
Season the Meat Mixture Sprinkle the taco seasoning over the browned beef and onions, stirring well to coat all the meat evenly with the spices. Cook for an additional 1-2 minutes to toast the spices slightly and allow their flavors to bloom, which intensifies the overall taste of the filling.
Add Vegetables and Beans Stir in the corn, drained and rinsed black beans, and both cans of diced tomatoes with green chilis, mixing everything together until well combined. Let the mixture simmer for 3-5 minutes to allow the flavors to meld and excess liquid to reduce slightly, then add the teaspoon of salt and taste to adjust seasoning if needed.
Prepare the Baking Dishes Spray two 9×13-inch baking pans generously with non-stick cooking spray, making sure to coat the bottom and sides to prevent sticking. This preparation is essential since the rice layer will form a base that could otherwise adhere stubbornly to the pan without proper greasing.
Layer the Rice Foundation Divide the 4 cups of cooked rice evenly between the two prepared pans, spooning 2 cups into each and spreading it out with a spatula to create an even layer that covers the entire bottom. Press the rice down gently to create a compact base that will support the heavier meat mixture without shifting during baking.
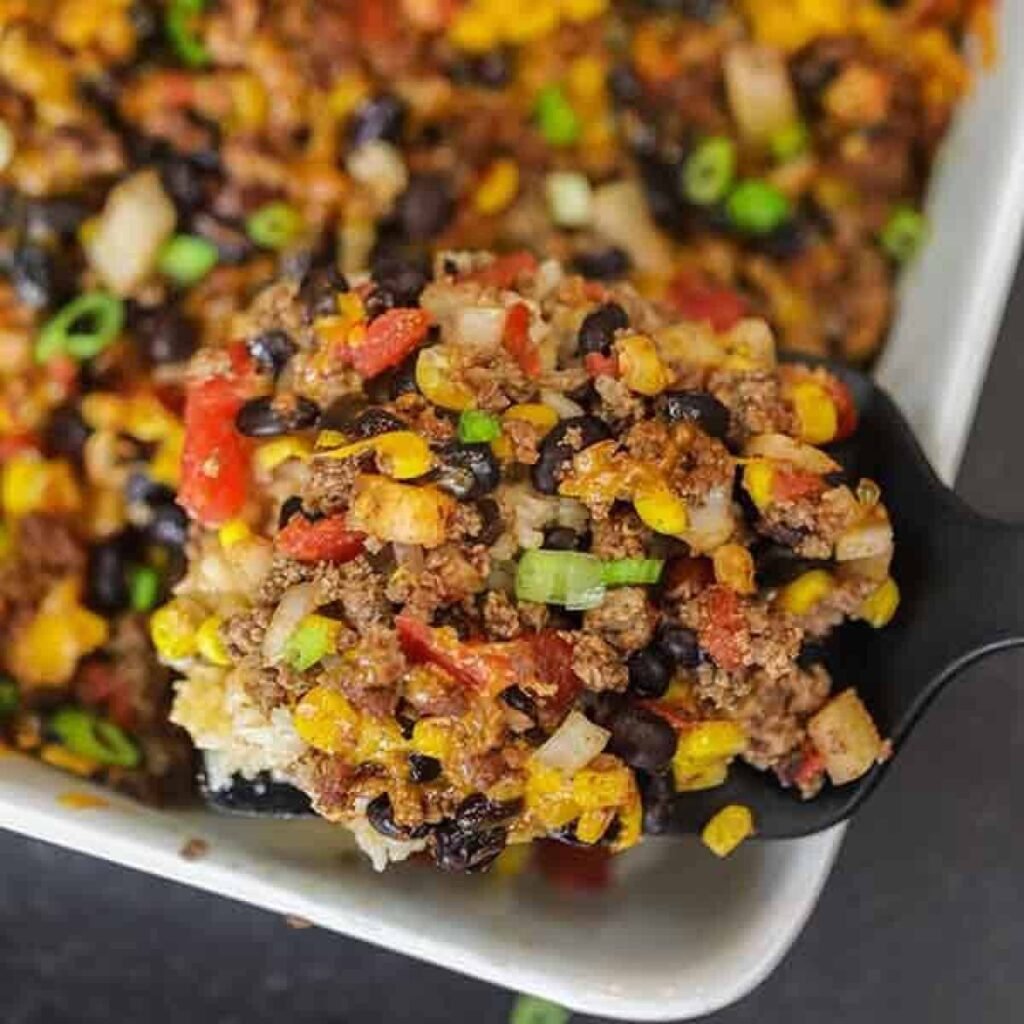
Add the Meat and Bean Mixture Spoon the seasoned beef, vegetable, and bean mixture over the rice layer in each pan, dividing it as evenly as possible between the two dishes. Use a spatula to spread the mixture to the edges, ensuring every portion of rice gets covered with the flavorful topping.
Top with Cheese Sprinkle 1½ cups of shredded cheddar cheese over the top of each casserole, distributing it evenly from edge to edge. The cheese should form a fairly complete coverage that will melt into a unified golden blanket rather than leaving large gaps of exposed filling.
Bake Immediately or Freeze for Later If serving right away, cover one or both pans with aluminum foil and bake in a preheated 350°F oven for 25 minutes until heated through and the cheese melts completely. For freezer storage, cover the unbaked casserole tightly with foil, label with the date and reheating instructions, and freeze for up to 3 months.
Reheat Frozen Casserole Properly When ready to use a frozen casserole, transfer it to the refrigerator 24 hours before serving to thaw completely. Bake the thawed casserole covered with foil at 350°F for 45 minutes, then remove the foil and continue baking for an additional 10-15 minutes until the top turns golden brown and slightly crispy at the edges.
Serve While Hot Let the casserole rest for 5 minutes after removing it from the oven to allow the layers to set slightly, making it easier to cut clean portions. Serve hot directly from the pan, using a large spatula to lift out square portions that show all the distinct layers.
Recipe Notes & Tips
Rice Type Flexibility – Any cooked rice works in this recipe including white, brown, jasmine, or even cauliflower rice for a lower-carb version, though cooking times may vary slightly with different rice types.
Prevent Soggy Rice Layer – Make sure your cooked rice is relatively dry rather than wet and sticky, as excess moisture in the rice layer can make the bottom of the casserole mushy rather than maintaining distinct layers.
Draining is Essential – Thoroughly drain and rinse the black beans to remove excess starch and sodium, and if using canned corn, drain it completely to prevent adding unnecessary liquid to the casserole.
Cheese Melting Coverage – For the most appealing presentation and consistent cheese distribution, break apart any clumps of shredded cheese before sprinkling so it distributes more evenly across the entire surface.
Half-Batch Adaptation – If you only want one casserole rather than two, simply cut all ingredients in half and use a single 9×13-inch pan, keeping all cooking times and temperatures the same.
Freezer Container Alternatives – If you lack disposable pans or prefer not to tie up your baking dishes in the freezer, assemble the casserole in a foil pan that can be discarded after use or transferred to a freezer-safe container.
Nutritional Information
Prep Time: 15 minutes
Cook Time: 25 minutes (fresh) or 60 minutes (frozen and reheated)
Total Time: 40 minutes
Servings: 12 servings (6 servings per casserole)
Calories: Approximately 380-420 calories per serving (based on 12 servings total with standard ingredient measurements)
Perfect Pairings
Fresh Garden Salad – A simple green salad with lime-cilantro dressing or ranch provides cooling contrast and adds fresh vegetables that balance the hearty, filling casserole.
Tortilla Chips and Salsa – Classic Mexican appetizers or sides that complement the casserole’s flavors while offering different textures for variety on the plate.
Mexican Street Corn Salad – Charred corn mixed with cotija cheese, lime, and cilantro echoes the casserole’s Mexican flavors while providing a lighter, fresher accompaniment.
Guacamole and Sour Cream – Creamy, cooling toppings that diners can dollop on their individual servings to add richness and temperature contrast.
Ideal Occasions
Busy Weeknight Dinners – The make-ahead nature means you can pull a complete meal from the freezer on hectic evenings when cooking from scratch feels overwhelming or impossible.
Potluck Contributions – The casserole travels well, feeds a crowd, and appeals to diverse palates, making it an ideal dish to bring when everyone needs to contribute to a shared meal.
Post-Surgery or New Baby Meals – Friends and family can prepare this freezer-friendly casserole in advance to give as a thoughtful gift that provides easy meals during recovery or adjustment periods.
Game Day Gatherings – The hearty, crowd-pleasing flavors and easy serving format work perfectly for casual entertaining when people want substantial food without formal plating.
Storage & Serving Tips
Proper Freezing Technique – Wrap the casserole tightly in plastic wrap first, then cover with aluminum foil to prevent freezer burn and protect against absorbing odors from other freezer items.
Thawing Best Practices – Always thaw frozen casseroles in the refrigerator over 24 hours rather than at room temperature, which prevents bacteria growth and ensures even reheating throughout.
Refrigerator Storage – Store leftover cooked casserole covered in the refrigerator for up to 4 days, reheating individual portions in the microwave for 2-3 minutes or larger portions in the oven.
Individual Portion Freezing – After baking, cut the cooled casserole into individual servings and wrap each portion separately for grab-and-go lunches or single servings that reheat quickly.
Creative Variations to Try
Chicken Taco Version – Replace the ground beef with shredded rotisserie chicken or cooked ground turkey for a lighter protein option that still delivers satisfying taco flavor.
Vegetarian Adaptation – Omit the meat entirely and double the beans, adding a second variety like pinto or kidney beans, plus extra vegetables like bell peppers or zucchini for substance.
Spicy Heat Enhancement – Add diced jalapeños to the meat mixture, use pepper jack cheese instead of cheddar, and include a few dashes of hot sauce for those who prefer more pronounced heat.
Southwestern Style – Incorporate quinoa instead of rice for added protein and nutrition, and add roasted poblano peppers and cilantro-lime seasoning for more complex Southwestern flavors.
Troubleshooting Common Issues
Watery Casserole – If the finished dish seems soupy, you likely didn’t drain the tomatoes, beans, or corn sufficiently; next time, drain all canned ingredients thoroughly and even press excess moisture from the tomatoes.
Dry, Overcooked Top – This happens when the casserole bakes too long uncovered or at too high a temperature; always cover with foil for most of the cooking time and only remove it for the final browning phase.
Cheese Not Melting Evenly – Pre-shredded cheese sometimes contains anti-caking agents that prevent smooth melting, so consider shredding your own cheese from a block for superior melting quality and coverage.
Rice Layer Too Hard – If the bottom rice layer turns out crunchy or hard, it wasn’t moist enough to begin with or the casserole needed more cooking time covered to allow steam to soften the rice properly.
Why This Recipe Works
The genius of this taco rice casserole lies in its strategic layering approach that creates distinct textures and allows flavors to build from bottom to top while the dish bakes. Starting with a rice foundation provides an absorbent base that soaks up the flavorful juices from the meat mixture above, preventing the bottom from becoming soggy while the rice gains tremendous flavor. The ground beef mixture, enriched with vegetables and beans, contributes protein and fiber while the tomatoes with green chilis provide moisture that keeps everything from drying out during the extended baking time. The cheese topping serves multiple purposes: it creates a barrier that traps steam and moisture inside the casserole during covered baking, then browns beautifully when exposed during the final uncovered phase, adding visual appeal and a slightly crispy texture on top. The freezer-friendly nature works because the assembled but unbaked casserole can freeze before the ingredients break down or release excess moisture, and the subsequent thawing and baking process essentially replicates the original fresh preparation. Making two casseroles simultaneously maximizes efficiency since you’re already doing the work of browning meat and chopping vegetables, and doubling the recipe requires minimal additional effort while providing tremendous future convenience. At approximately 380-420 calories per serving, this casserole delivers substantial protein, fiber, and satisfaction that makes it a complete meal without requiring calorie-dense sides or additional dishes.
Final Thoughts
Taco rice casserole represents the pinnacle of practical home cooking that respects busy schedules while refusing to compromise on flavor or nutrition. This recipe proves that meal planning and batch cooking don’t require complicated systems or hours of weekend prep work—sometimes the smartest approach is simply making two of something you’re already preparing. The freezer-friendly format transforms this from a simple weeknight dinner into a strategic tool for managing those inevitable evenings when energy and time are in short supply but your family still deserves a proper home-cooked meal. While the recipe is undeniably hearty and filling, you can adjust the proportions to include more vegetables and beans while reducing the meat and cheese for a lighter version that still captures the essential taco flavors everyone loves, making it adaptable to various dietary goals without losing its fundamental appeal.


