
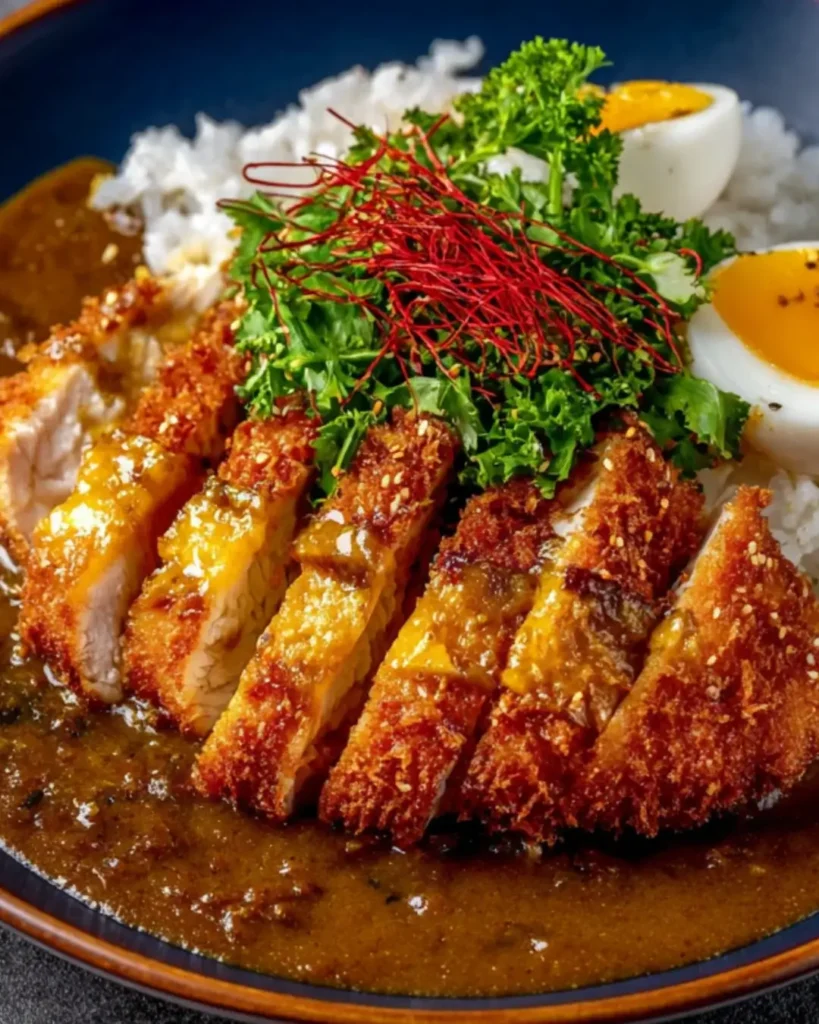
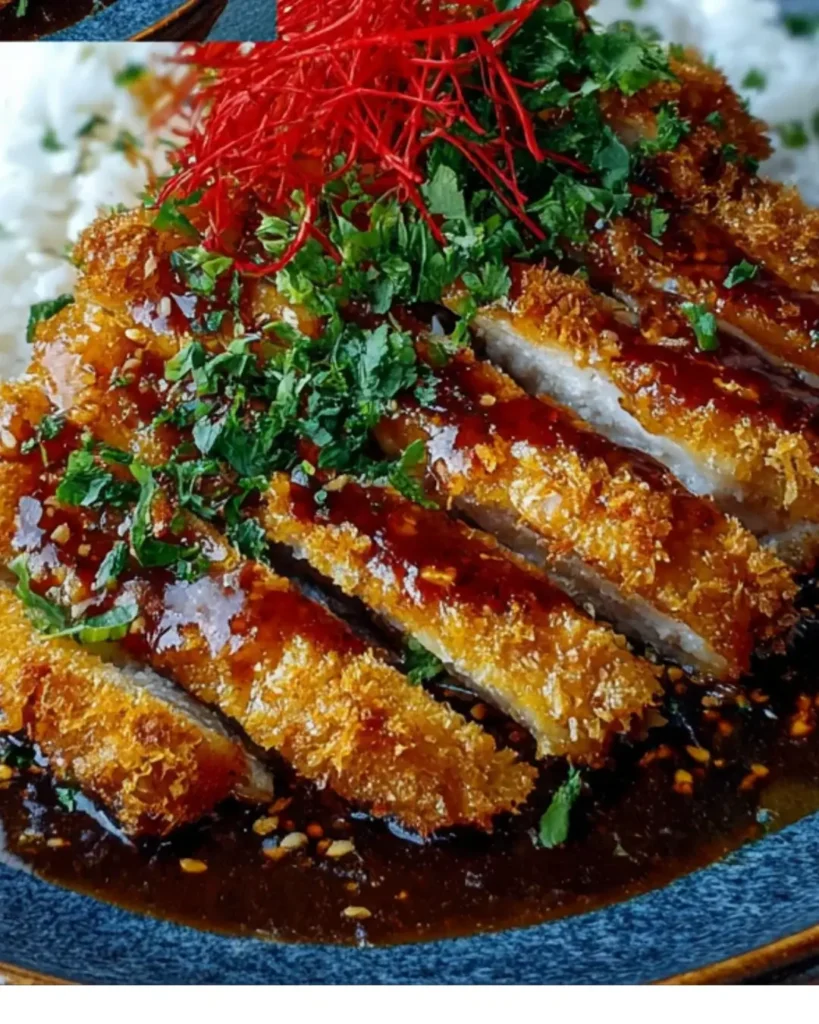
This chicken katsu curry combines two beloved Japanese dishes into one satisfying meal by pairing crispy, panko-breaded chicken cutlets with a mildly spiced, slightly sweet curry sauce served over fluffy white rice. The technique involves creating an ultra-crunchy exterior through proper breading and shallow frying while keeping the chicken interior juicy and tender, then building a quick curry sauce in the same pan to capture all the flavorful browned bits left behind. With its perfect balance of textures—crispy cutlet, velvety sauce, and tender rice—this dish delivers the kind of comfort food satisfaction that explains why it’s become a staple in Japanese home cooking and restaurants worldwide.
Why You’ll Love This Recipe
Restaurant Quality at Home – This recipe replicates the exact flavors and textures you’d find in Japanese restaurants, allowing you to enjoy authentic katsu curry without leaving your kitchen or paying premium prices.
Perfect Textural Contrast – The interplay between ultra-crispy panko coating, tender chicken, smooth curry sauce, and fluffy rice creates the kind of textural variety that makes every bite interesting and satisfying.
Manageable Cooking Sequence – Despite seeming complex, the recipe breaks down into simple, sequential steps that build logically from one to the next, making it accessible even for intermediate cooks.
Crowd-Pleasing Appeal – The mild curry spice level and familiar fried chicken format appeal to both adventurous eaters and those who prefer less challenging flavors, making it ideal for diverse groups.
Complete Meal Simplicity – With protein, vegetables, sauce, and starch all combined in one dish, you serve a nutritionally balanced dinner without needing multiple side dishes or accompaniments.
Make-Ahead Friendly Components – The curry sauce can be prepared in advance and reheated, while the breaded chicken can be fried just before serving, allowing you to split the work across multiple sessions.
Ingredients You’ll Need
For the Chicken Katsu
1 lb boneless, skinless chicken breasts – Provides lean protein and should be pounded to uniform thickness for even cooking and optimal tenderness throughout each piece.
1 cup panko breadcrumbs – Creates the signature light, crispy coating that’s crunchier than regular breadcrumbs due to their larger, airier flake structure specifically designed for Japanese frying.
½ cup all-purpose flour – Forms the first coating layer that dries the chicken surface and provides a base for the egg to adhere properly, ensuring the breading stays attached during frying.
2 large eggs – Acts as the adhesive middle layer that binds the flour and panko together while also contributing richness and helping create the golden-brown color during frying.
1 teaspoon salt – Seasons the flour coating directly so the chicken itself is flavored rather than relying solely on the sauce for seasoning.
½ teaspoon black pepper – Adds subtle warmth and aromatic complexity to the breading that enhances the chicken without competing with the curry sauce.
½ teaspoon garlic powder – Contributes savory depth to the coating with concentrated garlic flavor that distributes evenly throughout the breading.
½ teaspoon onion powder – Provides sweet, savory notes that complement the garlic and round out the seasoning profile in the crispy coating.
¼ cup vegetable oil (for frying) – Creates the cooking medium for shallow frying with a neutral flavor and high smoke point that allows proper browning without burning.
For the Curry Sauce
2 cups cooked white rice – Serves as the starchy foundation that soaks up the curry sauce and provides neutral bulk that balances the rich, flavorful components.
1 medium onion, chopped – Adds aromatic sweetness and body to the curry sauce while contributing natural sugars that caramelize and deepen the overall flavor.
2 carrots, sliced – Provides natural sweetness, vibrant color, and slight textural contrast while adding nutritional value through beta-carotene and fiber.
1 cup chicken broth – Forms the liquid base of the curry sauce and contributes savory depth that enhances the curry powder while creating proper consistency.
2 tablespoons curry powder – Delivers the signature warm, complex spice blend that defines the dish, with most Japanese curry powder being mild and slightly sweet rather than hot.
1 tablespoon soy sauce – Adds umami depth and saltiness that rounds out the curry flavor while contributing that characteristic Japanese savory element.
1 tablespoon honey – Provides balancing sweetness that’s typical of Japanese curry and helps temper the spices while adding glossy sheen to the sauce.
1 tablespoon cornstarch mixed with 2 tablespoons water (optional) – Thickens the curry sauce to proper coating consistency if needed, creating a slurry that prevents lumps when added to hot liquid.
Step-by-Step Instructions
Pound the Chicken to Even Thickness Place each chicken breast between two sheets of plastic wrap or inside a large resealable bag, then use a meat mallet or rolling pin to gently pound them to an even ½-inch thickness throughout. This uniform thickness ensures the chicken cooks evenly without dry edges or undercooked centers, and creates more surface area for the delicious crispy coating.
Set Up Your Breading Station Arrange three shallow dishes in a row for efficient breading assembly. In the first dish, combine the flour, salt, pepper, garlic powder, and onion powder, whisking to distribute the seasonings evenly. In the second dish, beat the eggs until the yolks and whites are fully combined. In the third dish, spread out the panko breadcrumbs in an even layer.
Bread the Chicken Systematically Working with one chicken breast at a time, dredge it first in the seasoned flour, coating both sides and shaking off any excess so only a thin layer remains. Next, dip the floured chicken into the beaten eggs, letting excess drip back into the dish. Finally, press the chicken firmly into the panko breadcrumbs on both sides, using your hands to pack the crumbs on so they adhere securely and create a thick, even coating.
Fry the Chicken Until Golden Heat the vegetable oil in a large skillet over medium heat until it shimmers and a few breadcrumbs dropped in sizzle immediately. Carefully add the breaded chicken breasts without crowding the pan, working in batches if necessary. Cook for 4-5 minutes on the first side without moving the chicken, allowing a deep golden-brown crust to develop, then flip carefully and cook another 4-5 minutes until the second side matches and the internal temperature reaches 165°F.
Drain and Rest the Chicken Transfer the cooked chicken katsu to a plate lined with paper towels to drain excess oil while you prepare the curry sauce. The paper towels absorb surface oil without making the coating soggy, keeping it crispy while the chicken rests and the juices redistribute throughout the meat.
Sauté the Vegetables In the same skillet used for frying (with most of the oil removed but leaving about 1 tablespoon), add the chopped onion and sliced carrots over medium heat. Sauté for about 5 minutes, stirring occasionally, until the onion becomes translucent and soft while the carrots begin to soften but still retain some bite.
Build the Curry Sauce Add the chicken broth, curry powder, soy sauce, and honey to the vegetables, stirring well to dissolve the curry powder completely and incorporate all the flavorful browned bits stuck to the bottom of the pan. Bring the mixture to a simmer and cook for about 10 minutes, stirring occasionally, which allows the vegetables to finish cooking and the flavors to meld into a cohesive sauce.
Thicken if Desired If you prefer a thicker, more gravy-like curry sauce that clings to the rice and chicken, stir in the cornstarch slurry during the final 2 minutes of simmering. Mix constantly as you add it to prevent lumps, and watch as the sauce transforms from thin and brothy to thick and glossy within a couple of minutes.
Slice and Assemble Transfer the rested chicken katsu to a cutting board and slice it crosswise into ½-inch strips using a sharp knife, which creates attractive portions and makes eating easier. Place a generous scoop of cooked white rice in each serving bowl, arrange the sliced chicken katsu on top or beside the rice, and ladle the hot curry sauce over everything, ensuring each serving gets plenty of vegetables and sauce.
Recipe Notes & Tips
Even Pounding is Essential – Take your time ensuring uniform thickness throughout each breast, as even a quarter-inch variation can mean some parts overcook while others remain undercooked.
Oil Temperature Matters – If the oil isn’t hot enough, the breading absorbs excess oil and becomes greasy rather than crispy; if too hot, the coating burns before the chicken cooks through.
Don’t Skip the Rest – Cutting into chicken immediately after cooking releases all the juices onto the cutting board rather than keeping them in the meat, resulting in dry katsu.
Curry Powder Variations – Japanese curry powder is milder and sweeter than Indian varieties; if using Indian curry powder, reduce the amount slightly and add extra honey to balance.
Panko Freshness – Stale panko doesn’t create the same crispy texture, so use fresh breadcrumbs and store the package sealed tightly after opening to maintain crunchiness.
Make-Ahead Curry – The curry sauce actually improves when made a day ahead as flavors meld, so consider preparing it in advance and reheating while you fry the chicken fresh.
Nutritional Information
Prep Time: 20 minutes
Cook Time: 30 minutes
Total Time: 50 minutes
Servings: 4 generous portions
Calories: Approximately 550 calories per serving
Perfect Pairings
Japanese Cucumber Salad – Crisp cucumber slices dressed with rice vinegar and sesame seeds provide cooling contrast and palate-cleansing acidity that cuts through the rich fried chicken.
Miso Soup – A light miso soup served as a starter adds traditional Japanese authenticity while warming the palate without filling you up before the main course.
Shredded Cabbage – Finely shredded raw cabbage tossed with sesame dressing is the traditional accompaniment in Japanese restaurants, adding crunch and freshness.
Pickled Vegetables – Japanese pickles (tsukemono) offer sharp, acidic contrast that cleanses the palate between bites of the rich curry and fried chicken.
Ideal Occasions
Weeknight Comfort Dinners – While requiring more steps than simple meals, the 50-minute total time still makes this achievable for evenings when you want something special but not overly complicated.
Japanese-Themed Dinner Parties – Impress guests with restaurant-quality Japanese cuisine that feels exotic and special while remaining familiar enough to appeal to diverse palates.
Meal Prep Sessions – The curry sauce stores beautifully for several days, and you can bread the chicken in advance, making it easy to fry fresh portions throughout the week.
Family Favorites Night – The mild curry and crispy chicken appeal to both children and adults, making this an excellent choice for family meals where everyone needs to be satisfied.
Storage & Serving Tips
Storing Components Separately – Keep leftover fried chicken, curry sauce, and rice in separate airtight containers to maintain the chicken’s crispiness and prevent everything from becoming soggy.
Refrigerator Storage – Store the curry sauce for up to 4 days and cooked rice for up to 3 days, but fried chicken is best consumed within 1-2 days as the coating loses crispiness over time.
Reheating the Chicken – Reheat leftover katsu in a 375°F oven for 10-12 minutes to restore some crispiness rather than microwaving, which makes the coating soggy and rubbery.
Freezing Considerations – The curry sauce freezes well for up to 3 months, but fried chicken doesn’t freeze successfully as the coating becomes unpleasantly soggy when thawed.
Creative Variations to Try
Pork Katsu Curry – Substitute thin-cut pork chops for the chicken and adjust cooking time slightly for a traditional Japanese variation that’s equally delicious.
Vegetarian Katsu – Replace chicken with thick slices of firm tofu, eggplant rounds, or breaded cauliflower steaks for plant-based versions that maintain the crispy-creamy contrast.
Spicy Curry Upgrade – Add chili paste, cayenne pepper, or fresh sliced jalapeños to the curry sauce for those who prefer more heat than the mild base provides.
Cheese Katsu – Place a thin slice of mozzarella or cheddar between two thin chicken cutlets before breading for a melty surprise in the center.
Troubleshooting Common Issues
Breading Falls Off During Frying – This happens when the coating isn’t pressed firmly enough, the oil isn’t hot enough, or you flip the chicken too early before the crust sets properly.
Soggy Coating – Oil that’s too cool causes the breading to absorb excess oil rather than crisping up; ensure the oil is properly heated and maintain consistent temperature throughout frying.
Dry Chicken – Overcooking is the culprit; use a meat thermometer to verify 165°F internal temperature and remove immediately rather than cooking by time alone.
Thin or Watery Curry – If the sauce seems too thin even after simmering, either continue reducing it with the lid off or add the cornstarch slurry to achieve proper coating consistency.
Why This Recipe Works
The success of chicken katsu curry lies in understanding how breading creates crispy coatings and how sequential layering builds complex flavors efficiently. Pounding the chicken to uniform thickness ensures even cooking throughout, preventing the common problem of overcooked edges and undercooked centers that plague varying-thickness breasts. The three-step breading process—flour, egg, panko—creates distinct layers that work together: flour dries the surface and provides texture for the egg to grip, egg acts as waterproof glue, and panko’s large flakes create air pockets that crisp beautifully when fried. Shallow frying in moderate oil achieves the golden crust without the mess and expense of deep frying, while medium heat prevents burning the coating before the chicken cooks through. Building the curry sauce in the same pan used for frying captures all those flavorful browned bits and residual chicken fat that would otherwise be wasted, creating depth impossible to achieve starting with a clean pan. The combination of curry powder, soy sauce, and honey creates the signature Japanese curry flavor profile that’s milder and sweeter than Indian curries, appealing to broader audiences including children. Sautéing the vegetables before adding liquid allows them to caramelize slightly and develop deeper flavors than simply simmering them from raw. At approximately 550 calories per serving, this dish provides substantial protein and satisfying carbohydrates while the vegetables contribute fiber and nutrients, making it a relatively balanced meal despite the fried component, though the frying does add significant fat that could be reduced by baking the breaded chicken instead.
Final Thoughts
Chicken katsu curry represents the kind of fusion comfort food that demonstrates how cultures blend and create new traditions, taking Japanese breading techniques and pairing them with adapted curry flavors to create something uniquely satisfying. This recipe proves that seemingly complicated restaurant dishes often break down into manageable steps that home cooks can master with attention to detail and proper technique. The combination of crispy, rich, and mildly spiced elements creates universal appeal that transcends cultural boundaries, explaining why this dish has become beloved far beyond Japan. While the fried chicken component makes this an indulgent meal, the moderate portion sizes, inclusion of vegetables, and relatively lean protein mean it can fit into balanced eating patterns when enjoyed occasionally rather than daily, and the satisfying nature of the dish means reasonable portions genuinely satisfy without needing seconds.


