
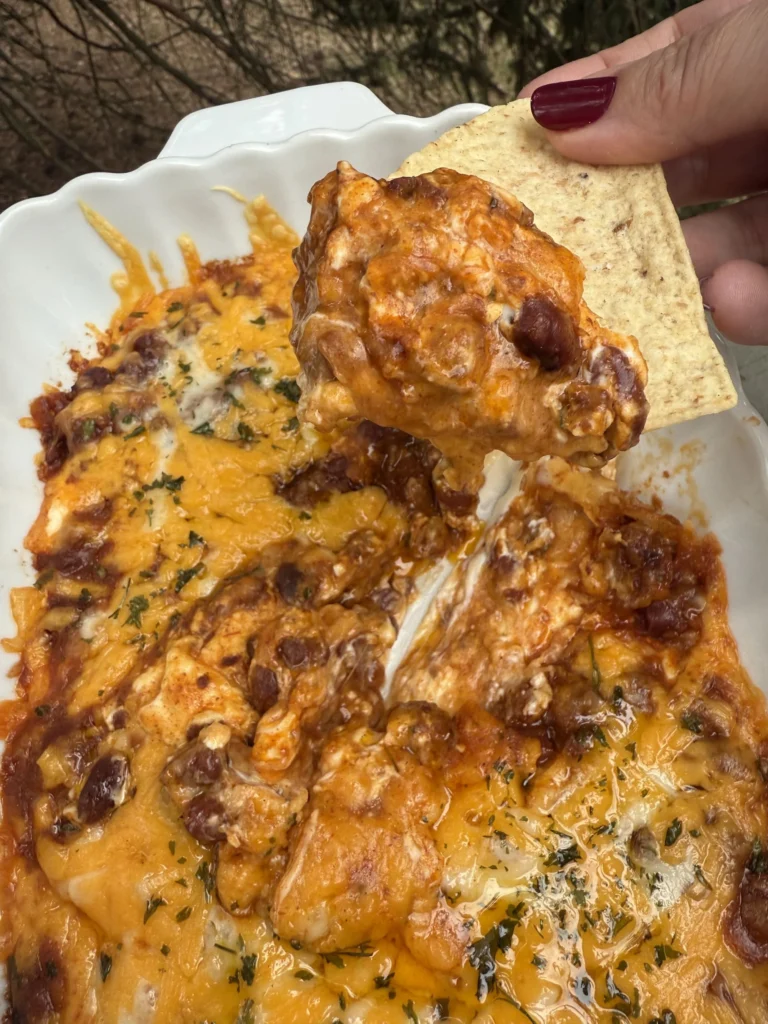
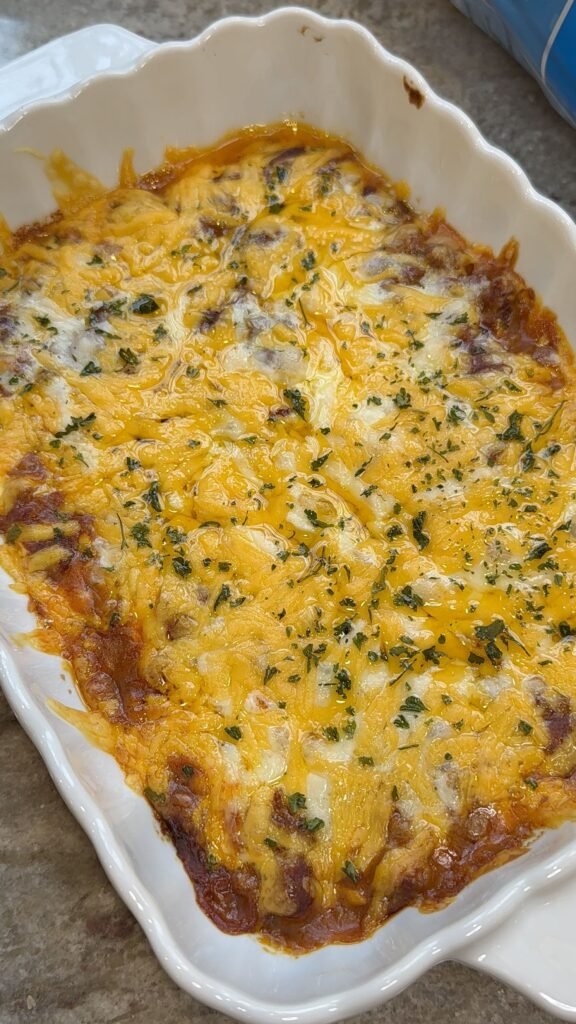
This 3 ingredient chili dip transforms pantry staples into a hot, bubbling appetizer by layering cream cheese, canned chili, and shredded cheddar in a baking dish before heating until the cheese melts into a gooey, scoopable dip perfect for tortilla chips. The technique involves nothing more than spreading room-temperature cream cheese as a base, topping it with chili and cheese, then baking until everything melds together into a cohesive, creamy dip with just enough spice to keep things interesting. With its minimal ingredient list, zero actual cooking required, and guaranteed crowd-pleasing appeal, this recipe exemplifies the kind of effortless entertaining food that lets you spend time with guests rather than stressing in the kitchen while still serving something warm, satisfying, and genuinely delicious.
Why You’ll Love This Recipe
Ultimate Simplicity – With just three ingredients and basic layering, this recipe requires virtually no cooking skills or culinary knowledge, making it accessible for absolute beginners.
Pantry-Friendly Preparation – All the ingredients are shelf-stable or refrigerator basics that most people keep on hand, allowing last-minute appetizer assembly without emergency grocery runs.
Crowd-Pleasing Guarantee – The combination of creamy cheese, savory chili, and melted cheddar appeals to virtually everyone and disappears quickly at any gathering.
Minimal Active Time – Just 5 minutes of hands-on prep means you can have this in the oven and move on to other party preparations without stress.
Game Day Perfect – The warm, shareable format and hearty flavors make this ideal for sports watching, tailgating, or casual gatherings where finger foods reign supreme.
Infinite Customization – The basic formula welcomes additions and modifications based on what you have available or dietary preferences without requiring recipe reconstruction.
Ingredients You’ll Need
Main Ingredients
15 oz can Hormel chili with beans – Provides the protein, flavor base, and signature chili character with pre-seasoned beef and beans that require zero preparation beyond opening the can.
8 oz cream cheese, room temperature – Creates the creamy foundation layer that adds richness and helps bind everything together into proper dip consistency rather than just warmed chili.
1½ cups cheddar cheese, hand shredded – Delivers the melted cheese topping that becomes golden and bubbly during baking while adding sharp, tangy flavor throughout every scoop.
Step-by-Step Instructions
Preheat the Oven Set your oven to 350°F and let it preheat for at least 10-15 minutes to ensure it reaches proper temperature. This moderate heat allows the dip to heat through completely and the cheese to melt without burning the top before the center warms.
Prepare the Baking Dish Take an 8×8-inch baking dish and spray it lightly with cooking spray or grease it with butter if you prefer, though this step is optional since the dip is creamy enough that sticking isn’t usually a problem. Using the specified size dish creates the proper depth for layering and serving.
Spread the Cream Cheese Base Remove the cream cheese from its packaging and place it in the prepared baking dish. Using a spatula or the back of a spoon, spread the cream cheese evenly across the bottom of the dish, creating a uniform layer that reaches all the edges. Room temperature cream cheese spreads much more easily than cold, so let it sit out for 30-60 minutes before starting if it’s been refrigerated.
Layer the Chili Open the can of chili and pour it directly over the cream cheese layer, spreading it gently with a spoon to distribute it evenly across the entire surface. Try not to disturb the cream cheese layer underneath too much, though some mixing at the edges is fine and actually creates nice swirls of flavor.
Top with Shredded Cheese Sprinkle the shredded cheddar cheese uniformly over the chili layer, making sure to cover the entire surface from edge to edge. Using hand-shredded cheese rather than pre-shredded melts better and creates superior texture since pre-shredded contains anti-caking agents that can interfere with smooth melting.
Cover and Bake Cover the baking dish with aluminum foil to trap steam and heat, which helps everything warm through evenly. Place the dish on the center rack of the preheated oven and bake for approximately 20 minutes, checking after 15 minutes if your oven runs hot, until the dip is hot throughout and the cheese is completely melted and bubbling around the edges.
Cool Slightly and Serve Remove the baking dish from the oven and let it cool for 3-5 minutes before serving, which allows the dip to thicken slightly and prevents anyone from burning their mouth on molten cheese. If desired, garnish with a sprinkle of fresh chopped parsley for color. Serve directly from the baking dish with Tostitos or your favorite tortilla chips for scooping.
Recipe Notes & Tips
Cream Cheese Temperature – Room temperature cream cheese is essential for easy spreading; if you forgot to set it out, microwave it for 10-15 seconds to soften slightly.
Chili Variety Options – While the recipe specifies Hormel chili with beans, any brand or variety works, including vegetarian chili, turkey chili, or no-bean versions based on preference.
Hand-Shredded Cheese Advantage – Shredding cheese yourself from a block creates better melting quality and superior texture compared to pre-shredded cheese with added cellulose.
Covering During Baking – The foil cover traps heat and moisture to ensure even warming throughout; removing it for the last 5 minutes creates a slightly browned top if desired.
Serving Dish Consideration – If your baking dish isn’t attractive enough for the table, transfer the hot dip to a decorative serving bowl, though serving directly from the baking dish keeps it warmer longer.
Make-Ahead Strategy – Assemble the layers completely and refrigerate covered for up to 24 hours, then bake directly from the refrigerator, adding 5-10 minutes to the baking time.
Nutritional Information
Prep Time: 5 minutes
Cook Time: 20 minutes
Total Time: 25 minutes
Servings: 8-10 servings (approximately ½ cup per serving)
Calories: Approximately 200-250 calories per ½ cup serving (varies based on chip consumption)
Perfect Pairings
Tortilla Chips – Tostitos Scoops or regular tortilla chips provide the classic vehicle for this dip with sturdy texture that holds up to the thick, creamy consistency.
Fritos – Corn chips add extra crunch and their salty, corn flavor complements the chili particularly well for those who love that classic Frito pie combination.
Fresh Vegetables – Carrot sticks, celery, and bell pepper strips offer lighter dipping options for those who want to balance the rich dip with raw vegetables.
Crackers – Sturdy crackers like Wheat Thins or Ritz provide an alternative to chips for those who prefer different textures or want variety.
Ideal Occasions
Game Day Gatherings – This dip epitomizes sports-watching food with its warm, hearty character and easy shareability that keeps everyone satisfied during long games.
Casual Parties – The no-fuss preparation and crowd-pleasing appeal make this perfect for informal gatherings where you want to feed people without complicated cooking.
Potluck Contributions – Transport the assembled but unbaked dip to your destination and bake on-site, or bake at home and transport in an insulated carrier to keep warm.
Last-Minute Entertaining – When unexpected guests arrive or you need an appetizer quickly, this comes together faster than most delivery options.
Storage & Serving Tips
Refrigerator Storage – Store leftover dip covered in the refrigerator for up to 4 days, reheating individual portions in the microwave or warming the whole dish in a 300°F oven.
Reheating Method – Microwave individual portions for 30-60 seconds or reheat the entire dish covered in a 300°F oven for 15-20 minutes until hot and bubbly again.
Serving Temperature – This dip tastes best served warm rather than piping hot, which allows the flavors to come through more clearly without burning mouths.
Portion Control – Using a slow cooker on the “warm” setting after initial baking keeps the dip at ideal serving temperature for extended periods during parties.
Creative Variations to Try
Loaded Chili Dip – Add diced tomatoes, sliced jalapeños, diced onions, and sour cream dollops on top before serving for loaded baked potato-style complexity.
Taco Dip Version – Replace chili with seasoned ground beef or turkey mixed with taco seasoning for a similar concept with slightly different flavor profile.
Buffalo Chicken Twist – Substitute shredded cooked chicken mixed with buffalo sauce for the chili to create an entirely different but equally crowd-pleasing dip.
Vegetarian Adaptation – Use vegetarian chili and ensure the cheese is made with vegetarian rennet for a meat-free version that maintains all the appeal.
Troubleshooting Common Issues
Cold Center – If the middle isn’t hot after 20 minutes, your baking dish may be too deep or oven temperature low; continue baking in 5-minute increments until fully heated.
Greasy Top Layer – Some canned chilis contain more fat that separates during heating; simply blot excess grease with paper towels before serving.
Separated Appearance – The cream cheese and chili may look slightly separated, which is normal; give everything a gentle stir before serving to recombine.
Too Thick for Dipping – If the dip seems too thick after baking, stir in a few tablespoons of milk or water to thin it to preferred consistency.
Why This Recipe Works
The success of this 3 ingredient chili dip lies in understanding how simple layering and gentle heating can transform distinct components into a cohesive appetizer greater than the sum of its parts. The cream cheese base provides a rich, tangy foundation that adds dairy creaminess and helps bind the chili into proper dip consistency rather than remaining soup-like. Spreading it as the bottom layer ensures it’s in every scoop and distributes its creamy character throughout. Canned chili provides pre-seasoned, ready-to-eat convenience with the perfect balance of meat, beans, and spices that would take hours to develop from scratch, while its slightly thick consistency makes it ideal for dipping rather than too liquidy. The shredded cheddar cheese topping serves multiple purposes: it adds visual appeal with its golden, bubbly appearance, contributes sharp cheese flavor that complements both the cream cheese and chili, and creates textural interest with its melted, stretchy quality. Baking at moderate 350°F heat warms everything through gently without scorching the cheese or causing the cream cheese to break and separate, while the foil cover traps steam that helps heat penetrate evenly. The relatively short 20-minute baking time is sufficient to melt all the cheese and heat the dip thoroughly without overcooking or drying out any components. The layering technique—cream cheese on bottom, chili in middle, shredded cheese on top—creates visual interest when scooped and ensures proper distribution of all three elements in each chip-full. While this dip is undeniably rich and indulgent with its cream cheese and cheddar components, it’s designed as a shared appetizer where reasonable portions alongside other party foods create balanced snacking rather than a meal replacement, and the protein from the chili and cheese provides more substance than many pure-cheese dips offer.
Final Thoughts
3 ingredient chili dip demonstrates how minimalism in cooking can produce maximum results when you choose the right ingredients and combine them thoughtfully. This recipe proves that entertaining doesn’t require culinary expertise, expensive ingredients, or hours of preparation—sometimes the best party foods are the simplest ones that let quality convenience products shine. The universal appeal of warm cheese and chili makes this a safe choice for diverse groups where you’re unsure of preferences, while the basic formula’s flexibility allows confident cooks to customize and embellish as desired. While this dip is certainly indulgent and best enjoyed in moderation, it serves its purpose perfectly as occasional party food designed for sharing and celebrating rather than everyday eating, and the genuine enjoyment it brings to gatherings often matters more than nutritional analysis when the goal is bringing people together over food they love.


