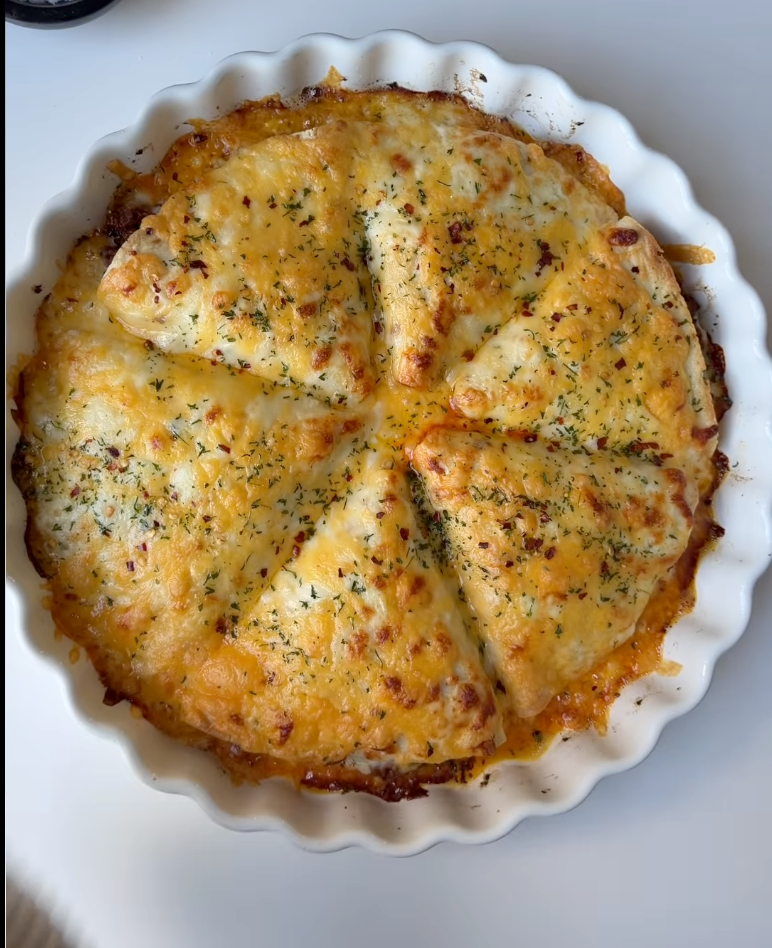
This recipe reinvents the standard taco night by packaging a savory, spiced ground beef filling inside crispy tortilla triangles. Think of these as a hybrid between a quesadilla and a baked burrito: portable, packed with melted cheese, and baked until the edges are golden and crunchy. They are perfect for dipping and substantial enough to serve as a satisfying main course.
Why You’ll Love This Recipe
- Finger-Food Friendly – The triangular pocket shape makes these easy to hold and eat, making them excellent for parties or game days.
- Textural Contrast – You get crispy, buttery tortilla edges, a soft interior, and gooey melted cheese all in one bite.
- Deeply Flavorful Filling – Simmering the beef with tomato paste and a robust spice blend creates a rich, saucy meat mixture rather than dry crumbles.
- Easy Batch Cooking – Unlike frying tacos one by one, you assemble these and bake them all at once in a single dish.
- Hidden Veggies – The diced onions and peppers melt into the filling, adding nutrition and flavor without overpowering the meat.
- Totally Customizable – You can easily adjust the heat level by skipping the Serrano peppers or adding extra chili flakes for spice lovers.
Ingredients You’ll Need
The Beef Filling
- Ground Beef (1 lb, 80/20) – The higher fat content keeps the filling juicy during the double-cook process (sautéing then baking).
- Aromatics (Onion & Garlic) – Finely diced onion and minced garlic provide the savory foundation for the dish.
- Bell Pepper (1 cup) – Chopped; adds sweetness and crunch to balance the savory meat.
- Serrano Pepper (1-2, optional) – Adds a sharp, fresh heat; remove seeds for milder spice or substitute jalapeño.
- Tomato Paste (3 tbsp) – Provides a concentrated umami depth and binds the sauce.
- Water (¾ cup) – Used to simmer the beef, allowing the spices and tomato paste to meld into a cohesive sauce.
- Oil (2 tbsp) – For sautéing the vegetables and browning the meat.
The Spices
- Smoked Paprika (1 tsp) – Adds a subtle wood-smoke flavor that mimics grilling.
- Cumin & Chili Powder (1 tsp each) – The classic “taco” flavor profile; earthy and warm.
- Garlic Powder & Onion Powder – Enhances the fresh aromatics.
- Red Chili Flakes (1 tsp) – For a kick of heat (adjust to taste).
- Salt & Black Pepper – Essential seasoning to bring all flavors forward.
Assembly & Topping
- Large Tortillas (4) – Flour tortillas work best here; cut in half to create 8 semicircles.
- Cheese Blend (Mozzarella & Cheddar) – Mozzarella for the stretch (inside and out), Cheddar for the sharp flavor (topping).
- Garlic Butter (3 tbsp) – Used to grease the pan and brush the tops for golden browning.
Step-by-Step Instructions
Step 1: Sauté the Aromatics Heat the oil in a large skillet over medium heat. Add the diced onions and minced garlic, sautéing for 1 to 2 minutes until the onions soften and turn translucent, releasing their aroma.
Step 2: Brown the Beef Add the ground beef to the pan. Break it up with a wooden spoon and cook for 3 to 4 minutes until the pink color is gone. If there is excessive grease, you can drain some off now, but leave a little for flavor.
Step 3: Season and Simmer Add the salt, pepper, paprika, garlic powder, chili powder, cumin, and chili flakes. Stir well. Add the tomato paste and cook for 2 to 3 minutes to “bloom” the spices and cook out the raw tomato taste. Pour in the water, stir, and simmer on medium heat for 8 to 10 minutes until the liquid reduces and the mixture is saucy but not watery.
Step 4: Add Fresh Crunch Stir in the chopped bell peppers and Serrano peppers. Sauté for just 2 to 3 minutes—you want them to retain some texture rather than becoming mushy. Turn off the heat and set the filling aside.
Step 5: Assemble the Pockets Preheat your oven to 400°F. Cut each large tortilla in half to make two semicircles. Place a pinch of shredded mozzarella in the center of a semicircle, followed by 2–3 tablespoons of the beef mixture. Fold the corners over the filling to form a triangle cone shape, pressing the edges to seal.
Step 6: Prepare the Baking Dish Grease a circular baking dish or pie plate generously with garlic butter. Arrange the folded pockets in the dish in a circular pattern (points facing in or out, depending on fit), packing them snugly so they hold their shape.
Step 7: Bake Brush the tops of the tortillas with the remaining garlic butter. Sprinkle the remaining mozzarella and cheddar cheese over the top. Bake for 15–20 minutes until the cheese is bubbling and the exposed tortilla edges are golden brown.
Recipe Notes & Tips
- Warm Your Tortillas – Cold tortillas crack easily when folded. Microwave the stack of tortillas for 15–20 seconds wrapped in a damp paper towel before cutting and folding to make them pliable.
- Reduce the Liquid – Ensure most of the water has evaporated from the beef mixture before filling. A wet filling will soak through the tortilla bottom and cause it to tear.
- Blooming Tomato Paste – Don’t skip frying the tomato paste with the meat before adding water. This caramelizes the sugars in the tomato, adding a richness that simple simmering cannot achieve.
- Grate Your Own Cheese – Pre-shredded cheese contains anti-caking agents (cellulose) that prevent smooth melting. For the best “cheese pull,” grate a block of mozzarella yourself.
- Don’t Overfill – It can be tempting to stuff the pockets, but 2–3 tablespoons is the sweet spot. Overfilling makes them difficult to fold and increases the chance of bursting in the oven.
Nutritional Information
- Prep Time: 20 minutes
- Cooking Time: 35 minutes
- Total Time: 55 minutes
- Servings: 8 Pockets (approx. 2 per person)
- Calories: Approximately 350–400 kcal per pocket (depending on cheese amount)
Perfect Pairings
- Chunky Guacamole – The cool, creamy avocado balances the spicy, hot beef filling.
- Sour Cream or Crema – A dollop of sour cream adds a tangy contrast to the rich cheddar and spices.
- Mexican Street Corn Salad – Serve a side of corn with lime, mayo, and cotija cheese for a complete feast.
- Cilantro Lime Rice – A fluffy rice side helps soak up any extra sauce and rounds out the meal.
Ideal Occasions
- Game Day Appetizers – These pockets are sturdy enough to be eaten by hand while watching sports.
- Taco Tuesday Twist – A fun alternative to traditional hard-shell or soft tacos that kids will love.
- Potluck Contributions – They transport well in the baking dish and stay warm for a long time.
- Leftover Makeover – The filling can be made a day ahead, making assembly quick for a weeknight dinner.
Storage & Serving Tips
- Refrigerator – Store leftovers in an airtight container for up to 3–4 days.
- Freezing – You can freeze the baked pockets. Wrap them individually in foil and place in a freezer bag for up to 2 months.
- Reheating – Reheat in an oven at 350°F or an air fryer to maintain the crispy tortilla texture. Microwaving will make the tortilla chewy and soft.
- Serving Temp – Let the dish rest for 5 minutes after taking it out of the oven. This prevents the hot cheese and filling from burning your mouth and allows the structure to set.
Creative Variations to Try
- Breakfast Pockets – Swap the ground beef for scrambled eggs and breakfast sausage; keep the cheese and peppers.
- Vegetarian Bean Style – Replace the beef with a mix of black beans, corn, and walnuts for a hearty meat-free version.
- Turkey or Chicken – Use ground turkey or chicken for a leaner option; increase the spices slightly as poultry is milder than beef.
- Enchilada Style – Instead of brushing with butter, top the assembled pockets with enchilada sauce before adding the cheese for a “wet burrito” experience.
Troubleshooting Common Issues
- Pockets Opening Up – If the tortillas won’t stay closed, use a “glue” of flour and water, or place the pockets seam-side down (or against the side of the baking dish) to hold them shut.
- Soggy Bottoms – This happens if the beef wasn’t simmered down enough. If your filling looks wet, use a slotted spoon to transfer the meat to the tortilla, leaving the excess liquid in the pan.
- Bland Filling – Ground beef needs aggressive seasoning. Taste your filling before assembling the pockets. If it lacks punch, add more salt or a splash of lime juice.
- Burnt Cheese – If the cheese on top is browning too fast before the pockets are heated through, cover the dish loosely with aluminum foil for the first 10 minutes of baking.
Why This Recipe Works
This recipe succeeds by treating the filling like a meat sauce (Bolognese style) rather than just fried meat. By adding water and tomato paste and letting it reduce, you hydrate the dried spices and coat the beef in a thick, flavorful gravy. This ensures the filling remains moist inside the oven without making the tortilla soggy.
The baking method utilizes conduction and convection. The garlic butter on the dish creates a fried-like bottom crust (conduction), while the hot oven air crisps the top edges (convection). The “pocket” shape acts as a steam chamber, melting the cheese rapidly and melding the flavors of the beef and peppers together, creating a unified bite that is superior to a loosely assembled taco.
Final Thoughts
Cheesy Beef Pockets are a brilliant solution for turning simple ground beef into a meal that feels special and fun. They offer the satisfying crunch of a chimichanga without the hassle of deep-frying. Whether you serve them as a hearty appetizer or a main course, the combination of spiced meat, vibrant peppers, and molten cheese is universally comforting.