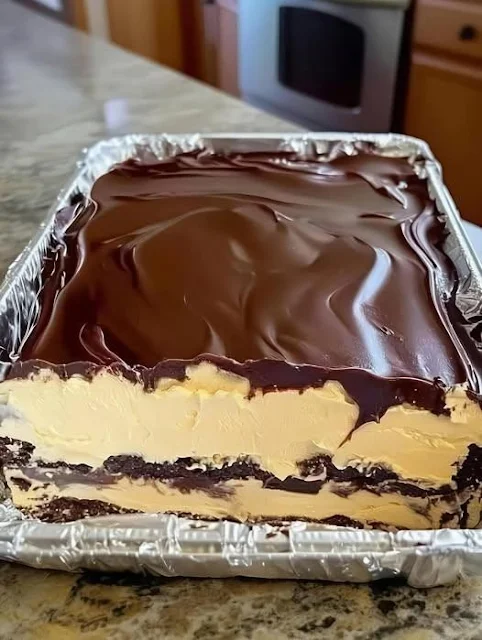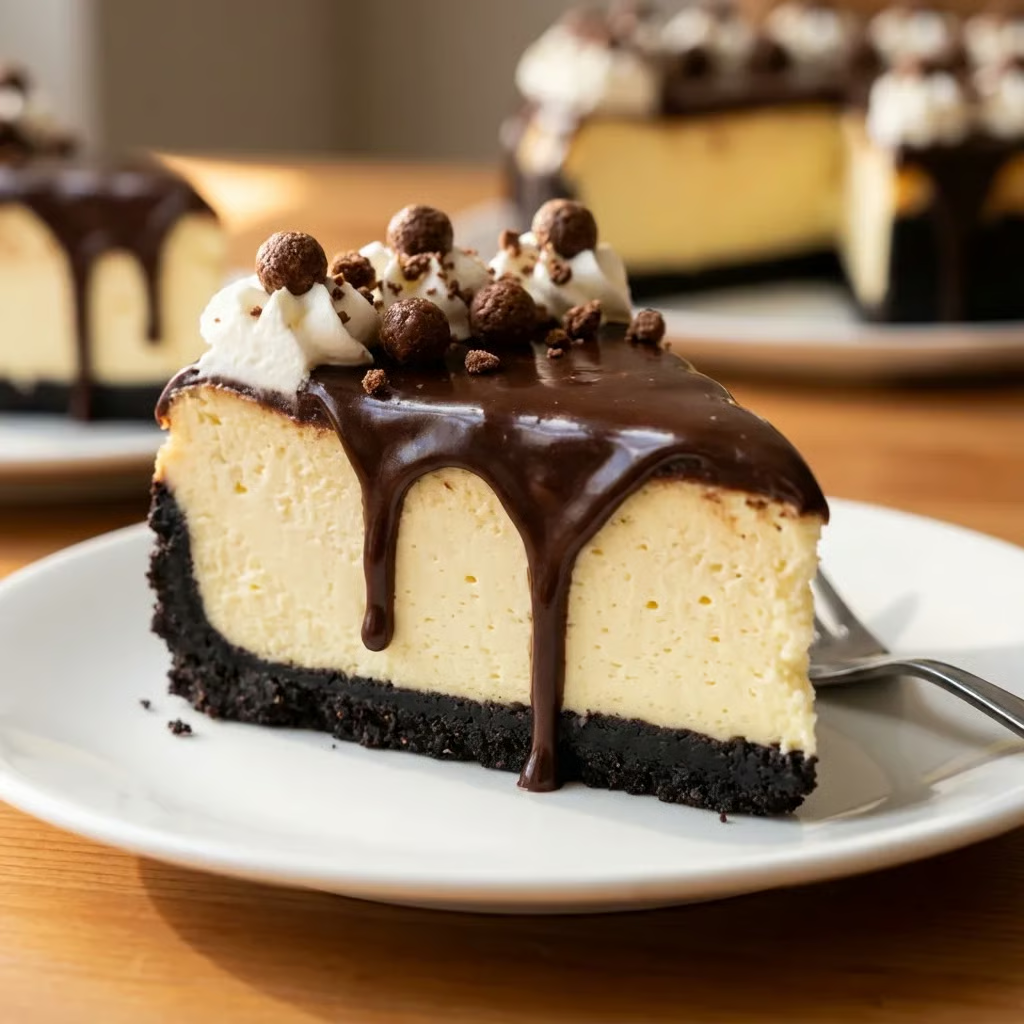
This decadent triple-layer dessert combines a fudgy brownie base, silky smooth cheesecake filling, and glossy hot fudge topping into one spectacular creation that rivals any ice cream parlor sundae. The richness of chocolate meets the tangy creaminess of cheesecake in perfect harmony, while the whipped cream, sprinkles, nuts, and cherries transform this into an over-the-top celebration dessert that looks as stunning as it tastes.
Why You’ll Love This Recipe
- Three Desserts in One – Satisfies every craving simultaneously by combining the dense richness of brownies, the creamy tanginess of cheesecake, and the intense chocolate satisfaction of hot fudge in a single slice.
- Showstopping Presentation – The dramatic layers visible from the side, combined with the festive sundae-style toppings, create a bakery-worthy dessert that impresses guests at any special occasion.
- Make-Ahead Convenience – Requires overnight chilling, which means you must prepare this dessert in advance, eliminating last-minute stress when entertaining and allowing flavors to develop fully.
- Brownie Mix Shortcut – Uses boxed brownie mix for the base layer, significantly reducing prep time and complexity while still delivering homemade quality and impressive results.
- Water Bath Protection – The gentle baking method prevents the dreaded cheesecake cracks and ensures velvety, creamy texture throughout, creating professional-looking results even for intermediate bakers.
- Customizable Indulgence – The sundae-style garnishes can be adjusted to personal preferences or dietary needs, allowing you to make this dessert uniquely yours while maintaining its essential appeal.
Ingredients You’ll Need
For the Brownie Base:
- 1 box (510g) brownie mix – Creates the foundation layer with rich chocolate flavor; use fudgy-style mix rather than cake-like for best texture contrast
- Ingredients listed on box (typically eggs, oil, water) – Follow package directions exactly for consistent results
- ½ tsp espresso powder (optional) – Intensifies the chocolate flavor without adding coffee taste; enhances depth and complexity
For the Cheesecake Filling:
- 680g (24 oz) cream cheese, softened – Forms the creamy, tangy base; must be room temperature to prevent lumps and ensure smooth mixing
- 200g (1 cup) granulated sugar – Sweetens the cheesecake and helps create the signature dense, creamy texture through proper structure
- 3 large eggs, room temperature – Binds the filling and creates structure; room temperature eggs incorporate more smoothly without curdling
- 240ml (1 cup) sour cream – Adds tangy flavor and extra creaminess while contributing to the velvety, smooth mouthfeel
- 1 tsp vanilla extract – Enhances all flavors and adds aromatic sweetness that complements both the chocolate and cream cheese
- 2 tbsp (16g) all-purpose flour – Stabilizes the cheesecake filling and helps prevent cracking by absorbing excess moisture
For the Hot Fudge Topping:
- 240ml (1 cup) hot fudge sauce – Provides glossy, intensely chocolate topping; store-bought jarred sauce works perfectly or use homemade
- 90g (½ cup) semisweet chocolate chips (optional) – Can be melted into the hot fudge for extra richness and thickness
For the Sundae Garnish:
- Whipped cream (freshly whipped or canned) – Adds light, airy contrast to the dense layers and creates classic sundae appearance
- Sprinkles (rainbow or chocolate) – Provides festive color, visual interest, and slight textural crunch
- Chopped nuts (pecans, walnuts, or peanuts) – Contributes nutty flavor and crunchy texture that contrasts beautifully with creamy layers
- Maraschino cherries – Creates the iconic sundae look and adds bright pop of color and sweet, fruity note
- Extra hot fudge sauce for drizzling – Allows for dramatic presentation and gives guests option to add more chocolate intensity
Step-by-Step Instructions
Prepare the Brownie Base Preheat your oven to 175°C (350°F) and position a rack in the center. Line the bottom of a 9-inch (23cm) springform pan with parchment paper cut to fit precisely, then lightly grease the sides with butter or cooking spray to prevent sticking. Prepare the brownie batter according to the package directions (or your favorite homemade recipe), adding the optional espresso powder if using, and pour it evenly into the prepared pan. Bake for 20-25 minutes until the edges are set and a toothpick inserted near the center comes out with moist crumbs—you want it slightly underbaked since it will cook further with the cheesecake. Remove from the oven and let cool to room temperature while you prepare the filling.
Make the Cheesecake Filling Reduce the oven temperature to 160°C (325°F). In a large mixing bowl, beat the softened cream cheese with an electric mixer on medium speed for 2-3 minutes until completely smooth, fluffy, and free of lumps, scraping down the sides frequently. Add the sugar and continue beating for another 2 minutes until well combined and slightly lighter in texture. Add the eggs one at a time, beating on low speed after each addition just until incorporated and scraping down the bowl between additions to ensure even mixing. Mix in the sour cream, vanilla extract, and flour on low speed until the batter is smooth, creamy, and uniform in consistency—avoid overmixing, which can incorporate too much air and cause cracks.
Assemble and Create Water Bath Pour the cheesecake filling over the cooled brownie base in the springform pan, using an offset spatula to spread it evenly to the edges and smooth the top surface. Place the filled springform pan inside a larger roasting pan or deep baking dish. Carefully pour hot water into the outer pan until it reaches halfway up the sides of the springform pan, creating a water bath (bain-marie) that provides gentle, even heat and prevents the cheesecake from cracking or drying out during the long baking time.
Bake Low and Slow Carefully transfer the nested pans to the oven, taking care not to slosh water into the cheesecake. Bake at 160°C (325°F) for 55-65 minutes, checking at the 55-minute mark. The cheesecake is done when the edges are fully set and slightly puffed, but the center 2-3 inches still jiggles slightly when you gently shake the pan—it will continue cooking and setting as it cools. Turn off the oven completely, crack the door open about 4 inches, and let the cheesecake rest inside for 1 full hour, which allows it to cool gradually and prevents dramatic temperature changes that cause cracking.
Cool Completely After the oven rest, carefully remove the roasting pan from the oven and lift the springform pan out of the water bath. Remove the parchment or foil collar if you used one, run a thin knife around the edge of the pan to loosen the cheesecake from the sides, but don’t remove the springform ring yet. Let the cheesecake cool completely at room temperature for 2-3 hours, then cover loosely with plastic wrap and refrigerate for at least 4-6 hours or preferably overnight, which allows the layers to firm up completely and the flavors to develop fully.
Add Hot Fudge Layer Once the cheesecake is thoroughly chilled and firm, warm the hot fudge sauce in the microwave or in a small saucepan over low heat until it’s pourable but not hot—you want it spreadable but not so warm it melts the cheesecake. If using chocolate chips, melt them into the hot fudge for extra richness. Pour the warm fudge over the center of the chilled cheesecake and use an offset spatula to spread it evenly from the center outward to the edges, creating a smooth, glossy layer. Return the cheesecake to the refrigerator for 20-30 minutes to allow the fudge topping to set and firm up.
Create Sundae Presentation When ready to serve, carefully release and remove the springform pan sides, leaving the cheesecake on the base for stability. Transfer to your serving platter if desired. Pipe or dollop generous swirls of whipped cream around the outer edge of the cheesecake, creating 12 evenly spaced mounds that correspond to serving portions. Sprinkle rainbow or chocolate sprinkles generously over the whipped cream and fudge layer, then scatter chopped nuts over the top for crunch and visual interest. Place one maraschino cherry on top of each whipped cream swirl for classic sundae appearance. Just before serving, drizzle additional hot fudge sauce in decorative patterns over the entire top for dramatic finishing touch.
Recipe Notes & Tips
- Cream Cheese Temperature – This is crucial for smooth filling; leave cream cheese at room temperature for at least 2 hours, or microwave in 10-second bursts at 30% power until softened but not melted.
- Preventing Cracks – The water bath, gradual cooling in the oven, and avoiding overmixing the filling all work together to prevent cracks; if cracks do appear, the hot fudge layer covers them perfectly.
- Springform Pan Preparation – Wrap the outside of your springform pan with heavy-duty aluminum foil before placing in the water bath to prevent any water from seeping through the seam and making the brownie soggy.
- Testing Doneness – The “jiggle test” is more reliable than time alone; the center should wobble like Jell-O but not look liquid or unset when you gently shake the pan.
- Brownie Base Alternatives – If you prefer homemade brownies, use a recipe that yields about 2 cups of batter; the key is keeping it slightly underbaked so it doesn’t become dry after the second bake.
- Storage Timeline – This dessert must be made at least one day ahead for proper setting, but it can be prepared up to 3 days in advance with the toppings added just before serving for best presentation.
Nutritional Information
Prep Time: 30 minutes
Cooking Time: 60 minutes (plus 1 hour oven cooling)
Total Time: 90 minutes active time (plus 4-6 hours or overnight chilling)
Servings: 12 generous slices
Calories: Approximately 520 calories per serving (based on standard boxed brownie mix and full-fat dairy products)

Perfect Pairings
- Premium Coffee – Serve with freshly brewed strong coffee or espresso to cut through the richness and provide bitter contrast that enhances the chocolate flavors.
- Cold Milk – Offer tall glasses of cold whole milk alongside for a nostalgic pairing that helps balance the intense sweetness and richness.
- Fresh Berries – Accompany slices with fresh raspberries, strawberries, or blackberries for tart, refreshing contrast and a lighter element on the plate.
- Vanilla Ice Cream – For ultimate indulgence, serve a small scoop of vanilla ice cream alongside warm slices to reinforce the sundae theme and add temperature contrast.
Ideal Occasions
- Birthday Celebrations – Makes a spectacular alternative to traditional birthday cake that feels extra special and indulgent for milestone celebrations or chocolate lovers.
- Holiday Entertaining – Perfect showpiece dessert for Thanksgiving, Christmas, or New Year’s gatherings when you want something impressive that can be made entirely ahead.
- Special Anniversary Dinners – Romantic and luxurious enough for intimate celebrations while being easy to portion and serve without complicated plating requirements.
- Potluck Showstopper – Guarantees you’ll be the hit of any dessert table at church socials, office parties, or neighborhood gatherings where visual impact matters.
Storage & Serving Tips
- Refrigerator Storage – Keep the cheesecake covered loosely with plastic wrap or in a cake keeper in the refrigerator for up to 5 days; the brownie base may soften slightly but flavors actually improve over time.
- Freezing Instructions – Freeze the completed cheesecake (without sundae garnishes) wrapped tightly in plastic wrap then foil for up to 2 months; thaw overnight in refrigerator and add toppings fresh before serving.
- Slicing Technique – Use a long, thin knife dipped in hot water and wiped clean between each cut for the neatest slices that show off the beautiful layers without dragging or smearing.
- Serving Temperature – Remove from refrigerator 15-20 minutes before serving to allow the cheesecake to soften slightly to room temperature, which enhances creaminess and allows flavors to bloom fully.
Creative Variations to Try
- Peanut Butter Lovers – Swirl ½ cup melted peanut butter into the cheesecake filling and use peanut butter cups as garnish instead of cherries for Reese’s-inspired flavor.
- Mint Chocolate Version – Add ½ teaspoon peppermint extract to the cheesecake filling, use chocolate mint brownies for the base, and garnish with crushed mint candies for refreshing twist.
- Salted Caramel Brownie – Replace hot fudge with salted caramel sauce and add a sprinkle of flaky sea salt over the top for sophisticated sweet-salty contrast.
- Triple Chocolate – Use dark chocolate brownie mix, add chocolate chips to the cheesecake filling, and top with chocolate whipped cream for maximum chocolate intensity.
Troubleshooting Common Issues
- Cracked Cheesecake Surface – If cracks appear despite precautions, don’t worry—the hot fudge layer completely conceals them; prevent future cracks by ensuring gradual temperature changes and avoiding overmixing.
- Soggy Brownie Base – Water seeping into the pan during the water bath causes this; always wrap the springform pan exterior with two layers of heavy-duty foil to create waterproof seal.
- Cheesecake Sinks in Center – This happens if the cheesecake is overbaked or cooled too quickly; follow timing carefully and never skip the gradual oven cooling step to maintain structure.
- Hot Fudge Won’t Spread – If the fudge is too thick or the cheesecake too cold, warming the fudge longer or letting the cheesecake sit at room temperature briefly will make spreading easier.
Why This Recipe Works
This multi-layered dessert succeeds by carefully balancing contrasting textures and complementary flavors that work together rather than competing for attention. The dense, fudgy brownie base provides structural foundation and intense chocolate flavor, while the creamy cheesecake layer offers tangy richness that prevents the dessert from becoming monotonously sweet. The water bath baking method ensures the cheesecake cooks gently and evenly from all sides, creating the signature velvety texture without the dry, grainy consistency that results from direct oven heat. The overnight chilling isn’t just convenient—it’s essential for allowing the cheesecake to fully set, the brownie to soften slightly from moisture migration, and all flavors to meld into a cohesive whole. The hot fudge layer serves multiple purposes: it conceals any surface imperfections, adds glossy visual appeal, reinforces the chocolate theme, and provides another textural element. The sundae-style garnishes transform what could be an overly serious dessert into something playful and celebratory while adding textural variety with crunchy nuts, airy whipped cream, and chewy cherries. At 520 calories per serving, this is undeniably indulgent, but the rich, satisfying nature means a single slice delivers complete dessert satisfaction without anyone needing seconds.
Final Thoughts
Hot Fudge Brownie Cheesecake represents the pinnacle of American dessert indulgence—combining three beloved treats into one spectacular creation that delivers maximum impact with manageable technique. While classified as intermediate difficulty, the recipe breaks down into straightforward steps that any home baker can master with careful attention to timing and temperature. The make-ahead requirement actually reduces stress rather than creating it, since you’ll have one less thing to worry about on the day of your event. This dessert proves that special occasions deserve special effort, and the expressions on guests’ faces when they see this towering chocolate masterpiece will validate every minute spent preparing it. Whether celebrating a milestone, impressing dinner party guests, or simply treating yourself to something extraordinary, this cheesecake delivers bakery-quality results that taste even better than they look—and they look absolutely stunning.