
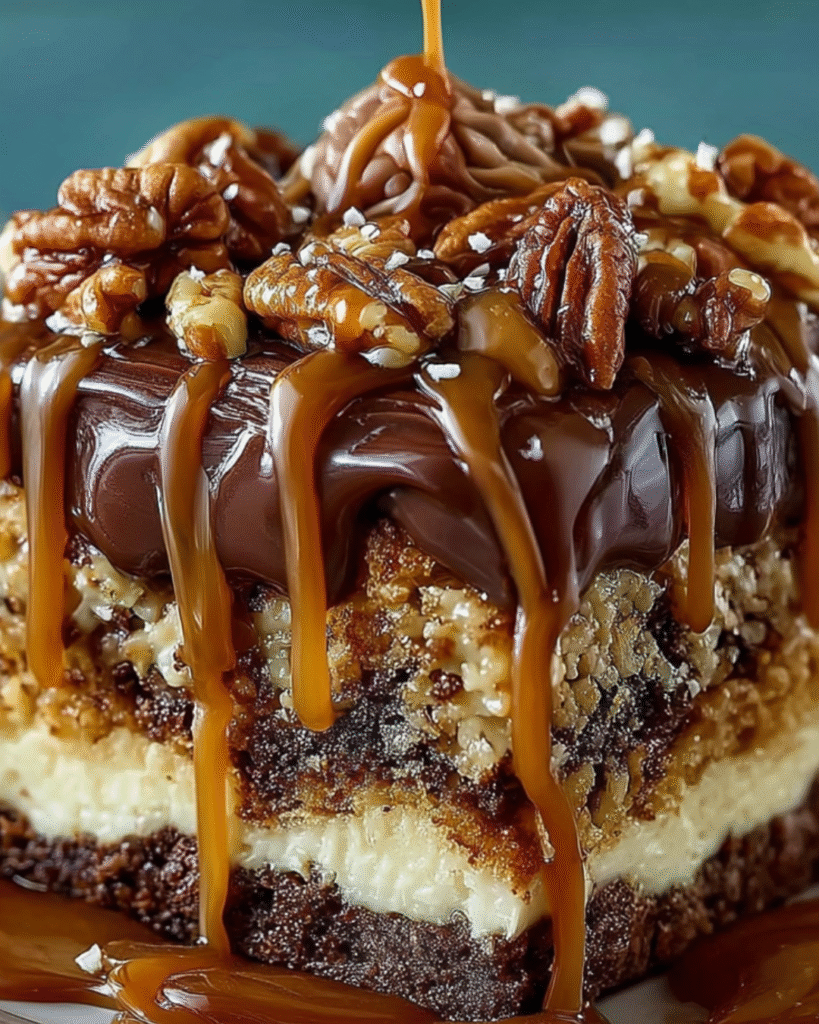
This decadent dessert reimagines the classic “Turtle” candy flavors—chocolate, caramel, and pecans—into a moist, crowd-pleasing sheet cake. A rich chocolate sponge is perforated while warm and infused with ribbons of caramel and chocolate syrup, ensuring every bite is gooey and flavorful. Topped with fluffy whipped cream and crunchy pecans, it offers a perfect balance of textures and sweetness that improves as it sits.+1
Why You’ll Love This Recipe
- Incredible Moisture – The “poke” technique allows the caramel and chocolate sauces to seep deep into the cake, guaranteeing it never tastes dry.
- Classic Flavor Trio – It faithfully recreates the beloved combination of roasted pecans, buttery caramel, and deep chocolate found in Turtle candies.
- Ideal for Make-Ahead – This cake actually tastes better after sitting in the fridge for a few hours, making it perfect for preparing the day before an event.
- Simple Pantry Ingredients – Despite its impressive taste, the base is a standard chocolate cake made with everyday staples like flour, cocoa, and oil.
- Easy Assembly – There is no need for complex frosting techniques or leveling layers; simply bake, poke, pour, and spread.
- Crowd-Pleasing Format – Baked in a 9×13 pan, it is easy to transport and slice, making it the ultimate dessert for potlucks and family gatherings.
Ingredients You’ll Need
The Chocolate Cake Base
- All-Purpose Flour (2 cups) – Provides the structure for the cake; measure by spooning and leveling to avoid a dense crumb.
- Granulated Sugar (2 cups) – Sweetens the cake and contributes to a tender texture.
- Unsweetened Cocoa Powder (½ cup) – Delivers the primary chocolate flavor; natural or Dutch-process both work here.
- Baking Powder (1 tbsp) – The leavening agent that ensures the cake rises and becomes fluffy.
- Whole Milk (1 cup) – Adds richness and liquid to the batter.
- Vegetable Oil (½ cup) – Ensures the cake remains soft and moist even when refrigerated (unlike butter, which hardens).
- Eggs (2 large) – Provides structure and richness.
- Vanilla Extract (2 tsp) – Enhances the chocolate flavor.
- Boiling Water (1 cup) – Critical for “blooming” the cocoa powder to release its full flavor and creating a smooth batter.
The Filling & Topping
- Caramel Sauce (1 cup) – Store-bought or homemade; provides the sticky, buttery sweetness characteristic of Turtles.
- Chocolate Syrup (1 cup) – Adds extra moisture and a punch of chocolate flavor to the soak.
- Chopped Pecans (1 cup) – Provides the essential nutty crunch; can be toasted beforehand for deeper flavor.
- Whipped Topping (1 cup) – Such as Cool Whip; creates a light, airy finish that balances the rich, heavy soak.
Step-by-Step Instructions
Step 1: Prepare the Equipment Preheat your oven to 350°F (175°C). Grease a 9×13-inch baking pan thoroughly with butter or cooking spray, and dust lightly with flour to prevent sticking.
Step 2: Mix Dry Ingredients In a large mixing bowl, whisk together the all-purpose flour, granulated sugar, cocoa powder, baking powder, and salt until uniform and free of lumps.
Step 3: Add Wet Ingredients Pour in the milk, vegetable oil, eggs, and vanilla extract. Beat with an electric mixer on medium speed for about 2 minutes until the mixture is creamy and smooth.
Step 4: Incorporate Boiling Water Carefully pour in the boiling water while stirring. The batter will become very thin and liquid consistency—this is normal and essential for a moist cake. Pour the batter into the prepared baking pan.
Step 5: Bake the Cake Bake for 30–35 minutes. The cake is done when a toothpick inserted into the center comes out clean or with just a few moist crumbs attached.
Step 6: Poke and Infuse Remove the cake from the oven and let it cool for about 15 minutes (it should still be warm). Using the handle of a wooden spoon, poke holes all over the surface of the cake, spacing them about 1 inch apart.
Step 7: Add the Sauces and Nuts While the cake is warm, pour the caramel sauce evenly over the top, aiming to fill the holes. Follow immediately with the chocolate syrup. Sprinkle the chopped pecans over the sticky surface.
Step 8: Chill and Top Allow the cake to cool completely to room temperature, then refrigerate for at least 2 hours to let the flavors meld. Just before serving, spread the whipped topping over the cake (covering the nuts or leaving some visible if preferred).
Recipe Notes & Tips
- Don’t Skip the Boiling Water – The hot water “blooms” the cocoa powder, dissolving the particles completely to release a deeper, more intense chocolate flavor.
- Hole Size Matters – Use a wooden spoon handle rather than a fork. You need holes large enough for the thick caramel sauce to seep down into the cake, rather than just sitting on top.
- Toast the Pecans – For superior flavor, toast the pecan pieces in a dry skillet for 2–3 minutes before adding them to the cake. This amplifies their nuttiness and crunch.
- Timing the Soak – Pour the sauces while the cake is still slightly warm. The warmth reduces the viscosity of the caramel, helping it travel deeper into the sponge.
- Whipped Topping Stability – If using real whipped cream instead of Cool Whip, stabilize it with a little confectioners’ sugar or gelatin so it doesn’t weep into the cake over time.
Nutritional Information
- Prep Time: 20 minutes
- Cooking Time: 35 minutes (+ chilling time)
- Total Time: 2 hours 55 minutes
- Servings: 12 slices
- Calories: Approximately 350 kcal per serving
Perfect Pairings
- Vanilla Bean Ice Cream – A scoop on the side adds a temperature contrast to the chilled cake.
- Hot Coffee – The bitterness of black coffee cuts through the extreme sweetness of the caramel and chocolate syrup.
- Fresh Strawberries – The acidity of fresh berries brightens the heavy, rich flavors of the chocolate and caramel.
- Cold Milk – The classic accompaniment to any rich chocolate dessert.
Ideal Occasions
- Office Potlucks – It yields a large number of servings and is easy to eat from a paper plate.
- Family BBQs – A chilled dessert is refreshing after a meal of grilled meats.
- Birthday Parties – A fun, messy alternative to a traditional frosted layer cake.
- Weekend Treats – Perfect for making on a Saturday to enjoy throughout the weekend.
Storage & Serving Tips
- Keep Refrigerated – Because of the whipped topping and the moisture content, this cake must be stored in the fridge.
- Cover Tightly – Use plastic wrap or a fitted lid to prevent the whipped topping from absorbing fridge odors.
- Serve Chilled – This cake is best eaten cold, where the caramel has a fudgy consistency.
- Shelf Life – The cake will last for 3–4 days in the refrigerator; the texture actually becomes fudgier on day two.
Creative Variations to Try
- Salted Caramel Version – Sprinkle flaky sea salt over the caramel layer before adding the whipped topping for a sweet-salty contrast.
- Toffee Crunch – Mix Heath bar or Skor toffee bits in with the pecans for extra crunch and flavor.
- Peanut Butter Twist – Swap the caramel sauce for melted peanut butter or a peanut butter glaze for a “Reese’s” style poke cake.
- Boozy Kick – Add a tablespoon of bourbon or Kahlúa to the caramel sauce before pouring it over the cake.
Troubleshooting Common Issues
- Soggy Cake – This can happen if you pour the sauce when the cake is piping hot (straight out of the oven) or use too much thin syrup. Let it cool for 15 minutes first.
- Caramel Not Soaking In – If the caramel is too thick, microwave it for 10–20 seconds to thin it out before pouring.
- Cake Stuck to Pan – Grease the pan generously. Since this is a wet cake, it can stick easily; serving the first slice is often the messiest.
- Topping Sliding Off – Ensure the cake is completely cold before adding the whipped topping. If the cake is even slightly warm, the whip will melt and slide.
Why This Recipe Works
The “poke cake” method is a brilliant culinary technique that transforms a standard sponge into a dessert resembling a pudding or truffle. By using a boiling water batter, the cake base itself is designed to be exceptionally moist and delicate. The hot water gelatinizes the starches immediately and blooms the cocoa butter, creating a deep flavor foundation.
When you punch holes and add the caramel and chocolate syrup, you are essentially injecting flavor and moisture into the center of the cake, not just the top. As the cake chills, the liquids thicken and set, creating “tunnels” of gooey caramel fudge throughout the crumb. The pecans provide the necessary textural opposition—a hard crunch against the soft cake and creamy whip—completing the “Turtle” experience.
Final Thoughts
The Caramel Turtle Poke Cake is a testament to how simple ingredients can come together to create something truly indulgent. It is a dessert that appeals to the inner child with its gooey texture and sweetness, yet satisfies the adult palate with the complex interplay of roasted nuts and dark cocoa. Whether for a special celebration or a simple weeknight treat, this cake delivers maximum satisfaction with minimal effort. At approximately 350 calories per slice, it is a rich treat worth every bite.


