
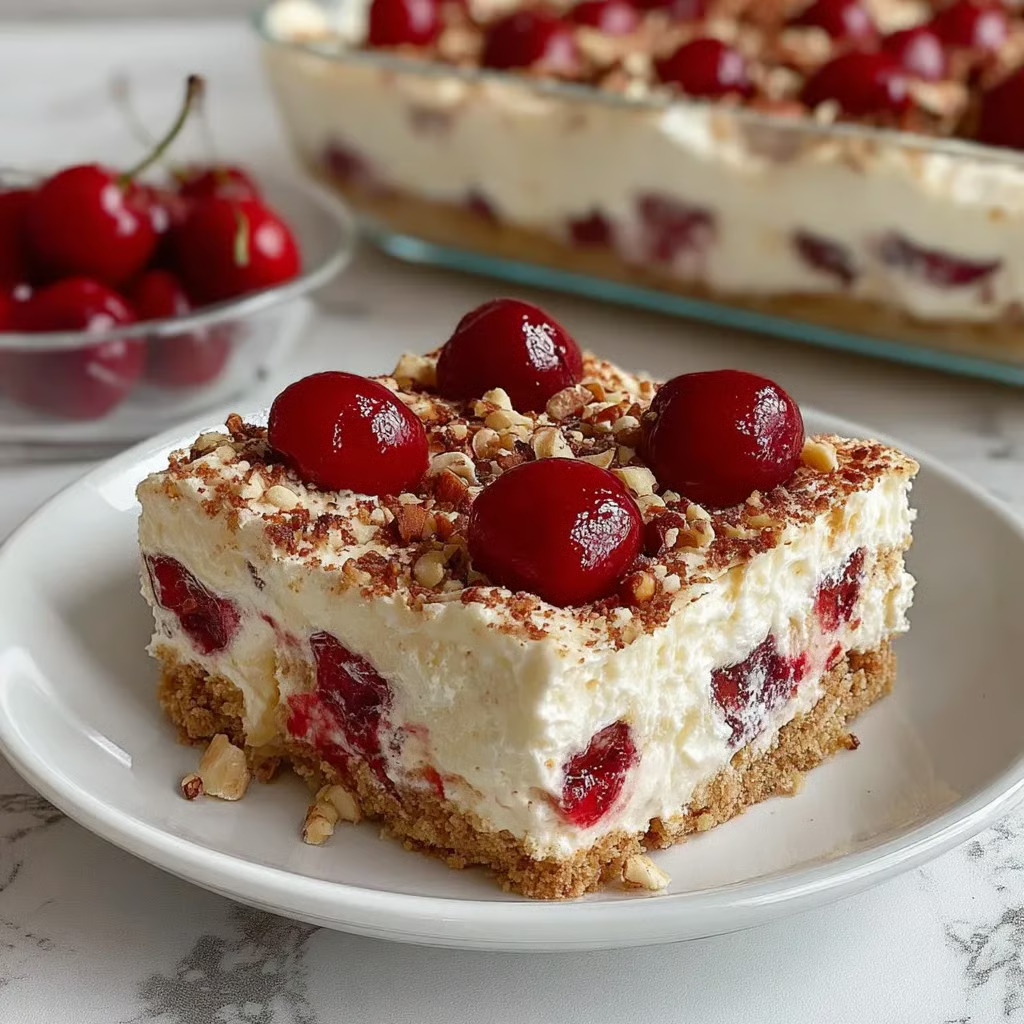
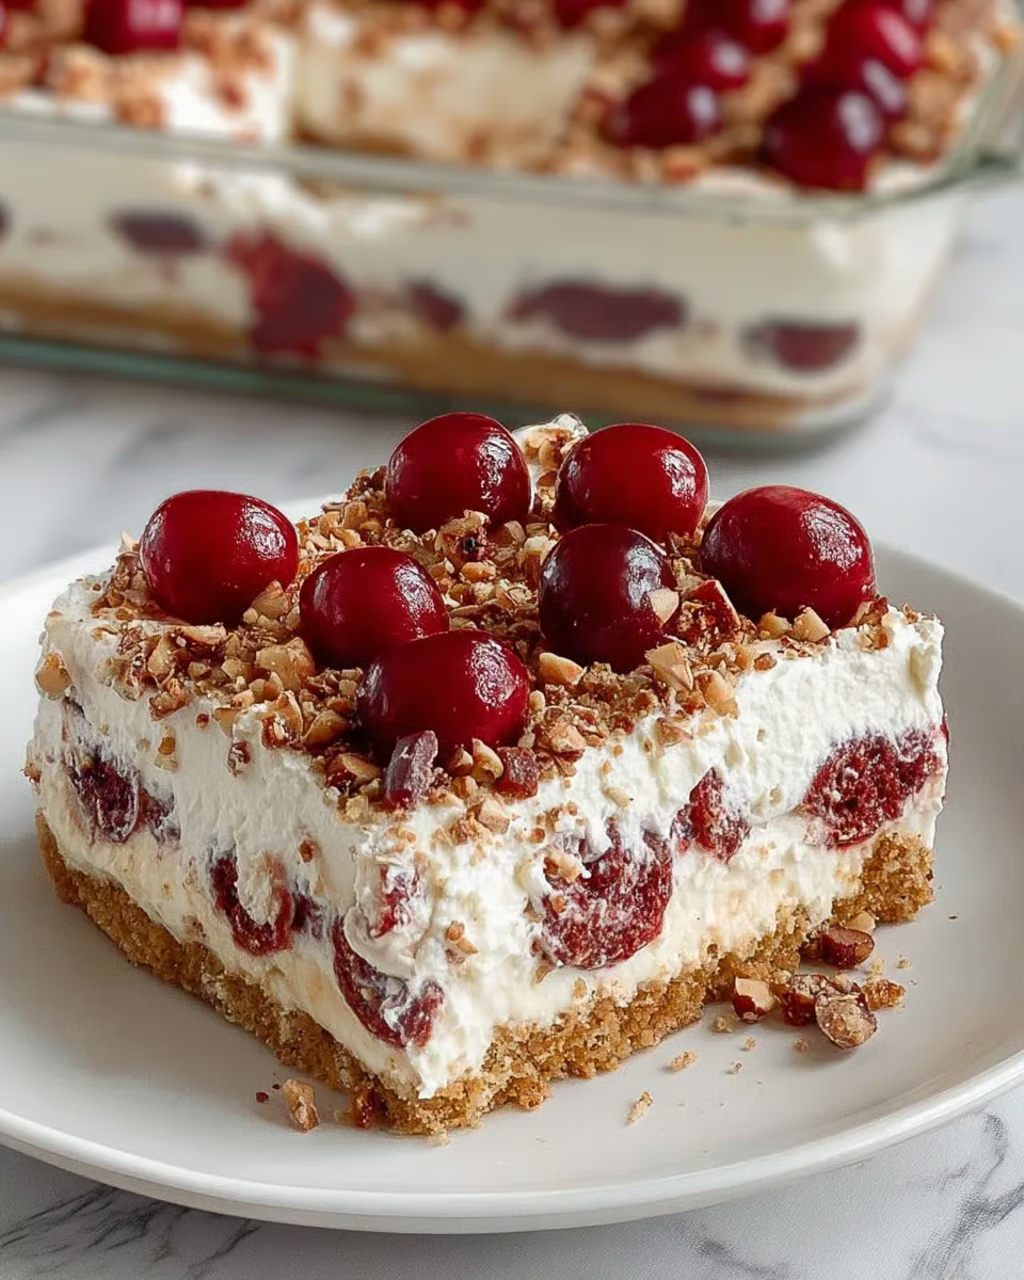
This Cherry Pecan Cheesecake Lush is a show-stopping layered dessert featuring a buttery pecan-graham cracker crust, smooth cream cheese filling, sweet cherry pie filling, and billowy whipped cream topping, all garnished with toasted pecans. By assembling these distinct layers in a 9×13 pan and chilling until set, this no-bake (or minimal-bake) recipe creates an elegant, crowd-pleasing dessert that looks impressive but requires no advanced skills or specialized equipment. The result is a beautiful, refreshing treat with contrasting textures—crunchy crust, creamy cheesecake, fruity cherries, and light whipped topping—that’s perfect for potlucks, holidays, or any time you want a stunning dessert that serves a crowd.
Why You’ll Love This Recipe
- No-Bake Simplicity – Requires minimal or no baking (just optional crust toasting), making this accessible even without oven experience and keeping kitchens cool in summer.
- Impressive Presentation – The beautiful layers visible from the side and colorful cherry topping create stunning visual appeal that looks far more difficult than it actually is.
- Feeds a Crowd – One 9×13 pan serves 12-15 people generously, making it ideal for potlucks, family gatherings, or holiday celebrations.
- Make-Ahead Convenience – Must be refrigerated for hours anyway, making it perfect for preparing the day before and eliminating last-minute dessert stress.
- Customizable Flavors – Works with various pie fillings (blueberry, strawberry, apple) and nut options, allowing endless variations based on preferences or what’s available.
- Light and Refreshing – Despite being indulgent, the whipped topping and fruit create lighter character than heavy cakes, making it appealing after large meals.
Ingredients You’ll Need
For the Pecan Crust:
- 1½ cups crushed graham crackers or vanilla wafers (about 12 graham cracker sheets or 40 wafers) – Creates the crispy, sweet foundation
- ¾ cup finely chopped pecans, lightly toasted – Adds nutty flavor and textural interest to the crust
- ½ cup (1 stick) unsalted butter, melted – Binds the crumbs and adds rich flavor
- 2 tablespoons granulated sugar – Sweetens the crust slightly
For the Creamy Cheesecake Layer:
- 8 ounces cream cheese (1 package), softened to room temperature – Provides the signature tangy, rich cheesecake flavor
- ½ cup powdered sugar (confectioners’ sugar) – Sweetens and helps create smooth texture
- 1 teaspoon pure vanilla extract – Adds aromatic depth that enhances the cream cheese
- 1 tablespoon fresh lemon juice – Brightens the flavor and adds subtle tang
- 1½ cups whipped topping (such as Cool Whip), thawed – Lightens the cream cheese layer and creates fluffy texture
For the Cherry Layer:
- 1 can (21 ounces) cherry pie filling – Provides the fruity, sweet-tart component
- ½ teaspoon almond extract (optional) – Enhances the cherry flavor with complementary almond notes
For the Topping:
- 2 cups whipped topping (such as Cool Whip), thawed – Creates the light, fluffy top layer
- ¼ cup chopped toasted pecans – Adds crunch and reinforces the pecan theme
- 3-4 fresh cherries (optional) – Provides elegant garnish and signals the flavor
Step-by-Step Instructions
Prepare the Pecan Crust Place graham crackers or vanilla wafers in a zip-top bag and crush them with a rolling pin, or pulse in a food processor until you have fine crumbs. In a medium bowl, combine the crushed crackers, finely chopped toasted pecans, melted butter, and granulated sugar, stirring until the mixture resembles wet sand and holds together when squeezed.
Form the Crust Base Press the crumb mixture firmly and evenly into the bottom of a 9×13-inch baking dish, using the bottom of a measuring cup or glass to compact it. Pay special attention to the corners and edges, creating an even layer. At this point, you have two options: (1) refrigerate for 20-30 minutes to set without baking, or (2) bake in a preheated 350°F oven for 10 minutes to create a firmer, crunchier crust, then cool completely. Either method works—baking creates slightly more structure.
Make the Cheesecake Layer In a large mixing bowl using an electric mixer, beat the softened cream cheese on medium speed for 1-2 minutes until smooth and creamy with no lumps. Add the powdered sugar, vanilla extract, and lemon juice, beating for another 1-2 minutes until completely smooth and well combined.
Fold in Whipped Topping Using a spatula, gently fold 1½ cups of whipped topping into the cream cheese mixture. Fold carefully with a sweeping motion from the bottom of the bowl up and over, continuing until the whipped topping is completely incorporated and the mixture is light and fluffy with no streaks visible. Don’t overmix or you’ll deflate the airiness.
Spread Cheesecake Layer Spread the cream cheese mixture evenly over the cooled crust, using an offset spatula or the back of a spoon to create a smooth, even layer that reaches all edges and corners. This layer should be completely level to support the cherry topping.
Add Cherry Layer If using almond extract, stir it into the cherry pie filling in the can. Spoon the cherry pie filling evenly over the cream cheese layer, spreading gently to distribute the cherries and sauce across the entire surface. Try to create an even layer without disturbing the cream cheese beneath.
Add Whipped Cream Topping Spread the remaining 2 cups of whipped topping evenly over the cherry layer, creating swirls or a smooth finish as desired. Make sure to cover the cherries completely, reaching all edges of the pan.
Garnish Sprinkle the chopped toasted pecans evenly across the whipped cream topping. If using fresh cherries, place them strategically on top for visual appeal—one in each corner and a few in the center works well.
Chill to Set Cover the pan tightly with plastic wrap (being careful not to let it touch the whipped cream surface) or aluminum foil. Refrigerate for at least 4 hours, though overnight is ideal. This extended chilling time is essential for the layers to set properly and the flavors to meld.
Serve When ready to serve, cut into 12-15 squares using a sharp knife dipped in hot water and wiped clean between cuts for neat portions. Use a spatula to lift each piece out, ensuring you get all layers in each serving. Serve cold directly from the refrigerator.
Recipe Notes & Tips
- Room Temperature Cream Cheese – Essential for smooth mixing; cold cream cheese creates lumps that are difficult to eliminate even with extended beating.
- Toasting Pecans – Toast pecans in a dry skillet over medium heat for 3-5 minutes, stirring frequently, until fragrant; this enhances their flavor dramatically.
- Whipped Topping Alternatives – Homemade whipped cream (heavy cream whipped with sugar and vanilla) can replace Cool Whip for more natural option, though it won’t hold as long.
- Crust Variations – Try chocolate graham crackers, Oreo cookies (filling removed), or shortbread cookies for different flavor profiles.
- Pie Filling Swaps – Blueberry, strawberry, raspberry, or apple pie filling all work beautifully; match extract to fruit (vanilla for berry, cinnamon for apple).
- Complete Chilling – Don’t skip the 4+ hour chill time; the dessert won’t be properly set and will be difficult to slice cleanly without adequate refrigeration.
Nutritional Information
- Prep Time: 30 minutes (making crust, preparing layers, assembling)
- Cook Time: 10 minutes (optional crust baking)
- Chilling Time: 4+ hours minimum (overnight ideal)
- Total Time: 40 minutes active + 4+ hours chilling
- Servings: 12 generous squares
- Calories: Approximately 690 per serving (varies based on exact measurements and toppings)
Perfect Pairings
- Serve with hot coffee or tea for adult gatherings where the bitter beverages balance the sweet dessert.
- Pair with sparkling water or lemonade for refreshing beverage options that cleanse the palate between bites.
- Complement with fresh fruit salad for those who want additional fruit alongside the rich dessert.
- Include in dessert buffets alongside other options like brownies or cookies for variety that appeals to different preferences.
Ideal Occasions
- Perfect for potlucks, church socials, or covered dish events where impressive, crowd-pleasing desserts are expected and appreciated.
- Excellent choice for Fourth of July, Memorial Day, or Labor Day celebrations when the red-white-and-blue color scheme fits the patriotic theme.
- Ideal for Easter, Mother’s Day, or spring gatherings when light, fruity desserts feel most appropriate and seasonal.
- Great option for family reunions, birthday parties, or holiday dinners when you need dessert that serves many people without requiring individual plating.
Storage & Serving Tips
- Store leftover dessert covered tightly in the refrigerator for up to 3 days; the crust will soften over time but remains delicious.
- Don’t freeze this dessert; the whipped topping and cream cheese layer don’t maintain quality when frozen and thawed, becoming watery and separated.
- Add the fresh cherry garnish just before serving if making more than a day ahead, as fresh cherries can bleed juice into the whipped cream.
- If the whipped cream topping deflates slightly after a day, refresh it by adding a fresh dollop of whipped topping before serving.
Creative Variations to Try
- Strawberry Shortcake Lush – Use strawberry pie filling and vanilla wafer crust for classic strawberry shortcake flavors in lush format.
- Chocolate Cherry – Use chocolate graham crackers for the crust and add mini chocolate chips to the cheesecake layer for black forest-inspired version.
- Blueberry Lemon – Use blueberry pie filling and increase lemon juice to 2 tablespoons for bright, summery variation.
- Apple Pecan – Use apple pie filling, add cinnamon to the cheesecake layer, and sprinkle with cinnamon-sugar for fall-inspired version.
Troubleshooting Common Issues
- Crust falls apart – Not enough butter or didn’t press firmly enough; ensure butter is distributed throughout and compact the crust very firmly.
- Lumpy cheesecake layer – Cream cheese wasn’t soft enough or overmixed; always use room temperature cream cheese and fold gently after adding whipped topping.
- Layers mixing together – Previous layer wasn’t set or spread too aggressively; ensure each layer is firm before adding the next and spread gently.
- Watery bottom – Crust wasn’t dry enough when filled or condensation formed; ensure crust is completely cool and dry before adding cream cheese layer.
Why This Recipe Works
This cherry pecan cheesecake lush succeeds by combining distinct layers with complementary flavors and contrasting textures into a cohesive dessert that’s both beautiful and delicious. The graham cracker-pecan crust provides sweet, buttery, nutty foundation with satisfying crunch—toasting the pecans intensifies their flavor while pressing the crust firmly creates stability that supports the layers above. The cream cheese layer delivers the signature tangy richness of cheesecake without requiring baking, eggs, or a water bath—beating the cream cheese until smooth eliminates lumps while the powdered sugar dissolves completely. The lemon juice adds brightness that prevents the layer from being one-dimensionally rich, while folding in whipped topping creates light, mousse-like texture rather than dense cheesecake. Using whipped topping (rather than heavy whipped cream) provides stability and holds its texture for days without weeping or deflating. The cherry pie filling contributes fruity sweetness and vibrant color while its thick consistency prevents it from soaking into other layers. The optional almond extract enhances the cherry flavor with complementary nutty notes. The whipped topping layer creates light, creamy finish that balances the denser layers below while providing visual appeal. The toasted pecan garnish reinforces the crust flavor and adds textural interest on top. The extended chilling time (4+ hours) is essential—it allows the cream cheese layer to firm up, the crust to absorb slight moisture and soften just enough to be tender (not crumbly), and all flavors to meld together cohesively. At approximately 690 calories per serving, this is an indulgent dessert with significant calories from cream cheese, butter, whipped topping, and pie filling—it’s celebration food meant for special occasions when you want impressive dessert without restraint.
Final Thoughts
Cherry Pecan Cheesecake Lush belongs to a beloved category of American desserts sometimes called “lush,” “delight,” “dream,” or “yum-yum” depending on regional preferences—layered refrigerator desserts that became popular in the mid-20th century precisely because they deliver impressive results without requiring baking expertise, special equipment, or professional techniques. These desserts have endured because they solve practical problems: they feed crowds economically, they can be made completely ahead without quality loss, they look beautiful enough for special occasions, and they genuinely taste delicious despite their simplicity. While food trends come and go, these layered desserts remain staples at potlucks, family gatherings, and church socials because they’re reliably crowd-pleasing in a way that trendy, complex desserts often aren’t. This particular version with cherry and pecan is especially appealing because it feels elegant and special despite being quite easy—the combination of creamy cheesecake, sweet-tart cherries, crunchy pecans, and light whipped cream creates sophisticated flavor profile that could easily appear on restaurant dessert menus. Whether you’re new to making desserts and want something foolproof yet impressive, an experienced baker seeking convenient make-ahead options, someone responsible for bringing desserts to gatherings, or simply appreciate the satisfying combination of textures and flavors in layered desserts, this cherry pecan cheesecake lush delivers exactly what it promises—it’s beautiful, it’s delicious, it’s easy, and it proves that sometimes the most beloved recipes are the straightforward ones that anyone can make successfully and everyone will enjoy eating.


