
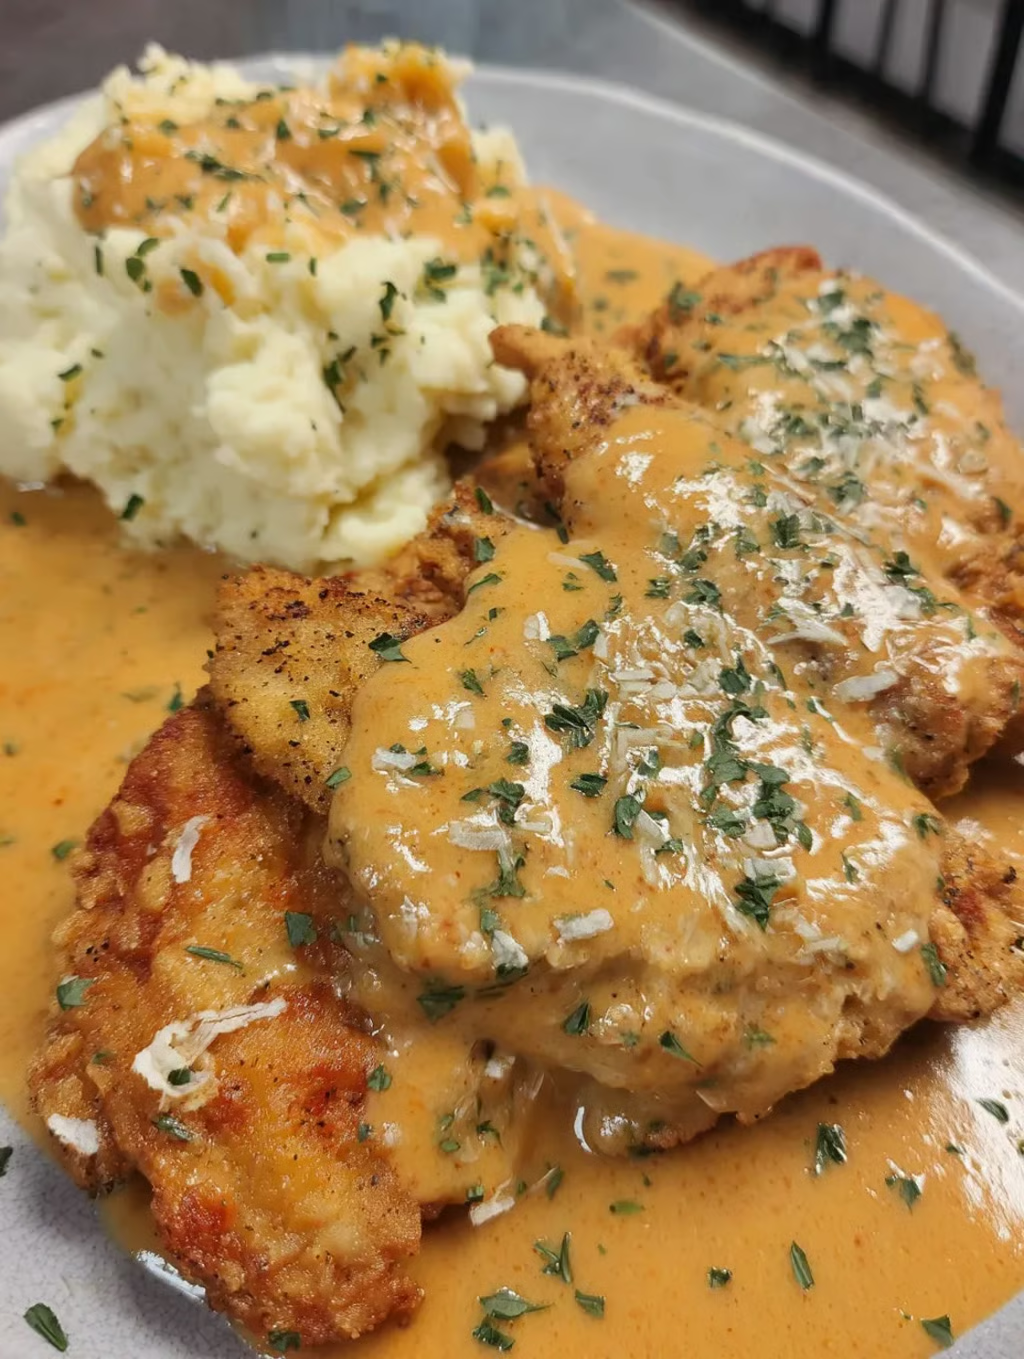
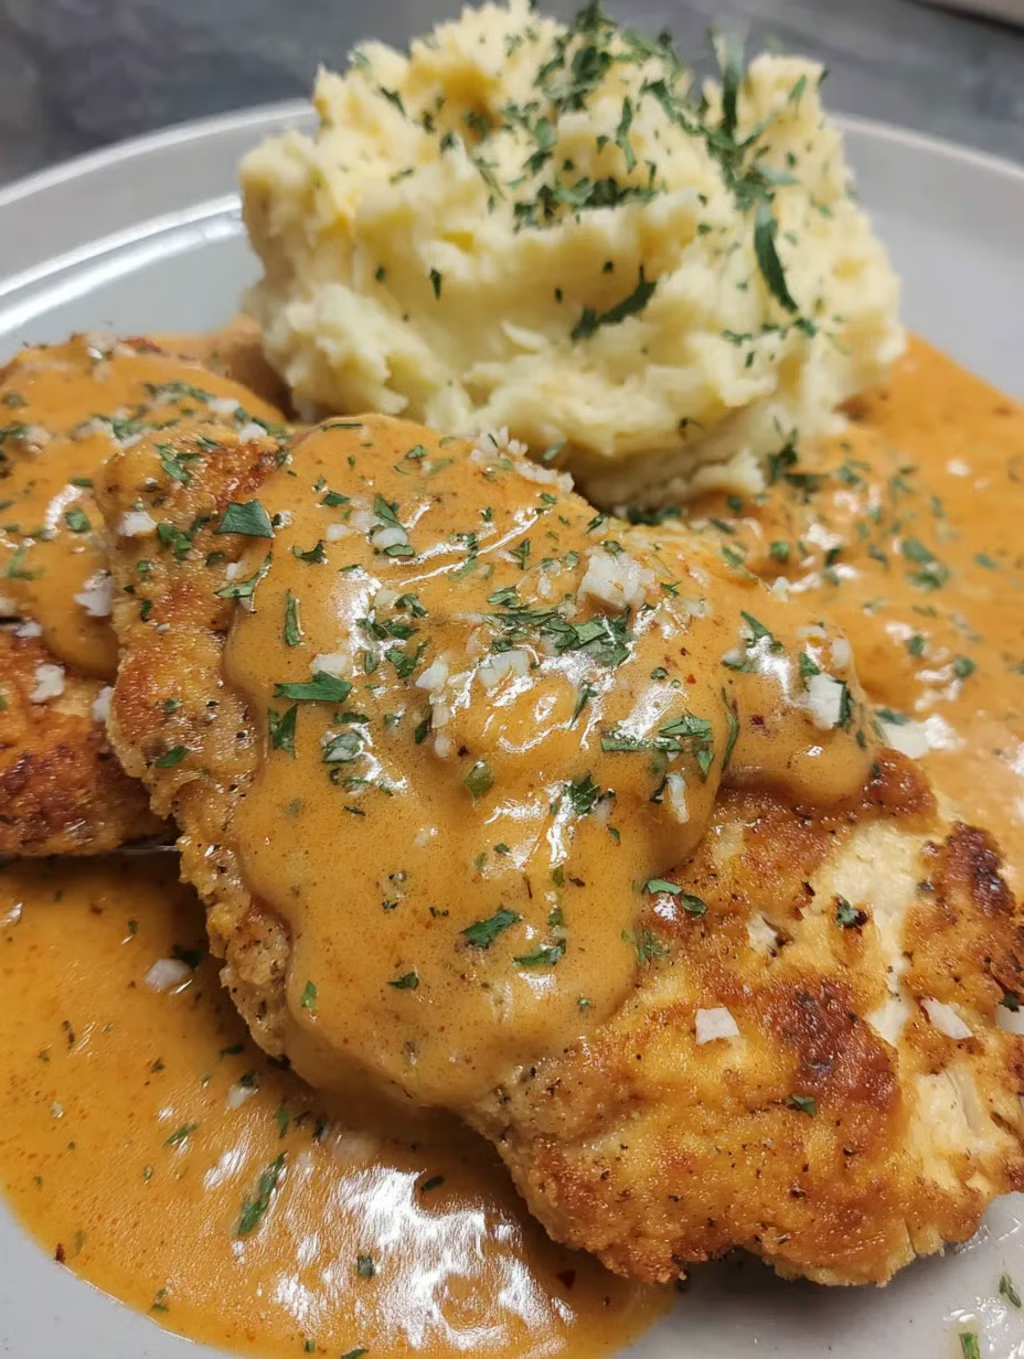
This creamy pan fried chicken delivers restaurant-quality results by combining the crispy, golden exterior of Southern-style fried chicken with a velvety, herb-infused gravy made right in the same pan. Butterflying the chicken breasts ensures even cooking and maximum surface area for the flour coating, while the pan drippings form the flavorful foundation for a rich cream sauce that envelops each piece. The result is a complete one-pan meal that transforms simple chicken breasts into an impressive comfort food dinner without requiring multiple pots or complicated techniques.
Why You’ll Love This Recipe
True One-Pan Efficiency – Everything cooks in a single skillet from start to finish, which means less cleanup and more time enjoying your meal instead of scrubbing multiple dishes.
Beginner-Friendly Technique – The straightforward process of dredging, frying, and sauce-making uses fundamental cooking methods that build confidence in the kitchen while producing impressive results.
Built-In Gravy Perfection – Using the browned bits left in the pan after frying the chicken creates a gravy with deep, complex flavor that you simply cannot achieve by starting with a clean pan.
Customizable Heat and Seasoning – The spice blend provides a template that welcomes adjustments based on your preferences, allowing you to increase smokiness, add heat, or emphasize different herb profiles.
Budget-Conscious Comfort Food – Chicken breasts, flour, and pantry seasonings keep the ingredient cost low while the cream sauce creates an upscale presentation that feels special enough for company.
Controlled Portion Sizes – Butterflying the chicken breasts creates uniform thickness that promotes even cooking and allows you to serve consistent portions that cook in the same amount of time.
Ingredients You’ll Need
Main Ingredients
1 lb chicken breast – Provides lean protein and should be butterflied to create thinner, more uniform pieces that cook quickly and evenly while maximizing the surface area for the crispy coating.
Salt, to taste (for initial seasoning) – Seasons the chicken directly before dredging and should be applied generously to ensure the meat itself is flavored, not just the coating.
Pepper, to taste (for initial seasoning) – Adds subtle heat and aromatic complexity to the chicken before coating and complements the garlic powder in the seasoning blend.
Garlic powder, to taste (for initial seasoning) – Infuses the chicken with savory, aromatic flavor that penetrates the meat rather than sitting only on the surface with the flour coating.
1 cup flour (for dredging) – Creates the crispy, golden coating on the chicken and should be seasoned separately to build layers of flavor throughout the crust.
2 tbsp butter – Contributes rich, nutty flavor to the frying fat and later enriches the gravy with dairy complexity that pure oil cannot provide.
2 tbsp olive oil – Raises the smoke point of the butter to prevent burning during the chicken frying process while adding its own subtle fruity notes.
2 tbsp minced garlic – Forms the aromatic base of the gravy and should be fresh rather than pre-minced for the best flavor and texture in the finished sauce.
2 tbsp flour (for gravy) – Thickens the cream sauce by creating a roux with the pan drippings and ensures the gravy has proper body to coat the chicken without being watery.
1 cup chicken broth – Adds savory depth to the gravy while providing liquid that deglazes the pan and picks up all the browned bits left from frying the chicken.
1 cup heavy whipping cream – Creates the signature rich, velvety texture of the gravy and provides luxurious mouthfeel that makes this dish feel indulgent.
1/2 tsp salt (for gravy) – Seasons the cream sauce specifically and should be added gradually, tasting as you go since the pan drippings and broth already contribute sodium.
1/2 tsp pepper (for gravy) – Adds warmth and subtle spiciness to balance the richness of the cream and butter in the finished sauce.
1 tsp garlic powder (for gravy) – Reinforces the garlic flavor from the minced fresh garlic and provides a more intense, concentrated garlic presence throughout the sauce.
1 tsp smoked paprika – Contributes both vibrant color and subtle smoky flavor that adds complexity without overwhelming the creamy base.
1 tsp onion powder – Provides sweet, savory depth that rounds out the flavor profile and creates a more complex taste than using garlic alone.
Step-by-Step Instructions
Butterfly and Season the Chicken Place each chicken breast on a cutting board and, using a sharp knife held parallel to the board, carefully slice horizontally through the thickest part of the breast, stopping just before cutting all the way through so the halves remain connected. Open the breast like a book to create a thinner, more uniform piece, then season both sides generously with salt, pepper, and garlic powder, pressing the seasonings into the meat.
Prepare the Seasoned Dredging Flour In a shallow container or plate with raised edges, combine the 1 cup of flour with additional salt, pepper, and garlic powder to taste, whisking the mixture together to distribute the seasonings evenly. This seasoned flour creates multiple layers of flavor since it coats the exterior while the initial seasoning flavors the meat itself.
Dredge the Chicken Thoroughly Working with one butterflied chicken breast at a time, press both sides into the seasoned flour mixture, ensuring complete coverage with no bare spots. Shake off the excess flour gently but leave a substantial coating that will crisp up during frying and create that golden, crunchy exterior.
Heat the Pan and Fry the Chicken Set a large skillet over medium heat and add the butter and olive oil, swirling to combine as the butter melts completely. Once the fat shimmers and a pinch of flour sizzles immediately when dropped in, carefully add the dredged chicken breasts and cook for 5-7 minutes on the first side without moving them, allowing a golden-brown crust to develop.
Finish Cooking and Check Temperature Flip the chicken breasts carefully using tongs or a spatula and continue cooking for another 5-7 minutes on the second side until both sides are deeply golden and crispy. Insert a meat thermometer into the thickest part of each breast to confirm the internal temperature reaches at least 165°F, then transfer the cooked chicken to a clean plate and tent loosely with foil to keep warm.
Start the Gravy with Garlic and Flour Without wiping out the skillet, add the minced garlic to the hot pan with the browned bits and remaining fat, stirring constantly for about 30 seconds until fragrant. Sprinkle the 2 tablespoons of flour over the garlic and stir vigorously for 1-2 minutes to create a roux that thickens and takes on a light golden color.
Deglaze and Build the Sauce Base Pour the chicken broth into the skillet while stirring continuously, scraping up all the browned bits stuck to the bottom of the pan with a wooden spoon or spatula. These fond particles contain concentrated flavor that enriches the gravy significantly, so make sure to incorporate them completely into the liquid.
Add Cream and Seasonings Pour the heavy whipping cream into the broth mixture while stirring constantly to create a smooth, unified sauce. Add the salt, pepper, garlic powder, smoked paprika, and onion powder, continuing to stir as the sauce heats and thickens over medium heat for 3-4 minutes until it reaches a consistency that coats the back of a spoon.
Combine Chicken and Gravy Return the fried chicken breasts to the skillet, spooning the gravy over the top to coat each piece thoroughly. Let everything simmer together for 1-2 minutes so the chicken absorbs some of the gravy flavor and the sauce clings beautifully to the crispy coating.
Serve Immediately Transfer the chicken to serving plates and generously ladle the remaining gravy over and around each portion. Serve while still hot to enjoy the contrast between the crispy exterior and the creamy sauce at their best textures.
Recipe Notes & Tips
Butterflying Creates Even Cooking – Taking the time to properly butterfly the chicken breasts eliminates thick spots that remain undercooked while thinner areas dry out, ensuring every part reaches 165°F simultaneously without overcooking.
Don’t Crowd the Pan – If your skillet isn’t large enough to hold all the chicken pieces with at least an inch between them, fry in batches to maintain proper temperature and achieve maximum crispiness rather than steaming.
Medium Heat Prevents Burning – Resist the urge to increase the heat for faster cooking, as medium heat allows the chicken to cook through completely while the flour coating develops a golden crust without burning the butter or creating bitter, dark spots.
Roux Timing Matters – Cook the flour and garlic mixture for the full 1-2 minutes to eliminate the raw flour taste, but watch carefully to prevent the garlic from burning, which would make the entire gravy bitter.
Gravy Consistency Adjustments – If your gravy becomes too thick, thin it with additional chicken broth one tablespoon at a time; if it’s too thin, let it simmer for a few extra minutes to reduce and concentrate.
Fresh Garlic is Essential – While jarred minced garlic offers convenience, fresh garlic provides superior flavor and texture in both the dredging mix and the gravy, making it worth the extra minute of prep time.
Nutritional Information
Prep Time: 20 minutes
Cooking Time: 20 minutes
Total Time: 40 minutes
Servings: 4 portions (approximately 4-5 oz chicken per serving with gravy)
Calories: Approximately 525 calories per serving (based on standard ingredient measurements and 4 oz cooked chicken)
Perfect Pairings
Mashed Potatoes or Rice – Starchy sides soak up the abundant gravy and provide a neutral canvas that allows the creamy, seasoned sauce to shine as the star of the plate.
Steamed Green Beans or Broccoli – Bright green vegetables add color contrast and a crisp-tender texture that balances the richness of the cream sauce while contributing nutritional value.
Buttered Egg Noodles – Wide egg noodles tossed with butter create the perfect vehicle for catching extra gravy and add comforting, home-style appeal to the meal.
Crusty Bread or Dinner Rolls – Fresh bread provides a tool for sopping up every last bit of the flavorful gravy that pools on the plate, ensuring nothing goes to waste.
Ideal Occasions
Sunday Family Dinners – The comforting, familiar flavors and generous portions make this recipe perfect for traditional weekly family meals where everyone gathers around the table.
Weeknight Speed Cooking – With just 40 minutes from start to finish, this recipe delivers impressive, restaurant-quality results on busy evenings when you need something more special than basic grilled chicken.
Comfort Food Cravings – When you’re seeking the soothing satisfaction of rich, creamy dishes without spending hours in the kitchen, this recipe delivers maximum comfort with minimal effort.
Beginner Cook Confidence Building – The straightforward techniques and hard-to-mess-up process make this an excellent choice for cooks developing their skills while still wanting to serve something impressive.
Storage & Serving Tips
Refrigerator Storage – Store leftover chicken and gravy together in an airtight container for up to 3 days, though the coating will soften as it sits in the sauce and won’t retain its original crispiness.
Reheating Method – Warm refrigerated portions in a covered skillet over medium-low heat with a splash of chicken broth or cream to thin the gravy that thickens during storage, heating until the chicken reaches 165°F throughout.
Freezing Considerations – While the chicken and gravy can be frozen for up to 2 months, cream-based sauces sometimes separate or become grainy when thawed, so this recipe is best enjoyed fresh or refrigerated rather than frozen.
Make-Ahead Strategy – Butterfly and season the chicken up to 24 hours in advance, storing it covered in the refrigerator, but wait to dredge and cook until ready to serve for the best texture and food safety.
Creative Variations to Try
Mushroom Cream Version – Add 8 oz sliced mushrooms to the skillet after removing the chicken, sautéing until golden before building the gravy for an earthy, sophisticated variation.
Lemon Herb Twist – Add fresh thyme and a squeeze of lemon juice to the finished gravy, along with lemon zest, to brighten the rich sauce with citrus notes that cut through the cream.
Cajun-Spiced Adaptation – Replace the smoked paprika and onion powder with Cajun seasoning and add a pinch of cayenne pepper for a Louisiana-inspired version with more pronounced heat.
Bacon Enhancement – Cook 4 strips of bacon in the skillet first, remove and crumble them, then use the bacon fat as part of your frying fat and sprinkle the crumbled bacon over the finished dish for smoky richness.
Troubleshooting Common Issues
Coating Falls Off During Cooking – Ensure the chicken is relatively dry before dredging and let the dredged pieces rest for 5 minutes before frying so the flour coating can adhere properly to the surface moisture.
Gravy Too Lumpy – Whisk vigorously when adding the liquids to the roux and consider straining the finished gravy through a fine-mesh sieve if lumps persist, though constant stirring during cooking usually prevents this issue.
Chicken Cooks Unevenly – Make sure the butterflied breasts are uniform thickness throughout by pounding thicker spots gently with a meat mallet, and verify your skillet heats evenly by checking that oil shimmers uniformly across the entire surface.
Gravy Separates or Looks Broken – This typically happens if the sauce gets too hot or boils vigorously after adding the cream, so keep the heat at medium and stir constantly, reducing to medium-low if you see any signs of breaking or curdling.
Why This Recipe Works
The genius of this creamy pan fried chicken lies in the strategic use of cooking techniques that build flavor at every stage while maximizing efficiency. Butterflying the chicken creates uniform thickness that prevents the common problem of overcooked exteriors and undercooked centers that plague whole chicken breasts, while also creating more surface area for the crispy coating to develop. The double seasoning approach—both directly on the meat and in the dredging flour—ensures flavor penetrates beyond just the surface, creating a more complex and satisfying taste experience. Using butter and olive oil together provides the best of both worlds: butter’s rich flavor and olive oil’s higher smoke point that prevents burning during the extended frying time needed for larger chicken pieces. The pan sauce technique transforms what would otherwise be discarded browned bits into the flavor foundation of the gravy, creating depth that commercial pan sauces cannot match. The roux formed by the flour and pan drippings thickens the sauce naturally without cornstarch or other stabilizers, while the heavy cream provides the luxurious texture and mouthfeel that makes this gravy cling to the chicken rather than sliding off. At approximately 525 calories per serving, this recipe provides substantial protein and satisfying richness that makes it feel indulgent while still fitting into a balanced diet when paired with vegetables and reasonable portions of starch.
Final Thoughts
Creamy pan fried chicken represents the kind of accessible home cooking that builds kitchen confidence while delivering results impressive enough for company. This recipe proves that you don’t need complicated techniques, expensive ingredients, or hours of time to create a meal that tastes like it came from a restaurant kitchen. The one-pan approach respects the reality of busy home cooks who want excellent food without facing a mountain of dishes, while the simple ingredient list relies on pantry staples and readily available items. While this dish is undeniably rich with its cream-based gravy and fried preparation, you can create lighter versions by using half-and-half instead of heavy cream, reducing the amount of gravy per serving, or even trying a Greek yogurt-based sauce for a tangy, protein-rich alternative that cuts calories while maintaining creamy texture.


