
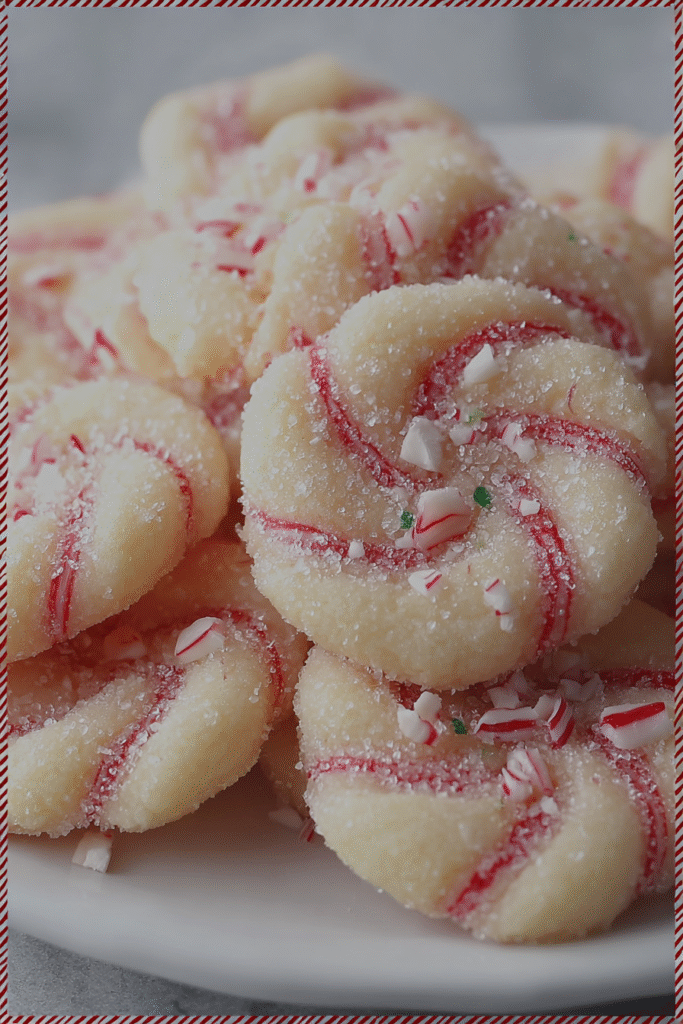
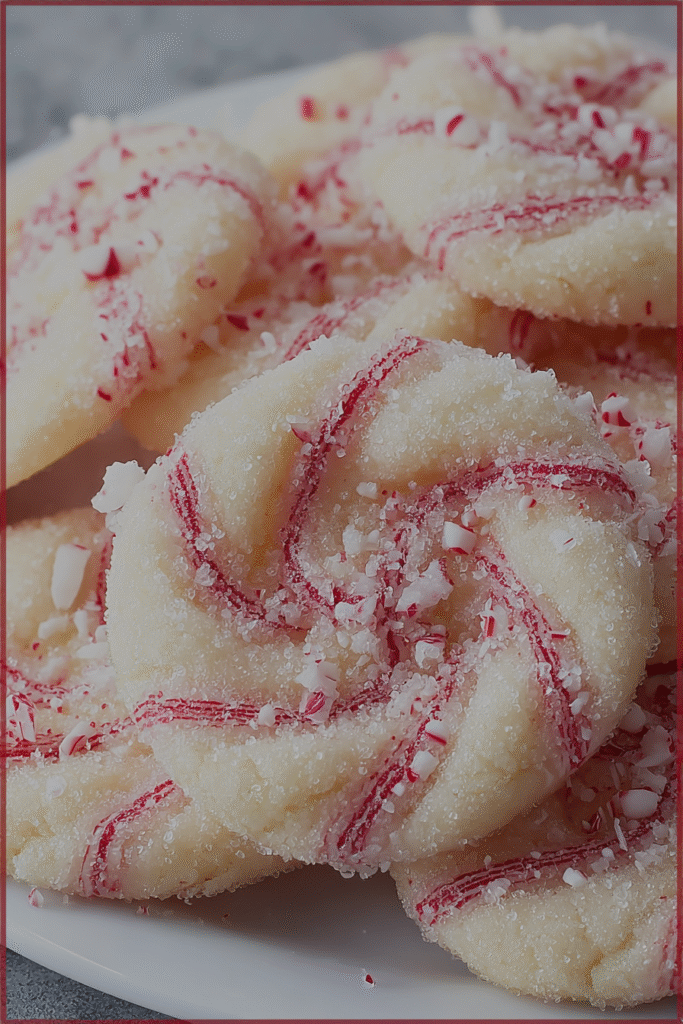
These charming, buttery cookies capture the iconic red-and-white striped appearance of candy canes through a simple twist-and-shape technique, creating festive treats that taste as delightful as they look on holiday cookie platters. The recipe combines classic sugar cookie dough flavored with vanilla and optional peppermint extract, then divides it into plain and red-tinted portions that twist together into recognizable candy cane shapes before baking to tender perfection. With their eye-catching presentation, nostalgic peppermint flavor, and surprisingly straightforward preparation that makes cookie decorating accessible even to beginners, these festive cookies represent the perfect addition to holiday baking traditions, cookie exchanges, gift boxes, or any occasion when you want edible decorations that deliver both visual charm and delicious taste.
Why You’ll Love This Recipe
- Visual Holiday Impact – The red-and-white twisted candy cane shape creates instant festive appeal that needs no additional decoration, making these cookies both beautiful and efficient to prepare.
- Beginner-Friendly Shaping – Unlike intricate piped or cut-out cookies, the rope-twisting technique requires no special equipment or advanced skills, making impressive results accessible to novice bakers.
- Classic Peppermint Flavor – The optional peppermint extract provides authentic candy cane taste that evokes holiday nostalgia, while its optional nature allows customization for those preferring pure vanilla.
- Perfect Cookie Exchange Star – These cookies travel well, maintain their shape during transport, and stand out visually on crowded cookie platters where uniqueness matters.
- Kid-Friendly Activity – The hands-on shaping process engages children in holiday baking, creating family memories while producing cookies everyone can proudly claim they helped make.
- Buttery, Tender Texture – The high butter-to-flour ratio creates rich, melt-in-your-mouth cookies with delicate crumb that distinguishes these from harder, crunchier candy cane cookies.
Ingredients You’ll Need
For the Cookie Dough
- 1 cup unsalted butter, softened – Provides rich flavor and creates tender texture; approximately 2 sticks or 225g, softened to room temperature for at least 30 minutes until it indents easily when pressed.
- 1 cup powdered sugar – Sweetens the dough while contributing to fine, delicate crumb texture; approximately 120g, with powdered sugar creating more tender cookies than granulated.
- 1 large egg – Binds ingredients together while adding structure and richness; room temperature egg incorporates more smoothly into the butter mixture.
- 1 tsp vanilla extract – Provides essential aromatic flavor foundation; approximately 5ml, with pure vanilla extract delivering superior taste compared to imitation.
- 1 tsp peppermint extract (optional but festive!) – Delivers authentic candy cane flavor; approximately 5ml, with this being genuinely optional for those preferring vanilla-only cookies or accommodating mint-averse eaters.
- 2 1/2 cups all-purpose flour – Forms the structural foundation; approximately 315g, with all-purpose flour’s moderate protein content (10-12%) creating ideal balance between structure and tenderness.
- 1 tsp baking powder – Provides gentle leavening that helps cookies maintain their shape without excessive spreading; approximately 5g, ensuring cookies stay recognizable as candy canes.
For Coloring and Finishing
- Red gel food coloring – Creates the vibrant red stripes; gel or paste food coloring provides intense color without adding excess liquid that would alter dough consistency—liquid food coloring won’t achieve deep enough red.
- Extra sugar for sprinkling – Adds sparkle and slight crunch; granulated white sugar sprinkled before baking creates attractive finish that catches light.
Step-by-Step Instructions
Create the Butter-Sugar Base
In a large mixing bowl, combine the softened unsalted butter and powdered sugar. Using an electric mixer on medium speed or vigorous manual beating with a wooden spoon, cream these ingredients together for 2-3 minutes until the mixture is light, fluffy, and pale in color—this incorporates air that creates tender texture. Scrape down the bowl sides as needed to ensure even mixing.
Add Wet Ingredients
Add the egg, vanilla extract, and optional peppermint extract to the butter-sugar mixture. Beat on medium speed for about 1 minute until completely incorporated and the mixture appears smooth and uniform. The peppermint extract is genuinely optional—include it for authentic candy cane flavor or omit it for vanilla-flavored cookies with candy cane appearance.
Incorporate Dry Ingredients
Add the all-purpose flour and baking powder to the wet ingredients. Mix on low speed or stir by hand just until a soft, cohesive dough forms and no visible flour streaks remain. Avoid overmixing, which would develop gluten and create tough cookies—the dough should come together cleanly and feel slightly soft but not sticky.
Divide and Color the Dough
Divide the dough into two equal portions, transferring each to a separate bowl or work surface. Leave one portion plain (this will be the white stripes). To the other portion, add red gel food coloring gradually—start with a small amount (about 1/4 teaspoon) and knead it in thoroughly with your hands, adding more color as needed until achieving a vibrant, even red throughout with no white streaks remaining. The gel consistency ensures the dough doesn’t become too wet or sticky.
Shape the Candy Canes
Preheat your oven to 350°F (175°C) and line baking sheets with parchment paper or silicone baking mats. Working with small portions (about 1 tablespoon of each color), roll each piece between your palms or on a clean work surface into a rope approximately 4-5 inches long and about 1/4 inch in diameter—the ropes should be uniform in thickness for even baking. Place one red rope and one white rope side by side, then gently press the tops together and twist them around each other 2-3 times, creating the classic candy cane stripe pattern. Carefully bend the top third of the twisted rope to form the traditional candy cane hook shape.
Prepare for Baking
Place the shaped candy canes on the prepared baking sheets, spacing them about 1 inch apart as they spread minimally during baking. Lightly sprinkle each cookie with granulated sugar for sparkle—use your fingers or a small spoon to distribute sugar evenly but not excessively.
Bake to Perfection
Bake in the preheated 350°F oven for 8-10 minutes, until the cookies are just set and the white portions show the barest hint of golden color at the edges—they should not brown significantly. The cookies will appear slightly soft when removed from the oven but will firm up as they cool. Overbaking creates dry, hard cookies that lose their tender appeal.
Cool Completely
Allow the cookies to cool on the baking sheet for 2-3 minutes to set slightly, then carefully transfer to a wire cooling rack using a thin spatula. Let cool completely before handling, serving, or storing—these cookies are delicate when warm and hold their shape best once fully cooled. The candy cane shape may distort if moved while hot.
Recipe Notes & Tips
- Butter Temperature Critical – Properly softened butter (cool room temperature, not melted or too cold) creams smoothly and creates ideal texture; test by pressing—it should indent easily but not be greasy or shiny.
- Gel Food Coloring Essential – Liquid food coloring adds too much moisture and creates sticky dough while failing to achieve deep color; invest in gel or paste food coloring for best results.
- Uniform Rope Thickness – Roll ropes to consistent diameter throughout their length to ensure even baking; thick sections remain doughy while thin sections overbake.
- Gentle Twisting – Twist ropes together gently rather than tightly; aggressive twisting breaks the ropes or creates too-compact cookies that look muddy rather than distinctly striped.
- Minimal Baking Time – These cookies continue baking slightly after removal from the oven due to residual heat; slightly underbaking creates tender texture while overbaking makes them hard.
- Peppermint Extract Strength – Peppermint extract is potent; use the full teaspoon for pronounced flavor or reduce to 1/2 teaspoon for subtle mint presence.
Nutritional Information
- Prep Time: 20 minutes (including shaping time)
- Baking Time: 8-10 minutes per batch
- Total Time: Approximately 45-60 minutes (depending on batch number)
- Servings: 24-30 cookies (depending on size)
- Calories: Approximately 110-130 per cookie (estimated based on standard ingredients)
Perfect Pairings
- Hot Chocolate or Cocoa – Serve with rich hot chocolate garnished with whipped cream and crushed candy canes for the ultimate holiday beverage-cookie pairing.
- Peppermint Tea – Accompany with peppermint or herbal tea that echoes the cookies’ minty flavor while providing warm, soothing contrast.
- Vanilla Ice Cream – Crumble over vanilla ice cream for a festive sundae that combines creamy, crunchy, and minty elements.
- Coffee or Espresso – Pair with strong coffee or espresso whose slight bitterness balances the cookies’ sweetness while the caffeine provides energy during busy holiday preparations.
Ideal Occasions
- Cookie Exchange Parties – These visually distinctive cookies stand out on crowded tables and travel well, making them perfect for swapping with friends and neighbors.
- Holiday Gift Boxes – Package in clear cellophane bags or decorative tins as homemade gifts that showcase both baking skill and holiday spirit.
- Christmas Tree Decorations – Create mini versions to hang as edible ornaments on the Christmas tree, combining decoration with treat.
- School or Office Holiday Parties – Bring to celebrations where the festive appearance and crowd-pleasing flavor appeal to diverse age groups and preferences.
Storage & Serving Tips
- Room Temperature Storage – Store in an airtight container at room temperature for up to 1 week; layer cookies between parchment paper to prevent sticking and maintain shape.
- Freezer Storage – Freeze baked cookies in airtight containers for up to 3 months; thaw at room temperature for 30 minutes before serving—frozen cookies maintain excellent quality.
- Dough Freezing – Freeze shaped but unbaked cookies on baking sheets until solid, then transfer to freezer bags; bake directly from frozen, adding 1-2 minutes to baking time.
- Serving Presentation – Arrange on festive platters with other holiday cookies, or stand upright in clear glasses or mugs for vertical display that showcases their candy cane shape.
Creative Variations to Try
- Chocolate Candy Canes – Replace 1/4 cup flour with cocoa powder in half the dough for chocolate-red striped versions that appeal to chocolate lovers.
- Green and White – Use green food coloring instead of red for candy canes that coordinate with different holiday color schemes or represent alternative peppermint stick colors.
- Sparkle Enhancement – Roll cookies in colored sanding sugar or edible glitter before baking for extra festive sparkle that catches light beautifully.
- Almond Variation – Replace peppermint extract with almond extract for a different flavor profile that maintains the festive appearance without mint taste.
Troubleshooting Common Issues
- Dough Too Sticky – Warm butter or overmixing creates stickiness; refrigerate dough for 15-20 minutes until firm enough to handle, or knead in additional flour one tablespoon at a time.
- Ropes Breaking While Twisting – Dough that’s too cold or has developed gluten from overworking breaks easily; let chilled dough sit at room temperature briefly and handle gently.
- Colors Bleeding Together – Overworking the twist or too-thick application of food coloring causes muddy appearance; twist gently 2-3 times only and ensure even color distribution.
- Cookies Spreading Flat – Warm dough or insufficient flour causes excessive spreading; chill shaped cookies on the baking sheet for 10 minutes before baking to help them maintain shape.
Why This Recipe Works
Festive Candy Cane Cookies succeed through the thoughtful balance of tender sugar cookie dough and simple shaping technique that creates impressive visual results without requiring advanced skills. The high butter-to-flour ratio (1 cup butter to 2.5 cups flour) creates rich, tender texture characteristic of shortbread-style cookies that melt in the mouth rather than requiring excessive chewing. Powdered sugar rather than granulated contributes to fine, delicate crumb by dissolving more completely into the butter and creating minimal structure that results in tender rather than crispy cookies. The baking powder provides gentle lift that prevents cookies from becoming too dense while keeping spreading minimal—excessive leavening would distort the carefully shaped candy cane forms. The rope-twisting technique creates visual interest through contrast (red and white) without requiring piping, flooding, or other advanced decorating skills that intimidate novice bakers. Rolling individual ropes allows precise control over size and ensures even baking, while the twisting creates natural adherence between colors without requiring adhesive or additional dough manipulation. The brief baking time (8-10 minutes) at moderate temperature (350°F) ensures cookies set without excessive browning that would muddy the pristine white portions or create hard texture. The optional peppermint extract provides authentic candy cane flavor for traditionalists while its optional nature accommodates those preferring vanilla or serving mint-averse guests. At approximately 110-130 calories per cookie, these represent moderate indulgence where calories derive primarily from butter and sugar—designed as holiday treats meant for occasional enjoyment within the context of seasonal celebration rather than everyday consumption.
Final Thoughts
Festive Candy Cane Cookies represent the perfect intersection of impressive appearance and accessible technique, proving that beautiful holiday baking doesn’t require professional skills or complicated procedures. This recipe appeals particularly to families seeking engaging holiday activities that produce tangible, delicious results, novice bakers wanting cookies that look professional without advanced decorating, or anyone seeking distinctive additions to holiday cookie collections that stand out through shape and color. The hands-on shaping process creates natural opportunities for family bonding and tradition-building, allowing multiple generations to work together creating cookies that become part of annual celebrations and cherished memories. The visual appeal—instantly recognizable candy cane stripes—creates cookies that function as both treats and decorations, serving dual purposes that maximize their value during busy holiday seasons. The tender, buttery texture distinguishes these from harder candy cane cookies found commercially, while the homemade nature signals care and effort that store-bought alternatives cannot replicate. While the 110-130 calorie estimate per cookie represents sweet indulgence, the holiday context and special-occasion nature appropriately frame these as celebration food meant for creating joy, sharing with loved ones, and marking significant moments throughout the festive season. For those seeking modifications, the peppermint extract is genuinely optional without compromising the recipe’s success, while other alterations risk affecting the delicate texture balance that makes these cookies special. Ultimately, this recipe deserves permanent status in holiday baking rotations as proof that the most beloved traditions often come from simple ideas executed well—sometimes the best cookies aren’t the most complicated or elaborate, but rather those that combine visual charm, accessible technique, nostalgic flavor, and the understanding that food made with care and shared with love creates memories that last far longer than any single cookie ever could.


