
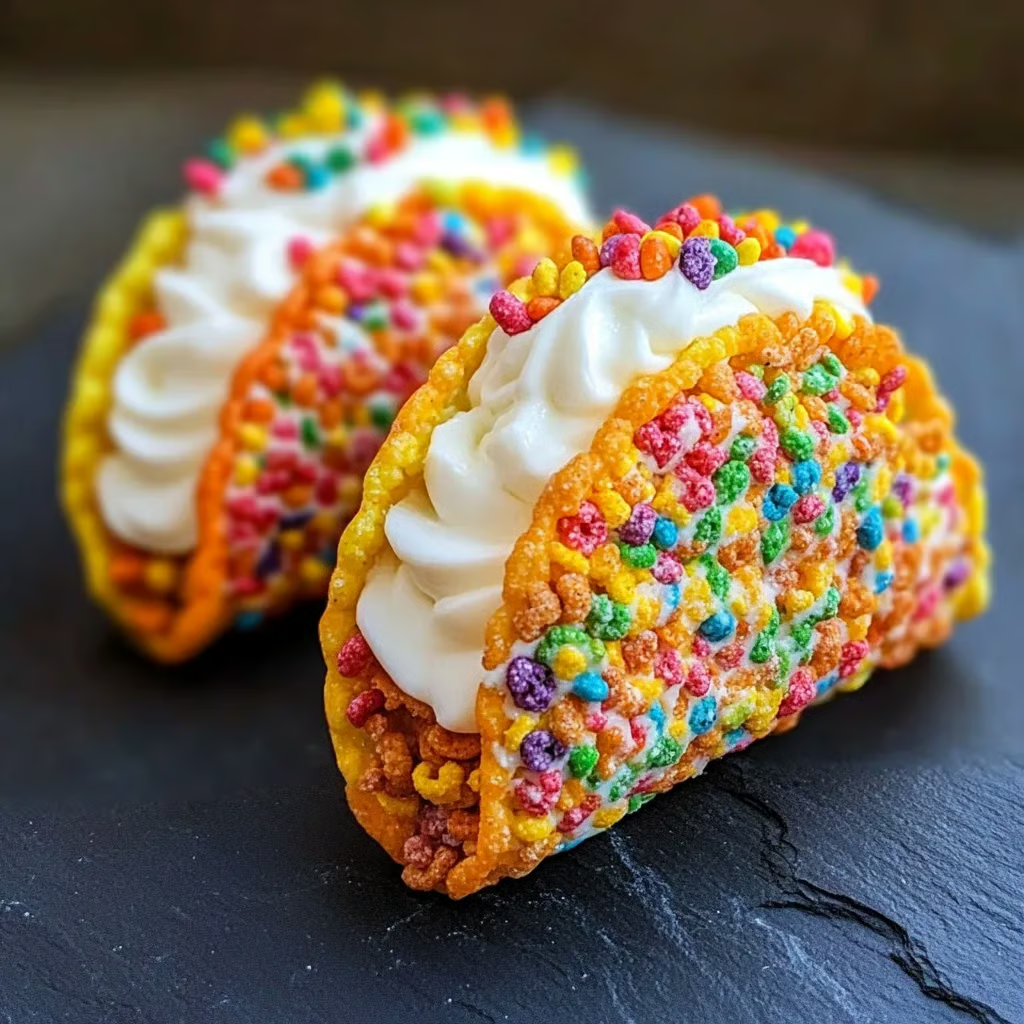
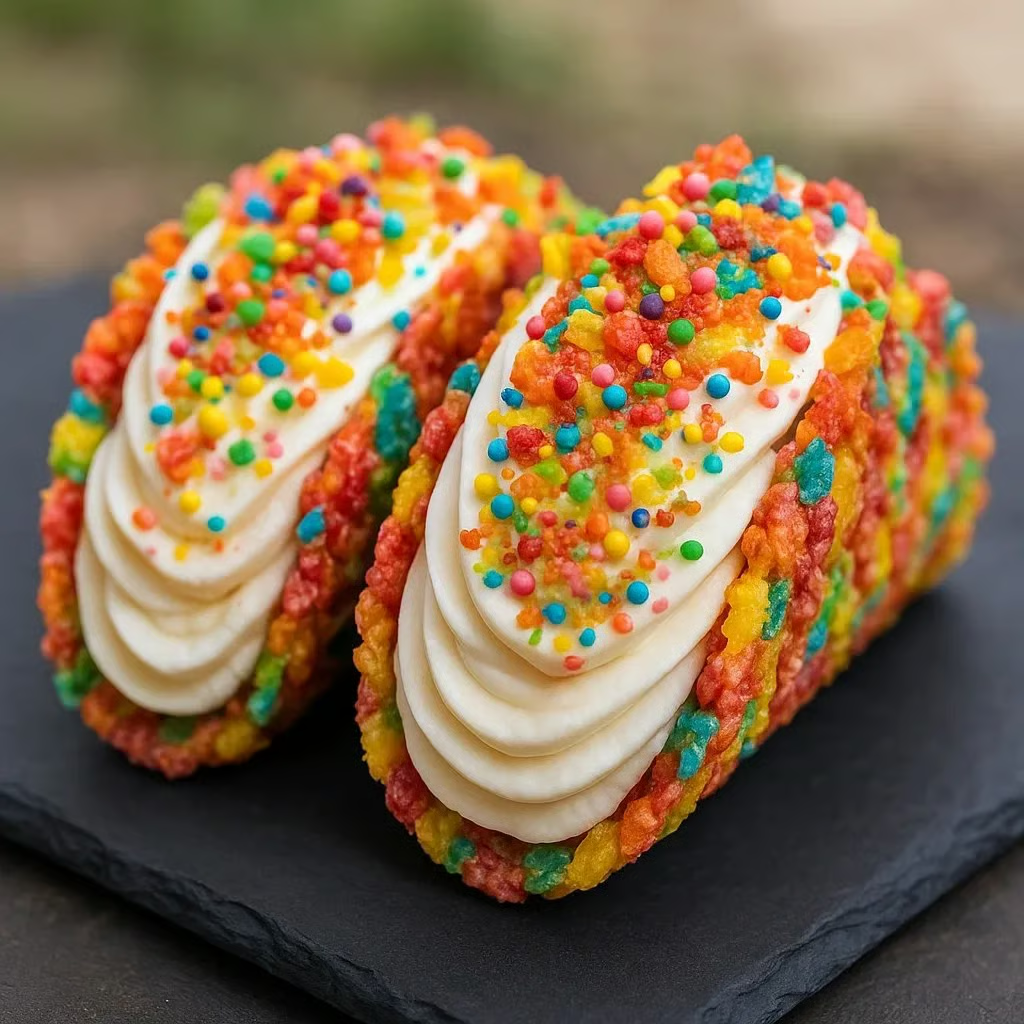
This playful, no-bake dessert combines the nostalgia of Saturday morning cartoons with the indulgence of a creamy cheesecake. By transforming colorful fruity cereal and melted butter into a crunchy “taco shell,” and filling it with a velvety, vanilla-infused cream cheese mousse, you create a treat that is as fun to look at as it is to eat. It is a whimsical, handheld dessert that delivers a satisfying crunch followed by a cloud of sweet, tangy filling.
Why You’ll Love This Recipe
- No Oven Required – Keeps the kitchen cool and safe for little helpers; the refrigerator does all the work to set the shells.
- Texture Explosion – The contrast between the shattered crunch of the buttery cereal shell and the smooth, airy cheesecake filling is incredibly satisfying.
- Visual Showstopper – The vibrant rainbow colors make these an instant centerpiece for birthday parties or festive gatherings.
- Kid-Friendly Activity – Children can easily help mix the cereal, press the shells, and sprinkle the toppings, making it a great family activity.
- Highly Customizable – The concept works with almost any sugary cereal, allowing you to tweak the flavor profile to your preference.
- Perfect Portion Control – Each “taco” is a pre-sized individual serving, making them easy to distribute at parties without slicing or plating.
Ingredients You’ll Need
The Cereal Shells
- Fruity Cereal (3 cups) – Such as Fruity Pebbles; provides the vibrant color, fruity flavor, and essential crunch structure.
- Unsalted Butter (½ cup, melted) – Acts as the binding agent; when chilled, the butter solidifies to hold the cereal together in the taco shape.
The Cheesecake Filling
- Cream Cheese (8 oz) – Softened to room temperature; the tangy, sturdy base that gives the filling its cheesecake identity.
- Powdered Sugar (½ cup) – Sweetens the filling without adding grit; the cornstarch in powdered sugar also helps stabilize the mixture.
- Vanilla Extract (1 tsp) – Enhances the sweet, creamy flavor profile.
- Whipped Cream (1 cup) – Heavy cream whipped to stiff peaks (or whipped topping); folded in to aerate the mixture, making it mousse-like rather than dense.
The Garnish
- Extra Cereal – For sprinkling on top to add a finished look and extra crunch.
Step-by-Step Instructions
- Coat the Cereal In a large mixing bowl, combine the 3 cups of fruity cereal with the ½ cup of melted butter. Stir gently but thoroughly until every single flake is glossy and coated. Note: Ensure the butter is warm, not piping hot, to prevent the cereal colors from bleeding excessively.
- Shape and Chill Spoon the cereal mixture into taco molds. If you do not have molds, turn a muffin tin upside down and press the mixture into the curved spaces between the cups to create a taco shape. Press firmly—this compression is key to the shell holding together. Refrigerate for at least 30 minutes until rock hard.
- Whip the Base In a medium bowl using an electric mixer, beat the softened cream cheese for 2 minutes until completely smooth and fluffy. Gradually beat in the powdered sugar (sifted, to avoid lumps) and vanilla extract. Scrape the sides of the bowl to ensure a uniform consistency.
- Fold for Lightness Switch to a rubber spatula. Gently fold the whipped cream into the cream cheese mixture. Use a “cut and fold” motion—cutting down the middle and turning the mixture over—to preserve the air bubbles. Stop mixing as soon as no white streaks remain.
- Fill the Tacos Remove the firm cereal shells from the refrigerator. Transfer the cheesecake mixture to a piping bag (or a ziplock bag with the corner snipped) for neatness. Pipe a generous amount of filling into the center of each shell, filling them to slightly overflowing.
- Garnish and Serve Sprinkle the tops immediately with extra cereal pieces, pressing them lightly so they adhere to the cream. Serve immediately for the best texture.
Recipe Notes & Tips
- The “Glue” Factor – If your shells are falling apart, you likely didn’t press the cereal firmly enough into the mold. You need to compact the cereal and butter so they fuse when chilled.
- Room Temp Cream Cheese – This is non-negotiable. If the cream cheese is cold, it will create lumps that will clog your piping bag and ruin the texture.
- Muffin Tin Hack – If using the upside-down muffin tin method, lightly grease the metal or use small squares of parchment paper to ensure the hardened shells pop off easily.
- Piping vs. Spoons – While you can spoon the filling in, a piping bag makes the dessert look professional and prevents you from accidentally breaking the fragile shells while filling.
- Serving Window – These are best eaten within an hour of filling. The moisture from the cheesecake will eventually soften the cereal shell.
Nutritional Information
- Prep Time: 45 minutes
- Chilling Time: 30 minutes (included in prep)
- Total Time: 45 minutes
- Servings: 12 taco treats
- Calories: Approximately 220–250 kcal per taco
Perfect Pairings
- Cold Milk – A classic glass of milk echoes the “cereal bowl” experience.
- Fresh Strawberries – Sliced berries add freshness and acidity to cut through the sweetness.
- Hot Coffee – The bitterness of coffee balances the high sugar content of the cereal.
- Birthday Cake – Serve these alongside a cake as a fun, handheld alternative option.
Ideal Occasions
- Children’s Birthday Parties – The rainbow colors fit any festive theme.
- Cinco de Mayo – A fun, sweet, “Americanized” twist on the taco theme for dessert.
- Sleepovers – A great late-night treat that kids can help assemble.
- Baby Showers – The pastel colors of the cereal make for beautiful table decor.
Storage & Serving Tips
- Refrigeration – You can store filled tacos in the fridge for up to 2 hours, but the shells will lose crispness.
- Shell Storage – Unfilled shells can be made a day in advance and stored in the fridge in an airtight container. Fill just before serving.
- Freezing – You can freeze these! The texture changes to an ice-cream taco style treat. Freeze on a baking sheet, then transfer to a bag. Eat frozen.
- Transport – If bringing to a party, transport the shells and filling separately and assemble on-site to maintain the crunch.
Creative Variations to Try
- Choco-Tacos – Use Cocoa Pebbles for the shell and mix a tablespoon of cocoa powder into the filling for a chocolate version.
- Cinnamon Churro – Use Cinnamon Toast Crunch for the shell and dust the finished taco with cinnamon sugar.
- Yogurt Twist – Substitute half of the whipped cream with thick Greek yogurt for a slightly tangy, frozen-yogurt style filling.
- Ice Cream Filling – Skip the cheesecake mixture and scoop slightly softened vanilla ice cream into the shells, then refreeze.
Troubleshooting Common Issues
- Shells Crumble – Solution: The butter wasn’t distributed evenly, or the mixture wasn’t pressed tight enough. If the kitchen is very hot, the butter might not be setting; put them in the freezer for 10 minutes.
- Filling is Runny – Solution: You may have overmixed the whipped cream, breaking the emulsion. Or, the cream cheese was melted rather than softened. Refrigerate the filling for 20 minutes to firm up.
- Stale Cereal – Solution: Ensure you are using a fresh box. Stale cereal will result in a chewy, tough shell rather than a crisp one.
- Butter Pooling – Solution: If there is a pool of butter at the bottom of your mold, you used slightly too much. Blot with a paper towel before chilling.
Why This Recipe Works
This recipe relies on the physical properties of saturated fat (butter). When melted, the butter flows into the microscopic crevices of the toasted rice cereal. As it chills, the butter returns to a solid state, acting as a delicious “cement” that bonds the cereal into a rigid structure. The filling works on the principle of aeration; by folding whipped cream (air bubbles trapped in fat) into cream cheese, you increase the volume and lighten the density, creating a mousse that is stable enough to hold its shape but soft enough to not break the delicate shell when bitten.
Final Thoughts
Fruity Pebbles Cheesecake Tacos are pure edible joy. They don’t take themselves too seriously, yet they deliver a surprisingly sophisticated balance of textures. While they are certainly a high-sugar indulgence, the smile they bring to people’s faces—both young and old—is well worth it. They are the perfect low-stress dessert for when you want to bring something unique to the party without turning on the oven.


