
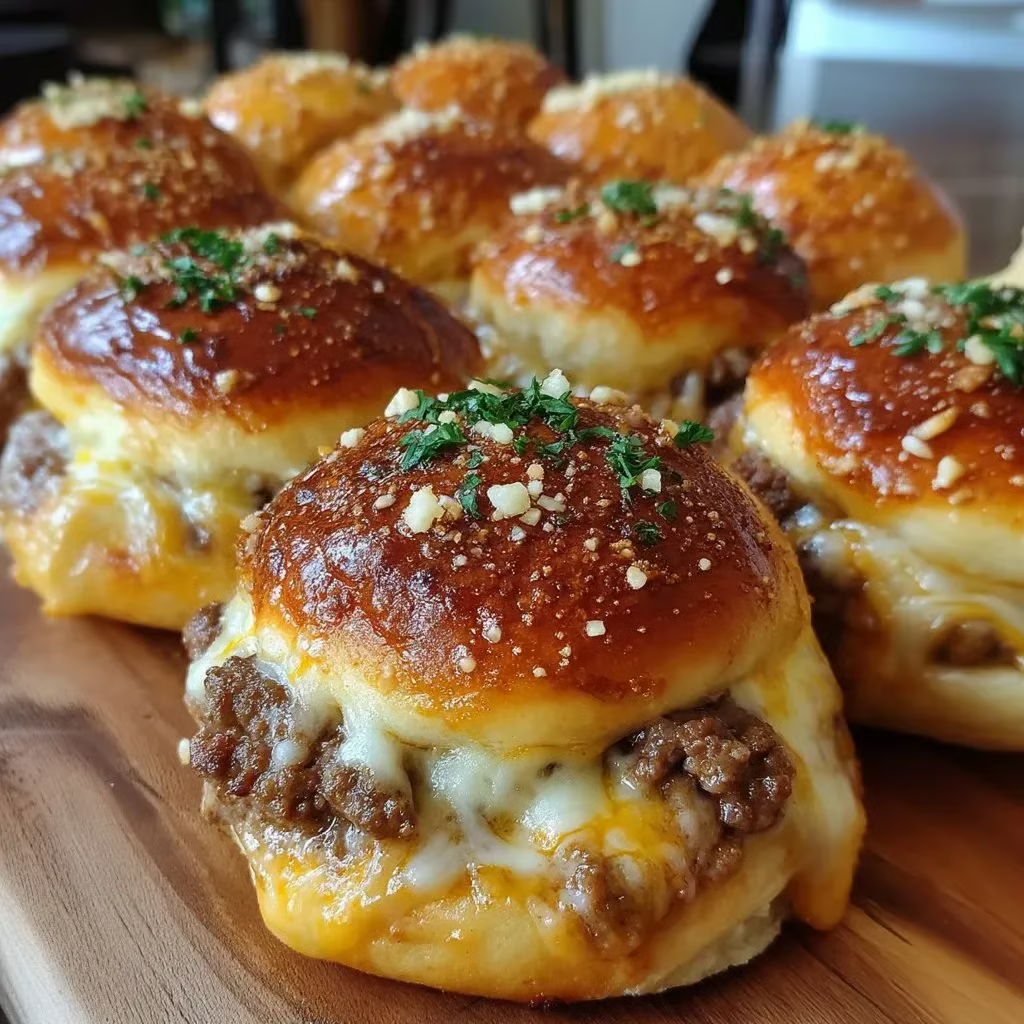
These savory bites pack all the juicy satisfaction of a classic cheeseburger into a portable, golden-brown pastry package. Seasoned ground beef and melted cheese are encased in flaky dough, then generously brushed with garlic butter and savory Parmesan for an explosion of flavor in every bite. They are the ultimate handheld comfort food, offering a mess-free way to enjoy rich, meaty flavors at parties or quick family dinners.
Why You’ll Love This Recipe
- Crowd-Pleasing Finger Food – They eliminate the need for plates and cutlery, making them perfectly suited for mingling guests or active kids.
- Shortcut Dough Convenience – By using refrigerated biscuit or pizza dough, you skip the hassle of making pastry from scratch without sacrificing texture.
- Make-Ahead Magic – You can assemble the unbaked bombs and refrigerate them before the party starts, allowing for stress-free hosting.
- Freezer Friendly – These reheat exceptionally well, meaning you can make a double batch and stash half for future emergency snacks.
- Endlessly Customizable – The filling is versatile enough to accommodate various cheeses, spices, or mix-ins like bacon and pickles.
- Balanced Texture – The contrast between the crisp, buttery exterior and the soft, cheesy meat filling creates a deeply satisfying mouthfeel.
Ingredients You’ll Need
The Burger Filling
- Ground Beef (1 lb) – The savory foundation of the dish; lean ground beef works best to minimize excess grease.
- Worcestershire Sauce (1 tbsp) – Adds a deep umami punch that mimics the savory depth of a grilled burger.
- Dried Seasonings (Salt, Pepper, Garlic & Onion Powder) – To taste; these pantry staples season the meat from the inside out.
- Shredded Cheese (1 cup) – Cheddar or mozzarella work best; acts as both a flavor enhancer and a binder to hold the meat crumble together.
- Optional Mix-ins – Crispy bacon bits, diced pickles, or caramelized onions can be added for extra texture and tang.
The Wrapping
- Refrigerated Dough (1 tube) – Biscuit dough or pizza dough; provides the structural casing that puffs up golden and flaky in the oven.
The Garlic Parmesan Topping
- Butter (2 tbsp, melted) – Acts as the adhesive for the toppings and adds a rich, golden sheen to the crust.
- Minced Garlic (1 tsp) – Or garlic powder; infuses the exterior with an aromatic pungency that hits the palate first.
- Parmesan Cheese (2 tbsp) – Freshly grated; provides a salty, nutty crust that crisps up during baking.
- Fresh Parsley (Chopped) – Optional; adds a pop of fresh green color and a slight herbal note to cut the richness.
Step-by-Step Instructions
- Brown the BeefIn a large skillet over medium heat, cook the ground beef until it is thoroughly browned and no longer pink. Break the meat up into fine crumbles as it cooks to ensure it fits easily inside the dough later.
- Season and CoolDrain any excess fat from the skillet to prevent a soggy crust. Season the meat with salt, pepper, garlic powder, onion powder, and Worcestershire sauce. Remove from heat and let the mixture cool completely. This is crucial to prevent the dough from melting during assembly.
- Incorporate the CheeseOnce the beef is cool to the touch, stir in the shredded cheese until it is evenly distributed. (Adding cheese to hot meat will cause it to melt prematurely and make filling difficult).
- Prepare the DoughSeparate your biscuit dough or cut your pizza dough into 8–12 equal pieces. Flatten each piece into a circle approximately 4 inches in diameter.
- Fill and SealPlace 1–2 tablespoons of the beef mixture into the center of each dough circle. Pull the edges of the dough up and over the filling, pinching them tightly together to seal. Gently roll the bomb between your palms to smooth out the shape.
- Apply Topping and BakePlace the bombs seam-side down on a baking sheet lined with parchment paper. Mix the melted butter with the minced garlic and brush generously over each bomb. Sprinkle with grated Parmesan. Bake at 375°F (190°C) for 15–18 minutes, or until golden brown.
Recipe Notes & Tips
- Cooling is Critical – If you put hot beef onto raw biscuit dough, the butter in the dough will melt instantly, making it sticky, unmanageable, and likely to tear.
- Sealing Technique – Pinch the seams very tightly. If there is even a small gap, the melting cheese will bubble out during baking and leave you with an empty shell.
- Don’t Overfill – It is tempting to stuff them, but overfilling stretches the dough too thin, causing it to burst in the oven. 1–2 tablespoons is the sweet spot.
- Parchment Paper – Always use parchment paper for easy cleanup and to prevent the bottoms from sticking or burning before the tops are golden.
- Serving Temperature – Let them rest for 5 minutes after baking. The filling inside will be extremely hot (hotter than the crust), so caution is advised.
Nutritional Information
- Prep Time: 20 minutes
- Cooking Time: 18 minutes
- Total Time: 38 minutes
- Servings: 6 servings (approx. 2 bombs per serving)
- Calories: Approximately 380 kcal per serving (estimated based on standard biscuit dough and beef)
Perfect Pairings
- Dipping Sauces – Offer a trio of dips: classic ketchup, spicy mayo, and garlic aioli or ranch dressing.
- Pickle Spears – The acidity of a cold dill pickle cuts through the hot, cheesy richness of the bomb.
- Sweet Potato Fries – A side of fries turns this appetizer into a full meal.
- Coleslaw – A crisp, vinegar-based slaw adds a refreshing crunch that contrasts with the soft dough.
Ideal Occasions
- Super Bowl / Game Day – Easy to eat with one hand while cheering for your team.
- Kids’ Birthday Parties – A fun, recognizable flavor profile that is manageable for small hands.
- Movie Nights – A substantial snack that feels like a treat but is easy to serve on the couch.
- Potluck Appetizers – They transport well and taste good even when warm rather than piping hot.
Storage & Serving Tips
- Refrigeration – Store leftovers in an airtight container in the fridge for up to 3–4 days.
- Reheating – Avoid the microwave if possible, as it makes the dough chewy. Reheat in an air fryer or oven at 350°F for 5–8 minutes to restore the crispy exterior.
- Freezing – Freeze baked bombs in a single layer, then transfer to a freezer bag. They can be reheated directly from frozen (add a few extra minutes to the baking time).
- Batch Cooking – You can assemble the bombs and freeze them unbaked. When ready to eat, bake from frozen, adding 5–10 minutes to the original cook time.
Creative Variations to Try
- Breakfast Bombs – Swap the ground beef for scrambled eggs and crumbled breakfast sausage; use cheddar cheese.
- Spicy Kick – Add diced jalapeños to the beef mixture and use Pepper Jack cheese instead of cheddar.
- Pizza Style – Use Italian sausage instead of beef, stir in a spoonful of marinara sauce, and use mozzarella cheese.
- Bacon Blue – Add crumbled blue cheese and bacon bits to the beef mixture for a gourmet “black and blue” burger flavor.
Troubleshooting Common Issues
- Soggy Bottoms – Solution: The beef wasn’t drained well enough. Ensure the filling is relatively “dry” before wrapping.
- Dough Pops Open – Solution: The seam wasn’t pinched tight enough or the dough was cold. Let the dough sit on the counter for 5 minutes before stretching to make it more pliable.
- Burnt Garlic – Solution: Minced garlic can burn at 375°F. If this happens, use garlic powder in the butter, or brush the garlic butter on during the last 2 minutes of baking.
- Dough Raw Inside – Solution: The oven temperature might be too high. Lower heat to 350°F and bake a bit longer, covering with foil if the top gets too dark.
Why This Recipe Works
This recipe succeeds by creating a contained environment for the filling. The biscuit dough acts as an insulator, trapping the steam released by the melting cheese and beef. This steam helps cook the inner layers of the dough while keeping the meat moist. The “double-seasoning” approach—seasoning the meat inside and the crust outside with garlic butter—ensures that the flavor profile is consistent throughout the bite. By cooling the filling first, you prevent the fat in the biscuit dough from separating before it hits the oven, ensuring the pastry layers rise and flake properly rather than becoming dense and greasy.
Final Thoughts
Garlic Parmesan Cheeseburger Bombs are the perfect example of high-impact, low-effort cooking. They take the beloved elements of a burger and wrap them in a package that is fun to eat and easy to share. While they are an indulgence at approximately 380 calories per serving, the satisfaction they provide makes them worth it. They bridge the gap between appetizer and main course, offering flexibility for whatever your hosting needs may be.


