

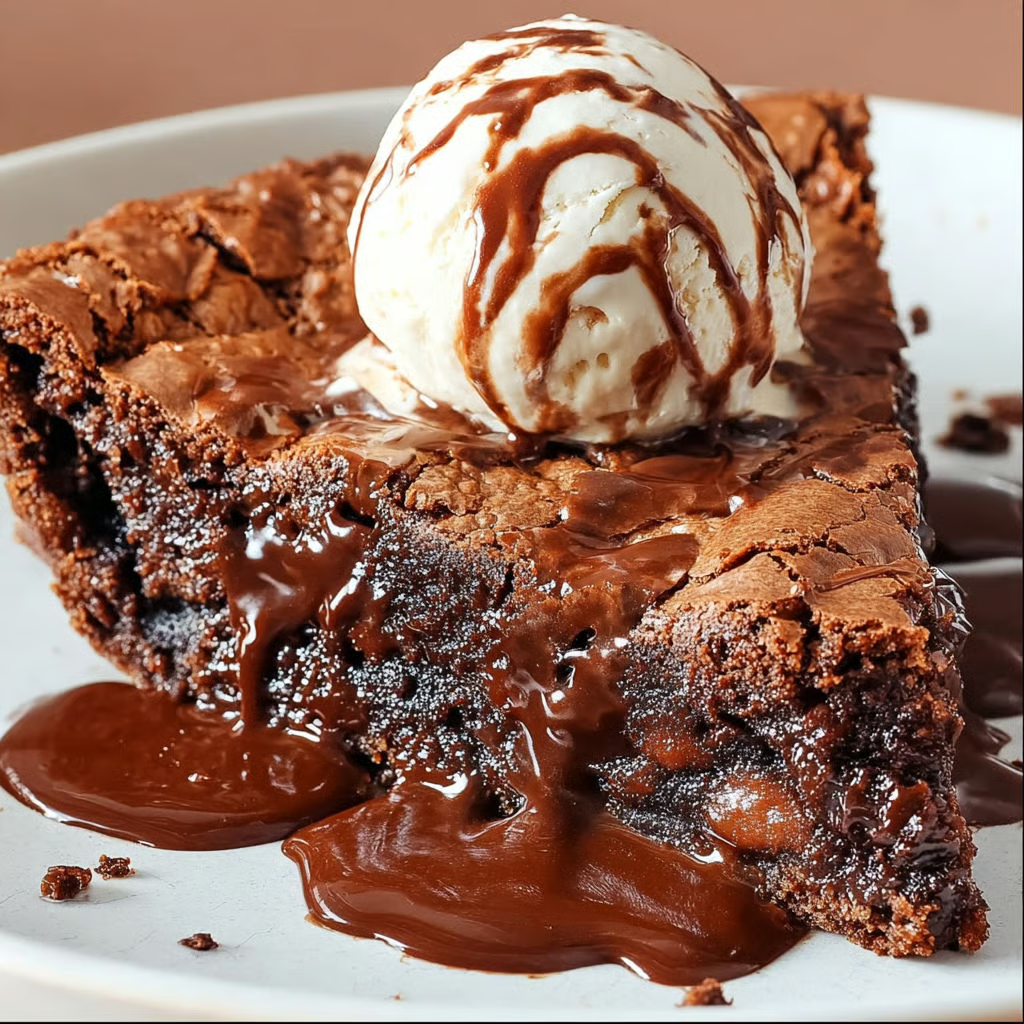
This gooey brownie chocolate pie delivers the ultimate chocolate lover’s experience by baking a ultra-rich brownie batter in pie form, creating crisp, crackly edges that give way to a molten, fudgy center that remains gloriously gooey even when cooled. The technique involves melting chocolate and butter together before incorporating beaten eggs that have been whipped to pale fluffiness, which creates a delicate structure that sets around the edges while keeping the interior luxuriously soft and almost pudding-like. With generous amounts of chocolate chips both melted into the batter and folded in whole for bursts of melty chocolate throughout, this dessert occupies the perfect middle ground between brownie and flourless chocolate cake, delivering pure chocolate decadence that needs nothing more than a scoop of vanilla ice cream to become the perfect celebration finale.
Why You’ll Love This Recipe
Pure Chocolate Indulgence – With three full cups of chocolate chips plus cocoa-rich batter, this pie delivers intense chocolate flavor that satisfies even the most serious chocolate cravings without apology.
Textural Perfection – The contrast between crispy, crackly edges and the molten, gooey center creates the kind of textural variety that makes each bite interesting and keeps you coming back for more.
Impressive Simplicity – Despite looking and tasting like a sophisticated dessert requiring advanced skills, this pie comes together with basic mixing and melting techniques anyone can master.
Versatile Serving Options – Delicious warm with melting ice cream, at room temperature for fudgy intensity, or even chilled for a firmer, truffle-like texture depending on your preference.
Reliable Show-Stopper – This dessert always impresses guests with its dramatic appearance and rich flavor, making it perfect for dinner parties, potlucks, or special occasions when you need guaranteed success.
Minimal Ingredient List – The straightforward roster of butter, chocolate, eggs, sugar, and just a bit of flour means you can often make this with ingredients already in your pantry.
Ingredients You’ll Need
Wet Ingredients
6 tablespoons unsalted butter – Provides rich, dairy flavor and helps create the fudgy texture while contributing to the pie’s moisture and luxurious mouthfeel.
2 cups semi-sweet chocolate chips (for melting) – Forms the chocolate foundation of the batter and should be melted with the butter to create a smooth, glossy base that distributes chocolate flavor throughout.
3 large eggs – Binds the ingredients together and provides structure through their proteins while the whipping process incorporates air that creates the tender crumb.
1 cup granulated sugar – Sweetens the intense chocolate while also contributing to structure and creating that characteristic crackly top when baked.
1 teaspoon vanilla extract – Enhances the chocolate flavor and adds aromatic complexity that rounds out the overall taste profile without being distinctly identifiable.
Dry Ingredients
½ cup all-purpose flour – Provides just enough structure to hold the pie together while remaining minimal enough to keep the texture fudgy rather than cakey.
¼ teaspoon baking powder – Contributes a tiny amount of lift that prevents the pie from being overly dense while still maintaining that characteristic gooey interior.
¼ teaspoon salt – Balances the sweetness and enhances the chocolate flavor by providing contrast that makes the cocoa notes more pronounced and complex.
Mix-Ins and Garnish
1 cup semi-sweet chocolate chips (for folding in) – Adds pockets of melted chocolate throughout the pie that create bursts of intense chocolate flavor and appealing visual interest when sliced.
Hot fudge sauce (optional, for serving) – Provides an extra layer of chocolate decadence for those who want to push the indulgence even further when serving.
Step-by-Step Instructions
Preheat and Prepare the Pan Set your oven to 350°F and let it preheat for at least 15 minutes to ensure even temperature throughout. Generously grease a 9-inch pie plate or springform pan with butter or nonstick spray, making sure to coat the bottom and sides thoroughly since this pie can stick stubbornly without proper greasing.
Melt the Chocolate and Butter Combine the 6 tablespoons of unsalted butter and 2 cups of semi-sweet chocolate chips in a large microwave-safe bowl. Microwave in 30-second intervals, removing and stirring thoroughly after each interval, until the mixture is completely smooth and glossy with no remaining lumps. Set aside to cool slightly for about 5 minutes—the mixture should be warm but not hot to prevent scrambling the eggs when combined.
Whip the Egg Mixture In a separate large bowl using an electric mixer, beat together the 3 eggs, 1 cup of granulated sugar, and 1 teaspoon of vanilla extract on medium-high speed for approximately 3 minutes. The mixture should become noticeably paler in color, increase in volume, and develop a fluffy, slightly thick consistency that falls in ribbons when you lift the beaters.
Combine Chocolate and Eggs Reduce the mixer speed to low and gradually pour the slightly cooled melted chocolate mixture into the beaten eggs in a slow, steady stream while mixing continuously. This gradual addition and constant mixing prevents the hot chocolate from cooking the eggs and creating scrambled bits. Mix just until everything is uniformly combined and no streaks of egg remain visible.
Incorporate the Dry Ingredients Add the ½ cup of flour, ¼ teaspoon of baking powder, and ¼ teaspoon of salt to the chocolate-egg mixture. Using a rubber spatula or mixing on the lowest speed, fold or mix gently just until the flour disappears and the batter becomes uniform. Avoid overmixing at this stage, which would develop gluten and create a tougher texture rather than the desired fudgy consistency.
Fold in Chocolate Chips Gently fold the remaining 1 cup of chocolate chips into the batter using a spatula, distributing them as evenly as possible throughout the mixture. These chips will create pockets of melted chocolate throughout the baked pie and add textural interest with their slightly different consistency from the surrounding brownie.
Bake to Gooey Perfection Pour the batter into your prepared pie plate, using a spatula to spread it evenly to the edges. Bake for 35-40 minutes, checking at the 35-minute mark. The pie is done when the edges are set and pulling slightly away from the pan while the center still jiggles noticeably when you gently shake the pan—this jiggle ensures that gooey, molten center that defines this dessert.
Cool and Serve Remove the pie from the oven and let it cool completely in the pan on a wire rack, which takes about 1-2 hours. The pie will continue setting as it cools and will be easier to slice cleanly once fully cooled, though you can also serve it slightly warm for an even gooier experience. Slice into wedges and serve at room temperature, or warm briefly in the microwave for 10-15 seconds per slice. Drizzle with hot fudge sauce if desired and top with vanilla ice cream or whipped cream for the ultimate chocolate dessert experience.
Recipe Notes & Tips
Chocolate Quality Matters – Use good-quality chocolate chips rather than bargain brands, as the chocolate flavor is so prominent in this pie that inferior chocolate will be noticeably disappointing.
Don’t Overbake – The single most important factor in achieving that signature gooey center is removing the pie while it still jiggles; it will continue cooking slightly as it cools.
Cooling Time Benefits – While tempting to slice immediately, letting the pie cool completely allows it to set properly and makes slicing much cleaner and easier.
Temperature Check – If you’re unsure about doneness, insert a toothpick halfway between the center and edge; it should come out with moist crumbs but not raw batter.
Springform Advantage – Using a springform pan makes removing slices easier and creates more dramatic presentation when you release the sides.
Storage Improvement – This pie actually tastes even better the next day after the flavors have melded and the texture has settled into perfect fudginess.
Nutritional Information
Prep Time: 15 minutes
Cook Time: 40 minutes
Total Time: 55 minutes (plus cooling time)
Servings: 8 slices (1 slice per serving)
Calories: Approximately 438 calories per slice
Perfect Pairings
Vanilla Ice Cream – The classic pairing that provides cooling contrast and creamy richness that balances the intense chocolate while melting into the warm pie.
Whipped Cream – Light, airy whipped cream offers a less rich alternative to ice cream while still providing creamy contrast and visual appeal.
Fresh Raspberries – Tart, bright berries cut through the chocolate richness and add color while their acidity provides palate-cleansing refreshment between bites.
Coffee or Espresso – A strong cup of coffee complements the chocolate beautifully while its bitterness balances the sweetness and enhances the cocoa flavors.
Ideal Occasions
Birthday Celebrations – This impressive dessert makes a fantastic alternative to traditional cake for chocolate lovers who want something more decadent and unique.
Dinner Party Finales – The make-ahead friendly nature and guaranteed crowd-pleasing appeal make this perfect for entertaining when you need a reliable show-stopping dessert.
Valentine’s Day – Few desserts say “indulgence” and “romance” quite like rich chocolate, making this ideal for celebrating with a partner who appreciates serious sweets.
Holiday Gatherings – While not seasonal in flavor, the rich chocolate satisfies diverse palates at family gatherings where you need something universally appealing.
Storage & Serving Tips
Room Temperature Storage – Cover the cooled pie tightly with plastic wrap and store at room temperature for up to 2 days if your kitchen isn’t excessively warm.
Refrigerator Storage – For longer keeping, refrigerate the covered pie for up to 5 days; the texture becomes firmer and more truffle-like when chilled, which some prefer.
Warming Slices – Microwave individual slices for 10-15 seconds to restore that gooey, molten quality if the pie has been refrigerated or you prefer it warm.
Freezing Method – Wrap individual slices tightly in plastic wrap then aluminum foil and freeze for up to 2 months, thawing in the refrigerator before serving.
Creative Variations to Try
Peanut Butter Swirl – Dollop spoonfuls of peanut butter over the batter before baking and swirl gently with a knife for a chocolate-peanut butter combination.
Espresso Enhancement – Add 1 tablespoon of instant espresso powder to the melted chocolate mixture for deeper, more complex chocolate flavor with subtle coffee notes.
Mint Chocolate – Substitute ½ teaspoon of peppermint extract for the vanilla and use dark chocolate chips for a sophisticated mint chocolate variation.
Salted Caramel Drizzle – Top each slice with salted caramel sauce instead of hot fudge for sweet-salty contrast that complements the chocolate beautifully.
Troubleshooting Common Issues
Dry, Cakey Texture – This results from overbaking; watch carefully during the final minutes and remove while the center still jiggles noticeably to maintain gooeyness.
Sunken Center – While some settling is normal, excessive sinking indicates underbaking or overmixing; ensure you bake until edges are set even if the center is soft.
Grainy Texture – If the chocolate mixture is too hot when added to the eggs, it can partially cook them and create graininess; always let it cool slightly first.
Sticking to Pan – Insufficient greasing causes sticking; use plenty of butter or nonstick spray and consider lining the bottom with parchment paper for insurance.
Why This Recipe Works
The success of this gooey brownie chocolate pie lies in understanding how minimal flour, proper egg incorporation, and controlled baking create that perfect balance between set edges and molten center. Using only ½ cup of flour for an entire pie means there’s barely enough structure to hold everything together, which is exactly what creates that fudgy, almost flourless texture rather than cakey consistency. Whipping the eggs with sugar incorporates air that creates a tender crumb and slight lift without making the pie fluffy or light—just enough structure to slice while maintaining decadence. Melting chocolate and butter together creates a smooth, homogeneous base that distributes chocolate flavor throughout while the butter adds richness and moisture. The relatively low proportion of flour to chocolate means cocoa dominates the flavor profile, creating intense chocolate taste that appeals to serious chocolate lovers. Adding whole chocolate chips creates pockets of different texture and concentrated chocolate flavor that make each bite slightly different and interesting. Baking at moderate 350°F heat allows the edges to set and develop that characteristic crackly top while the center remains underbaked and gooey—higher heat would set the center before the edges developed proper texture. The minimal baking powder provides just enough lift to prevent dense, heavy texture without creating actual cake-like rise that would compromise the fudgy character. At approximately 438 calories per slice, this dessert is undeniably indulgent and should be considered a special treat rather than everyday fare, though the intense chocolate satisfaction means a single slice genuinely satisfies without needing seconds, and the richness prevents most people from overindulging even when tempted.
Final Thoughts
Gooey brownie chocolate pie represents the kind of unapologetically decadent dessert that every chocolate lover needs in their repertoire for those moments when only serious chocolate will do. This recipe proves that sometimes the best desserts are the simplest ones that focus on quality ingredients and proper technique rather than complicated procedures or exotic components. The reliable results and impressive presentation make this a confidence-building recipe for bakers at any level, while the intense chocolate flavor ensures it remains a favorite even among experienced cooks with extensive dessert repertoires. While this pie is unquestionably rich and high in calories, reserving it for special occasions and celebrations allows you to enjoy the indulgence fully without guilt, and the substantial chocolate satisfaction means reasonable portions genuinely suffice without leaving you wanting more immediately afterward.


