
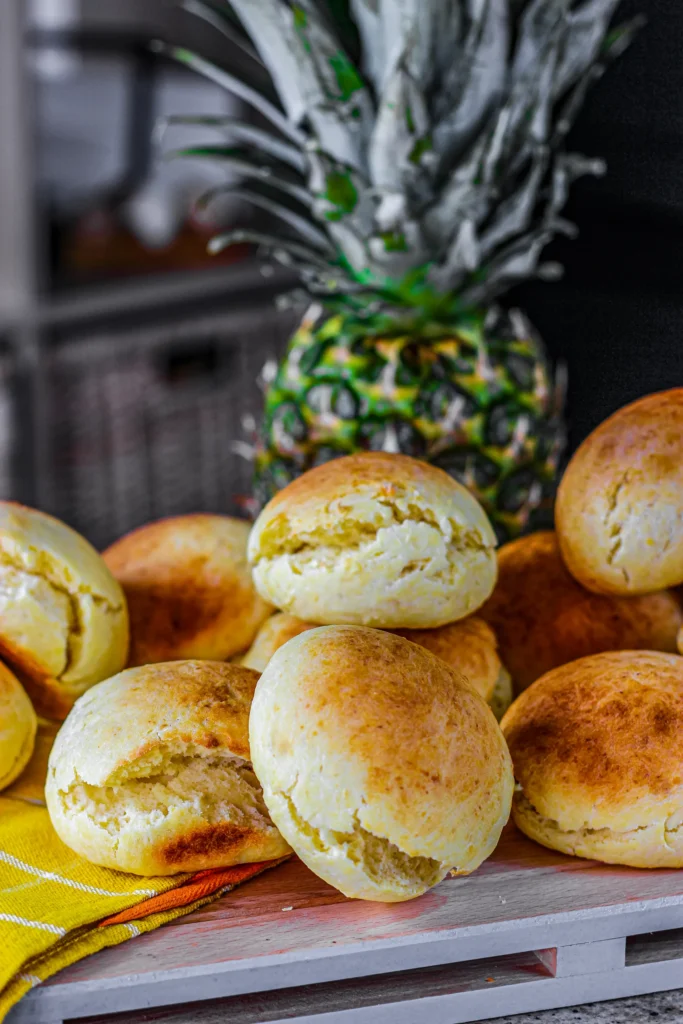
These Homemade King Hawaiian Rolls are soft, pillowy sweet rolls featuring a subtle tropical sweetness from pineapple juice, enriched with butter and eggs for tender texture, and baked until golden in a pull-apart format. By using instant yeast and allowing two rise times, this recipe creates the characteristic fluffy, squishy texture that makes Hawaiian rolls so beloved, while the pineapple juice contributes gentle sweetness without being detectably fruity. The result is a batch of 12 tender, slightly sweet dinner rolls perfect for sliders, sandwiches, or simply slathered with butter—capturing the essence of the famous King’s Hawaiian brand in homemade form.
Why You’ll Love This Recipe
- Copycat Classic – Recreates the beloved flavor and texture of King’s Hawaiian rolls at home for a fraction of the cost with fresher, preservative-free ingredients.
- Perfectly Balanced Sweetness – The pineapple juice adds subtle sweetness that complements both sweet and savory fillings without being overly sugary or detectably fruity.
- Irresistibly Soft Texture – The enriched dough creates pillowy, tender rolls with that characteristic squishy texture that makes these rolls so addictive.
- Versatile Usage – Works for sliders, sandwiches, burger buns, dinner rolls, or breakfast rolls, adapting to virtually any meal or occasion.
- Pull-Apart Format – Baking the rolls touching in a pan creates soft sides and easy pull-apart serving that’s perfect for sharing.
- Beginner-Friendly Yeast Bread – Uses instant yeast and straightforward technique without complicated steps, making this accessible even to novice bread bakers.
Ingredients You’ll Need
For the Sweet Roll Dough:
- 2 large eggs – Provides richness, structure, and helps create tender crumb
- 1 cup pineapple juice (canned or fresh) – Adds subtle tropical sweetness and acidity that tenderizes the dough
- ½ teaspoon vanilla extract – Enhances the overall flavor and adds aromatic depth
- ⅓ cup granulated sugar – Sweetens the rolls and feeds the yeast
- 4 tablespoons (½ stick) unsalted butter, melted – Adds richness, flavor, and helps create soft texture
- 3¼ cups all-purpose flour, divided (plus more for kneading) – Creates the structure; the division helps with mixing
- 1 packet (2¼ teaspoons) instant yeast – Provides leavening without requiring proofing in warm water
For Assembly:
- Nonstick cooking spray or butter for greasing the pan
- Optional: 2 tablespoons melted butter for brushing baked rolls
Step-by-Step Instructions
Prepare Wet Ingredients In a large mixing bowl, whisk together the eggs, pineapple juice, vanilla extract, sugar, and melted butter until well combined and the sugar begins to dissolve. The mixture should be smooth with no streaks of egg white visible.
Add Yeast and Flour Add the instant yeast and 3 cups of the flour (reserving ¼ cup for later) to the wet ingredients. Using a wooden spoon, sturdy spatula, or the paddle attachment of a stand mixer, mix on low speed until all the flour is incorporated and a shaggy dough forms. The dough will be quite sticky at this point—this is normal.
First Rise Cover the bowl with a clean kitchen towel or plastic wrap and place it in a warm, draft-free location (75-80°F is ideal—inside a turned-off oven with the light on works well). Let the dough rise for 1 hour, or until it has doubled in size and looks puffy.
Prepare the Pan While the dough rises, generously grease a 9×13-inch baking dish with nonstick cooking spray or butter, ensuring all corners and sides are coated to prevent sticking.
Knead the Dough After the first rise, sprinkle a clean work surface generously with flour from the reserved ¼ cup (plus extra as needed). Turn the risen dough out onto the floured surface. Knead the dough by pushing it away with the heels of your hands, folding it back over itself, turning it a quarter turn, and repeating for about 5 minutes. Add small amounts of additional flour as needed if the dough is too sticky to handle, but don’t add too much—the dough should remain soft and slightly tacky. After kneading, the dough should be smooth and elastic.
Divide and Shape Using a bench scraper or sharp knife, divide the dough into 12 equal pieces (weighing each piece ensures uniformity, but eyeballing works too). To shape each roll, take one piece of dough, tuck the edges underneath to create surface tension, and roll it against the work surface in a circular motion with your cupped hand until it forms a smooth ball.
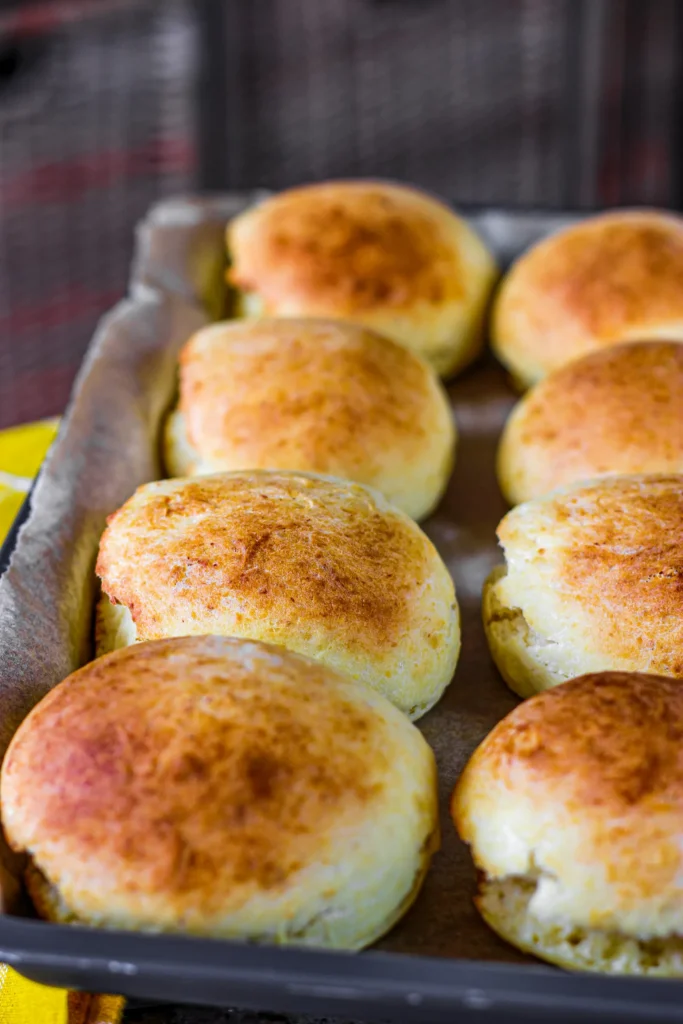
Arrange in Pan Place the shaped rolls in the prepared baking dish in a 3×4 arrangement (3 rows of 4 rolls), spacing them evenly. They should be close together but not quite touching—they’ll expand and connect during the second rise and baking.
Second Rise Cover the baking dish with a clean kitchen towel and return it to the warm location. Let the rolls rise for another 1 hour, or until they’ve doubled in size, look very puffy, and are touching each other in the pan.
Preheat the Oven About 15 minutes before the second rise is complete, preheat your oven to 350°F, positioning a rack in the center.
Bake the Rolls Once the rolls have completed their second rise, carefully transfer the baking dish to the preheated oven. Bake for 25-30 minutes, or until the tops are golden brown and the rolls sound hollow when tapped. An instant-read thermometer inserted into the center of a middle roll should register 190-200°F.
Optional Butter Brush If desired, immediately brush the hot rolls with 2 tablespoons melted butter for extra flavor and a glossy, soft top. This also helps keep the tops tender.
Cool and Serve Let the rolls cool in the pan for 5-10 minutes, then serve warm. They can be pulled apart easily or cut with a knife. Serve as dinner rolls, use for sliders or sandwiches, or enjoy simply buttered.
Recipe Notes & Tips
- Pineapple Juice Temperature – Use room temperature pineapple juice; cold juice can slow yeast activity and extend rise times.
- Warm Rise Location – Yeast dough rises best at 75-80°F; in cold kitchens, place the bowl in a turned-off oven with just the light on for warmth.
- Don’t Add Too Much Flour – The dough should be soft and slightly tacky; adding too much flour during kneading creates dense, dry rolls.
- First Rise Flexibility – If the dough hasn’t doubled after 1 hour, give it more time; yeast activity varies with temperature and humidity.
- Even Division – For uniform rolls, weigh the total dough and divide by 12 to get the weight per roll (typically about 2.5 ounces each).
- Underbaking Prevention – The rolls should be golden brown on top; if they’re browning too quickly, tent with foil for the last 10 minutes.
Nutritional Information
- Prep Time: 20 minutes (mixing dough, shaping rolls)
- First Rise: 1 hour
- Second Rise: 1 hour
- Bake Time: 30 minutes
- Total Time: Approximately 2 hours 50 minutes (mostly passive rising time)
- Yield: 12 rolls
- Calories: Approximately 200-220 per roll (varies based on exact measurements)
Perfect Pairings
- Use for sliders with pulled pork, ham and cheese, or turkey for sweet-savory sandwich combinations where the rolls complement rich fillings.
- Serve as dinner rolls alongside ham, turkey, fried chicken, or barbecue where their mild sweetness balances savory mains.
- Make breakfast sandwiches with eggs, bacon, and cheese for sweet-savory morning meals.
- Enjoy simply buttered and served warm as dinner rolls for any meal where soft, slightly sweet bread is welcome.
Ideal Occasions
- Perfect for holiday dinners like Thanksgiving, Christmas, or Easter when you want impressive homemade rolls without complicated technique.
- Excellent choice for potlucks, barbecues, or picnics where the pull-apart format makes serving easy and the rolls travel well.
- Ideal for slider parties, game day gatherings, or casual entertaining when you want to make multiple small sandwiches.
- Great option for meal prep when you want fresh rolls for the week; they freeze beautifully and reheat like new.
Storage & Serving Tips
- Store leftover rolls in an airtight container or sealed plastic bag at room temperature for up to 3 days; they stay remarkably soft due to the enriched dough.
- Freeze cooled rolls in freezer bags for up to 3 months; thaw at room temperature and warm in a 300°F oven for 5-10 minutes to refresh.
- Reheat rolls wrapped in foil in a 350°F oven for 10 minutes to restore warmth and softness without drying them out.
- For make-ahead convenience, shape the rolls and refrigerate overnight after the first rise; let them come to room temperature and complete the second rise before baking.
Creative Variations to Try
- Honey Butter Topping – Brush hot rolls with mixture of melted butter and honey for extra sweetness and glossy finish.
- Garlic Herb Rolls – Add 1 teaspoon garlic powder and 1 tablespoon dried herbs (parsley, oregano) to the dough for savory variation.
- Cinnamon Sugar Rolls – Brush with melted butter and sprinkle with cinnamon sugar immediately after baking for breakfast sweet rolls.
- Whole Wheat – Replace up to half the all-purpose flour with whole wheat flour for nuttier flavor and added fiber.
Troubleshooting Common Issues
- Dough didn’t rise – Yeast was dead (too old or killed by hot liquid), or environment too cold; ensure liquids are warm (not hot) and provide warm rise location.
- Rolls dense and heavy – Added too much flour during kneading or didn’t allow sufficient rise times; dough should be soft and puffy before baking.
- Too sweet – Pineapple juice and sugar can be reduced slightly if you prefer less sweet rolls; try ¼ cup sugar instead.
- Rolls stuck together – Normal for pull-apart rolls; if you want separated rolls, space them 2 inches apart during second rise.
Why This Recipe Works
These Hawaiian rolls succeed by combining enriched dough techniques with the distinctive ingredient of pineapple juice to create the characteristic flavor and texture. The pineapple juice serves multiple functions: it adds subtle tropical sweetness, provides acidity that tenderizes the gluten for softer texture, and contributes moisture that keeps the rolls soft for days. The sugar feeds the yeast while sweetening the dough, creating the gentle sweetness that defines Hawaiian rolls without being cake-like. Eggs add richness, structure, and help create the tender, fine crumb, while also contributing to the golden color. Butter adds flavor and creates soft texture—enriched doughs with fat produce more tender results than lean breads. Using instant yeast simplifies the process by eliminating the proofing step, making this more beginner-friendly. The two rise times are essential: the first rise develops flavor and gluten structure, while the second rise after shaping ensures light, airy texture in the finished rolls. Kneading for 5 minutes develops sufficient gluten to give the rolls structure without making them tough—enriched doughs need less kneading than lean doughs. Baking the rolls touching in a pan creates soft sides and the characteristic pull-apart format, while also helping them retain moisture from steaming against each other. The moderate oven temperature (350°F) allows the rolls to bake through and develop golden color without drying out. At approximately 200-220 calories per roll, these are moderate treats with calories from flour, sugar, butter, and eggs—they’re richer than plain dinner rolls but lighter than many sweet breads, making them appropriate for everyday use with various meals.
Final Thoughts
Homemade King Hawaiian Rolls prove that some commercial products inspire rather than intimidate home bakers—the beloved flavor and texture of the store-bought version can absolutely be recreated at home with better freshness and quality. These rolls have become an American classic precisely because they bridge the gap between dinner rolls and sweet breads, offering gentle sweetness that works with both sweet and savory applications. The pineapple juice is the secret ingredient that sets these apart from ordinary rolls, though its contribution is subtle enough that most people can’t identify it—they just know the rolls taste special. Making bread from scratch might seem daunting, but this recipe demonstrates that yeast baking doesn’t require professional skills or equipment, just patience during the rise times and willingness to follow straightforward steps. The hands-on work totals less than 30 minutes, with the rest being passive waiting that allows you to do other things. Whether you’re a King’s Hawaiian devotee wanting to recreate them at home, a bread baker looking for reliable dinner roll recipes, someone seeking versatile rolls for various uses, or simply curious about homemade versus store-bought, these rolls deliver authentic flavor and superior freshness that makes the minimal effort absolutely worthwhile—they’re soft, they’re slightly sweet, they’re incredibly versatile, and they prove that sometimes the best versions of beloved foods are the ones we make ourselves with real ingredients and genuine care.


