
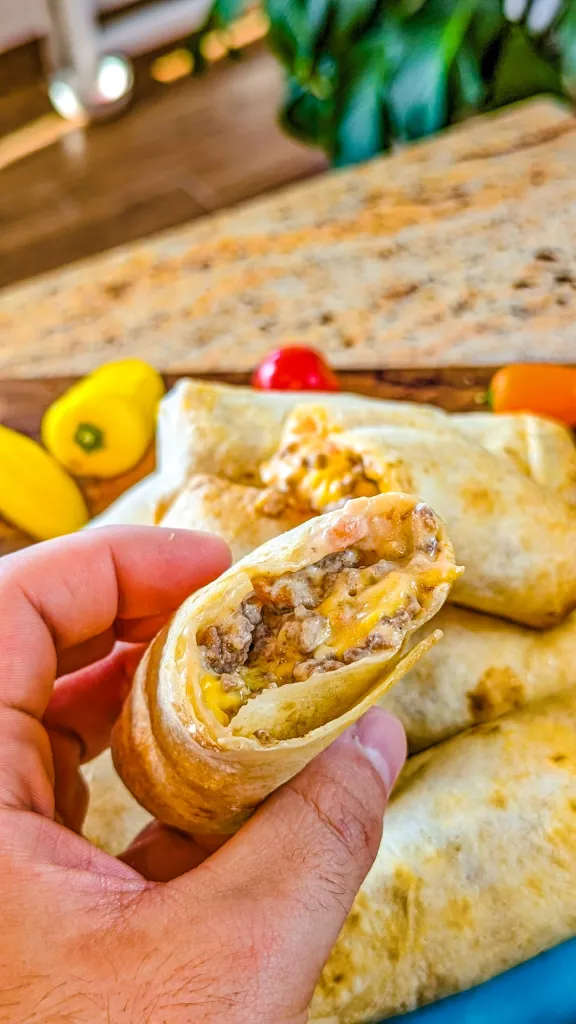
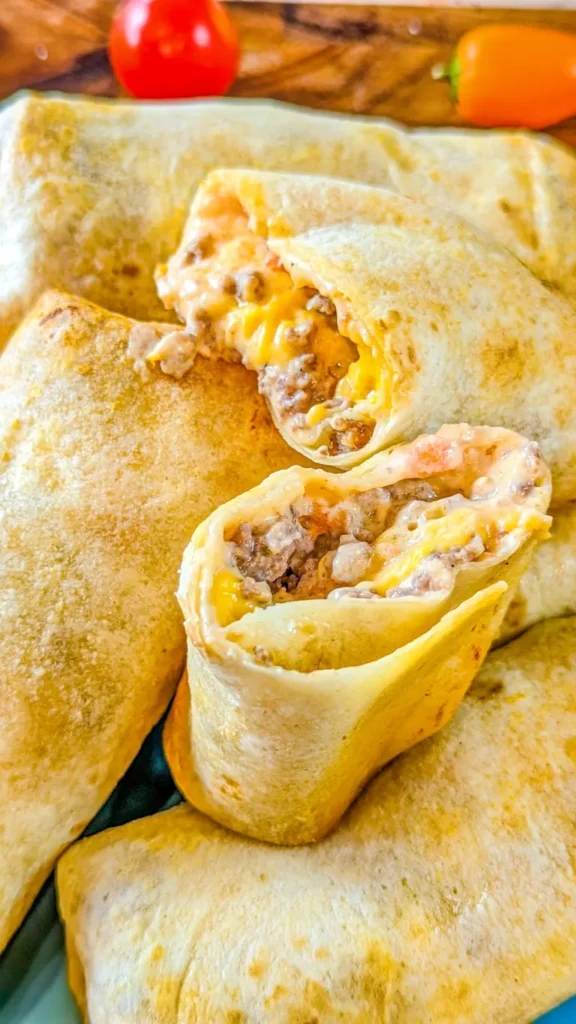
These loaded cheesy pocket tacos transform classic taco ingredients into convenient, handheld pockets that combine seasoned ground beef, creamy salsa-infused cheese filling, and melted cheddar inside folded tortillas. The tortillas are brushed with butter and baked until golden and crispy, creating a perfectly portable meal that’s ideal for feeding a crowd. With a simple assembly process and the ability to prepare components ahead of time, this recipe delivers maximum flavor with minimal kitchen time.
Why You’ll Love This Recipe
- Quick Assembly Time – With just 15 minutes of baking time and straightforward prep, you can have a complete meal ready in under an hour, making it perfect for busy weeknights or last-minute gatherings.
- Make-Ahead Friendly – The beef filling and cream cheese mixture can be prepared hours or even a day in advance, allowing you to simply assemble and bake when you’re ready to serve.
- Crowd-Pleasing Appeal – The combination of seasoned beef, creamy cheese, and crispy tortilla shells appeals to both adults and children, making it an ideal recipe for potlucks, parties, or family dinners.
- Customizable Toppings – From sour cream and guacamole to jalapeños and fresh cilantro, these pocket tacos serve as a blank canvas for your favorite Mexican-inspired toppings.
- Budget-Friendly Ingredients – Using simple, affordable pantry staples like ground beef, tortillas, and cream cheese, this recipe feeds 12 people without breaking the bank.
- Minimal Cleanup Required – With most of the cooking done in one pan and the baking on a single tray, you’ll spend less time washing dishes and more time enjoying your meal.
Ingredients You’ll Need
For the Filling
- 1 pound ground beef – Provides the hearty protein base; choose 80/20 ground beef for optimal flavor and moisture without excessive grease.
- 1 packet taco seasoning – Delivers the classic Mexican-inspired spice blend with cumin, chili powder, and garlic for authentic taco flavor.
- 8 ounces cream cheese, softened – Creates a smooth, creamy base that binds the filling and adds richness; must be at room temperature for easy mixing.
- ½ cup salsa – Adds moisture, tang, and a touch of heat to the cream cheese mixture; choose your preferred heat level.
- 1 cup cheddar cheese, shredded – Melts beautifully inside the pockets, adding sharp, savory notes and creating that irresistible cheese pull.
For Assembly and Baking
- 12 six-inch tortillas – Serve as the vessel for the filling; flour tortillas work best for their flexibility and ability to crisp up in the oven.
- 2 tablespoons melted butter – Brushed on top before baking to promote golden browning and add rich flavor to the exterior.
Optional Toppings
- Sour cream, additional salsa, green onions, cilantro, guacamole – Provide fresh, cooling, and bright contrasts to the rich, savory pockets.
Step-by-Step Instructions
Cook the Ground Beef
Brown the ground beef in a large skillet over medium-high heat, using a wooden spoon to break it into small crumbles as it cooks, which should take about 7-8 minutes. Once fully cooked with no pink remaining, drain the excess grease to prevent soggy pockets.
Season the Meat
Add the taco seasoning packet to the drained beef and stir thoroughly to coat every piece, adding 2-3 tablespoons of water if the seasoning packet instructions call for it. Cook for an additional 2-3 minutes to allow the spices to bloom and create a cohesive, flavorful filling.
Prepare the Cream Cheese Mixture
In a medium bowl, beat the softened cream cheese with a fork or electric mixer until completely smooth and free of lumps. Gradually mix in the salsa, stirring until the mixture is uniform and creamy, creating a spreadable consistency.
Assemble the First Layer
Lay one tortilla flat on a clean work surface and place approximately 2 tablespoons of the cream cheese mixture in the center, leaving about 1 inch of space around the edges for folding.
Add the Beef and Cheese
Spoon 2-3 tablespoons of the seasoned ground beef over the cream cheese layer, then sprinkle approximately 1 tablespoon of shredded cheddar cheese on top. Avoid overfilling, as this will make folding difficult and may cause the pockets to burst during baking.
Fold the Pockets
Fold the tortilla like a burrito by first folding the bottom edge up over the filling, then folding in both sides, and finally rolling it away from you to create a compact rectangular pocket. Place seam-side down on your work surface to help it hold its shape.
Prepare for Baking
Preheat your oven to 350°F and lightly grease a large baking tray with cooking spray or a thin layer of oil. Arrange the filled pockets seam-side down on the prepared tray, spacing them about 1 inch apart to allow for even heat circulation.
Brush with Butter
Using a pastry brush or the back of a spoon, generously coat the top of each pocket with melted butter, which will create a golden, crispy exterior during baking. Make sure to cover the entire surface for even browning.
Bake to Perfection
Place the tray in the preheated oven and bake for 15 minutes, or until the tortillas are golden brown and crispy with lightly toasted edges. The cheese inside should be fully melted and the pockets should feel firm to the touch.
Add Toppings and Serve
Remove from the oven and let cool for 2-3 minutes before transferring to a serving platter. Top with your choice of sour cream, fresh salsa, sliced green onions, cilantro, or guacamole, and serve immediately while hot.
Recipe Notes & Tips
- Tortilla Selection – Use fresh, pliable flour tortillas rather than corn tortillas, as they fold more easily without cracking and crisp up beautifully in the oven without becoming brittle.
- Prevent Soggy Bottoms – Ensure the ground beef is thoroughly drained and cooled slightly before assembling to prevent excess moisture from making the tortillas soggy during baking.
- Cream Cheese Consistency – Room temperature cream cheese is essential for smooth mixing; if you forget to soften it, microwave it in 10-second intervals until just soft but not melted.
- Even Filling Distribution – Use measuring spoons to portion the filling ingredients consistently across all 12 pockets, ensuring uniform cooking and preventing some from being overstuffed while others are underfilled.
- Seam-Side Down Placement – Always place the pockets seam-side down on the baking tray to prevent them from unfolding during baking and to create a crispy bottom surface.
- Oven Temperature Accuracy – If your oven runs hot, reduce the temperature to 325°F and bake for 17-18 minutes to prevent the tortillas from burning before the filling is heated through.
Nutritional Information
- Prep Time: 25 minutes
- Cooking Time: 15 minutes
- Total Time: 40 minutes
- Servings: 12 pocket tacos (serves 6 people with 2 pockets each)
- Calories: Approximately 320 calories per pocket (estimate based on standard ingredients)
Perfect Pairings
- Mexican Rice and Refried Beans – Serve alongside classic Mexican sides for a complete, restaurant-style meal that balances the richness of the pockets with wholesome carbohydrates.
- Fresh Garden Salad – A crisp salad with lime vinaigrette provides a refreshing, acidic contrast to the creamy, cheesy filling and adds nutritional balance to the plate.
- Tortilla Chips and Salsa – Offer as an appetizer or side, allowing guests to customize their meal with additional dipping options and satisfying that crunch craving.
- Mexican Street Corn (Elote) – The sweet, charred corn with cotija cheese and lime complements the savory pockets and adds an authentic touch to your Mexican-inspired spread.
Ideal Occasions
- Game Day Gatherings – The portable, handheld format makes these perfect for watching sports with friends, requiring no utensils and minimal mess while still delivering satisfying, hearty flavor.
- Weeknight Family Dinners – Quick enough for a Tuesday night but special enough that kids will get excited, these pockets transform ordinary ingredients into something fun and different.
- Potluck Contributions – Easy to transport, reheat well, and appeal to a wide range of palates, making them an ideal dish to bring to office parties, church gatherings, or neighborhood events.
- Meal Prep Sundays – Assemble multiple batches and freeze unbaked for quick future meals; simply brush with butter and bake from frozen, adding 5-7 extra minutes to the baking time.
Storage & Serving Tips
- Refrigerator Storage – Store baked pockets in an airtight container in the refrigerator for up to 3 days; reheat in a 350°F oven for 8-10 minutes to restore crispiness rather than using the microwave.
- Freezing Instructions – Freeze assembled but unbaked pockets on a baking sheet until solid, then transfer to freezer bags for up to 3 months; bake directly from frozen at 350°F for 20-22 minutes.
- Make-Ahead Strategy – Prepare the beef and cream cheese mixtures up to 2 days in advance and store separately in the refrigerator, then assemble and bake fresh when needed for optimal texture.
- Serving Temperature – These are best served hot from the oven when the cheese is melted and the tortilla is crispy; if making ahead for a party, keep warm in a 200°F oven for up to 30 minutes.
Creative Variations to Try
- Protein Alternatives – Substitute ground turkey, chicken, or even plant-based crumbles for the beef, adjusting seasoning as needed; deli ham or shredded rotisserie chicken also work beautifully for even faster prep.
- Spicy Kick Version – Mix diced jalapeños or green chiles into the cream cheese mixture, use pepper jack instead of cheddar, and add a dash of hot sauce to the beef for those who prefer more heat.
- Breakfast Pocket Tacos – Fill tortillas with scrambled eggs, breakfast sausage, cheddar cheese, and diced bell peppers for a morning twist that’s perfect for brunch gatherings or meal prep.
- Vegetarian Option – Replace the ground beef with black beans, sautéed bell peppers and onions, or seasoned sweet potato cubes, maintaining the same cream cheese and cheddar base for satisfying meatless pockets.
Troubleshooting Common Issues
- Pockets Opening During Baking – Ensure you’re not overfilling the tortillas and that you’re folding them tightly with the seam placed firmly against the baking sheet; a toothpick can secure stubborn pockets.
- Soggy or Soft Tortillas – Drain the beef completely and allow it to cool for 5 minutes before assembling, and make sure your oven is fully preheated to 350°F before baking for proper crisping.
- Uneven Browning – Rotate the baking sheet halfway through cooking if your oven has hot spots, and ensure pockets are spaced evenly on the tray without touching each other.
- Dry or Tough Texture – Don’t overbake beyond 15 minutes, and make sure to brush generously with melted butter before baking; using 80/20 ground beef instead of lean beef also adds moisture.
Why This Recipe Works
The genius of loaded cheesy pocket tacos lies in the layering technique that creates distinct flavor zones while the oven heat works its magic. The cream cheese and salsa mixture acts as both a flavor enhancer and a moisture barrier, preventing the tortilla from becoming soggy while adding tanginess that cuts through the richness of the beef and cheddar. Baking instead of frying allows the butter-brushed tortillas to develop a golden, crispy exterior with less fat than traditional fried tacos, while the enclosed pocket traps steam that melts the cheese and keeps the filling moist. The taco seasoning’s spice blend creates complexity without overpowering the other ingredients, while the optional toppings provide fresh, cooling elements that balance the warm, savory pockets. At approximately 320 calories per pocket, this recipe delivers satisfying portion sizes that work for both light lunches (one pocket) and hearty dinners (two pockets), with the option to reduce calories further by using 93% lean ground beef and reducing the butter to a light spray.
Final Thoughts
Loaded cheesy pocket tacos prove that crowd-pleasing meals don’t require complicated techniques or expensive ingredients—just smart assembly and quality components working together. The make-ahead capability transforms these from a simple weeknight dinner into a strategic entertaining solution, while the customizable nature means they’ll become a regular rotation recipe that never gets boring. Whether you’re feeding picky kids, hosting a casual gathering, or simply craving comfort food with a Mexican flair, these golden, crispy pockets deliver every time. For a lighter version, consider using low-fat cream cheese, reduced-fat cheddar, and lean ground turkey, which can reduce the calorie count to approximately 250 per pocket while maintaining the essential flavors and satisfying texture that make this recipe a winner.


