
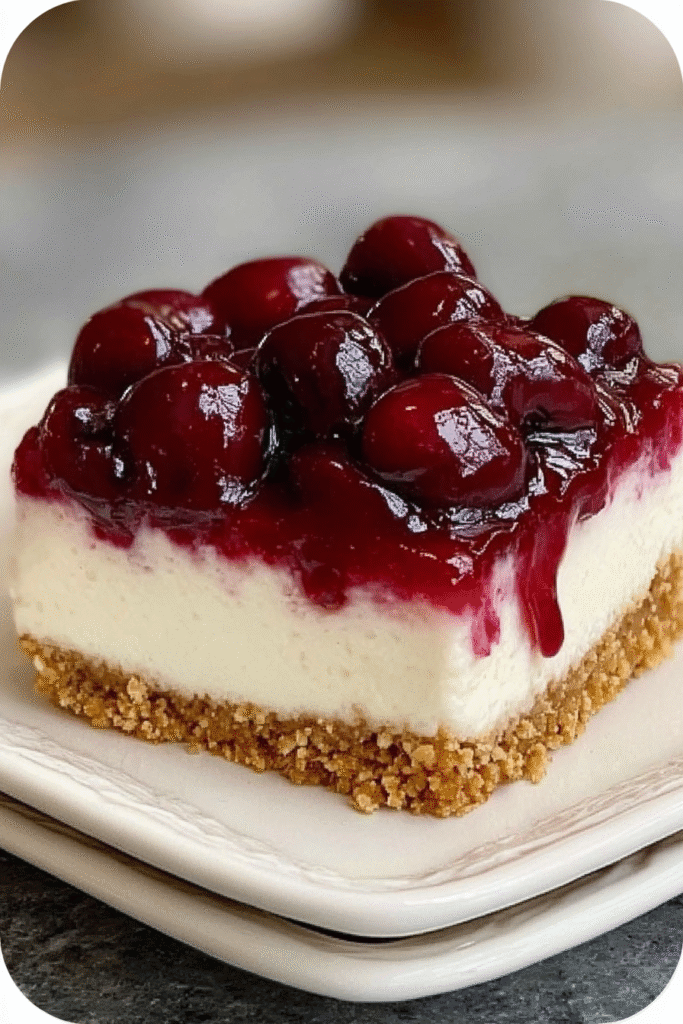
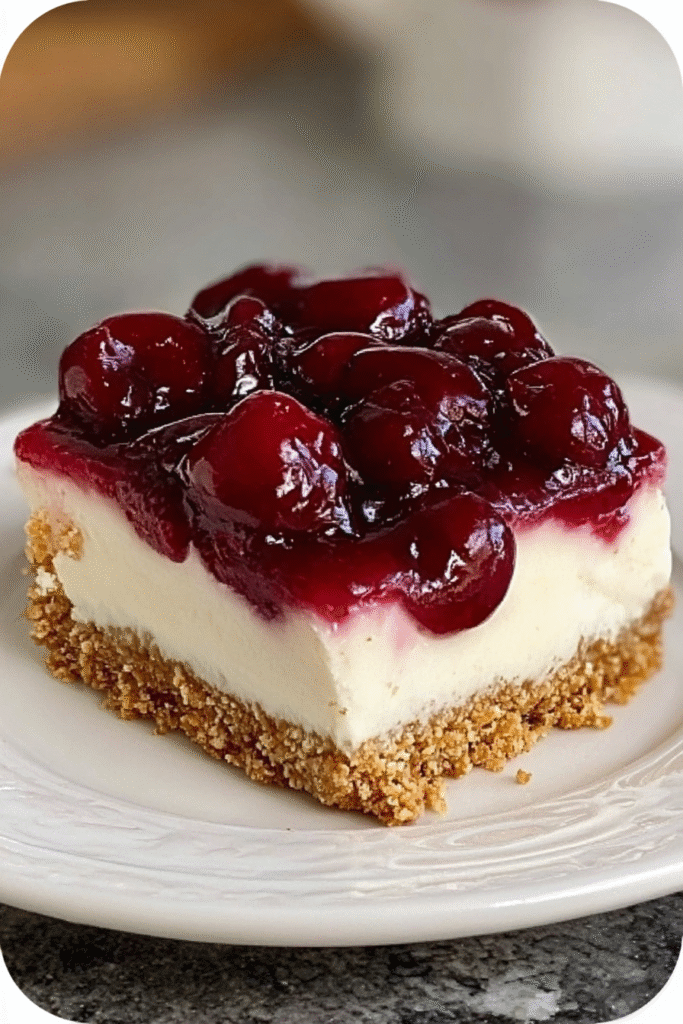
This No-Bake Cherry Cheesecake combines a buttery graham cracker crust with a luscious, tangy-sweet cream cheese filling lightened with whipped cream, then crowned with glossy cherry pie topping that creates a stunning ruby-red finish. The dessert requires no baking whatsoever—just mixing, layering, and chilling—making it perfect for warm weather when you don’t want to heat up the kitchen or anytime you want impressive results without oven complications. With its smooth, cloud-like texture from properly folded whipped cream and elegant presentation that rivals any bakery creation, this classic dessert delivers timeless appeal and crowd-pleasing satisfaction in every creamy, cherry-topped bite.
Why You’ll Love This Recipe
No Oven Required – This cheesecake sets perfectly through refrigeration alone, making it ideal for summer entertaining, small kitchens without ovens, or anyone intimidated by traditional baked cheesecake’s finicky requirements.
Timeless Classic Appeal – The combination of graham crust, creamy cheesecake filling, and cherry topping represents nostalgic Americana that appeals across generations and never goes out of style.
Cloud-Like Texture – Folding whipped cream into the cream cheese creates airy, mousse-like consistency that’s lighter than dense baked cheesecake while remaining rich and satisfying.
Elegant Presentation – The glossy cherry topping creates stunning visual impact that looks professionally made, making this suitable for special occasions and impressive enough for guests.
Make-Ahead Convenience – The required 4-6 hour (or overnight) chilling time makes this perfect for preparing the day before events when you want dessert completely finished ahead.
Customizable Components – From crust variations to homemade cherry topping to flavor additions, this recipe accepts endless modifications while maintaining its essential character.
Ingredients You’ll Need
For the Graham Cracker Crust
2 cups graham cracker crumbs (about 14 full sheets) – Form the foundation that provides sweet, slightly honey-flavored base; crush crackers yourself or use pre-made crumbs for convenience.
½ cup unsalted butter, melted – Binds the crumbs into cohesive, press-able crust while adding rich, buttery flavor that complements the sweet filling.
¼ cup granulated sugar – Sweetens the crust and helps bind the crumbs together while balancing the tangy cream cheese filling above.
Pinch of salt – Enhances all flavors and prevents the crust from tasting one-dimensional or overly sweet.
For the Cheesecake Filling
16 oz (450g) cream cheese, softened – Provides the rich, tangy base that defines cheesecake flavor and creates the filling’s structure; room-temperature cream cheese is essential for smooth texture.
1 cup powdered sugar – Sweetens the filling while maintaining smooth texture; powdered sugar dissolves more easily than granulated and prevents graininess.
1 teaspoon pure vanilla extract – Adds warm, aromatic depth that enhances sweetness and complements both the cream cheese and cherry topping.
1 tablespoon lemon juice (optional) – Provides brightness and acidity that balances the richness and enhances the tangy cream cheese character; highly recommended for best flavor.
1½ cups heavy whipping cream, cold – Creates the light, airy component that transforms dense cream cheese into cloud-like mousse when whipped to stiff peaks and folded in.
For the Cherry Topping
1 can (21 oz/595g) cherry pie filling – Provides the convenient, glossy cherry topping that crowns the cheesecake; use store-bought for ease or make homemade for superior flavor (recipe included).
Optional Homemade Cherry Topping
2 cups pitted cherries (fresh or frozen) – Form the fruit base for homemade topping that tastes fresher and more natural than canned.
½ cup granulated sugar – Sweetens the cherries and combines with their natural juices to create syrup.
1 tablespoon cornstarch – Thickens the cherry mixture into proper pie-filling consistency rather than thin syrup.
2 tablespoons water – Dissolves the cornstarch to create a slurry that thickens the cherry mixture without lumps.
1 teaspoon lemon juice – Brightens the cherry flavor and adds acidity that prevents the topping from tasting flat.
½ teaspoon almond extract (optional) – Enhances cherry flavor with complementary almond notes; traditional in cherry desserts but optional.
Step-by-Step Instructions
Prepare the Graham Cracker Crust – In a medium bowl, combine the graham cracker crumbs, melted butter, granulated sugar, and pinch of salt, mixing with a fork until the mixture resembles wet sand with all crumbs evenly moistened and holding together when pressed.
Press Crust into Pan – Transfer the crumb mixture to a 9-inch springform pan (or 9×9-inch square pan for bar-style servings) and use your fingers or the bottom of a flat glass to press it firmly and evenly into the bottom, creating a compact, solid base without gaps.
Chill the Crust – Place the pan in the refrigerator while you prepare the filling, allowing the butter to firm up and the crust to set, which takes approximately 15-20 minutes.
Beat the Cream Cheese Base – In a large mixing bowl, beat the softened cream cheese with an electric mixer on medium speed for 2-3 minutes until completely smooth, fluffy, and lump-free, scraping down the sides of the bowl as needed.
Add Sugar and Flavorings – Add the powdered sugar, vanilla extract, and lemon juice if using to the cream cheese, then beat on low speed initially to prevent sugar clouds, increasing to medium speed and mixing for 1-2 minutes until fully incorporated and the mixture appears light and creamy.
Whip the Heavy Cream – In a separate clean bowl with clean beaters, whip the cold heavy cream on medium-high speed for 3-5 minutes until stiff peaks form and the cream holds its shape firmly when the beaters are lifted.
Fold Cream into Cream Cheese – Add the whipped cream to the cream cheese mixture in three additions, using a rubber spatula to gently fold them together with smooth, sweeping motions from the bottom up, being careful not to deflate the whipped cream, until just combined with no white streaks remaining.
Fill the Crust – Pour the light, fluffy cheesecake filling over the chilled graham cracker crust, using an offset spatula to spread it evenly and smooth the top surface.
Chill Until Set – Cover the pan loosely with plastic wrap (ensure it doesn’t touch the filling surface) and refrigerate for at least 4 hours or preferably overnight, allowing the filling to firm up completely and the flavors to meld.
Add Cherry Topping – Once the cheesecake has set firmly, spoon the cherry pie filling (or homemade cherry topping if using) evenly over the top, spreading gently with a spoon to cover the surface without disturbing the delicate cream cheese layer below.
Final Chill and Serve – Return the topped cheesecake to the refrigerator for an additional 30 minutes to allow the cherry topping to set beautifully, then remove the springform pan sides (if using) and slice into wedges or squares using a sharp knife dipped in hot water and wiped clean between cuts.
For Optional Homemade Cherry Topping
Cook the Cherry Mixture – In a medium saucepan, combine the pitted cherries, sugar, and lemon juice over medium heat, then in a small bowl, whisk together the cornstarch and water until smooth and add to the cherries.
Simmer Until Thickened – Bring the cherry mixture to a simmer while stirring frequently, then cook for 5-7 minutes until the mixture thickens noticeably and becomes glossy.
Add Extract and Cool – Stir in the optional almond extract, remove from heat, and allow the topping to cool completely to room temperature before spreading over the cheesecake.
Recipe Notes & Tips
Room-Temperature Cream Cheese is Critical – Softened cream cheese blends smoothly without lumps; cold cream cheese creates grainy texture no matter how long you beat it, so leave it out for at least 2 hours before starting.
Use Full-Fat Ingredients – Full-fat cream cheese and heavy whipping cream are essential for proper texture and flavor; low-fat versions don’t set properly or taste as rich.
Whip Cream to Stiff Peaks – The whipped cream must hold very firm peaks to maintain structure when folded into cream cheese; under-whipped cream will deflate and create runny filling.
Fold Gently and Patiently – When combining whipped cream with cream cheese, use gentle folding motions rather than vigorous stirring to preserve the airiness that makes this filling light and cloud-like.
Overnight Chilling is Best – While 4 hours is the minimum, overnight refrigeration produces firmer texture and allows flavors to develop more fully for superior results.
Don’t Skip Lemon Juice – The tablespoon of lemon juice brightens the filling and enhances the tangy cream cheese flavor; don’t omit it even though it’s listed as optional.
Nutritional Information
Prep Time: 25 minutes
Chilling Time: 4-6 hours (overnight recommended)
Total Time: Approximately 6½ hours
Servings: 10-12 servings
Calories: Approximately 410 calories per serving
Carbohydrates: 34g | Protein: 5g | Fat: 29g
Saturated Fat: 17g | Sugar: 24g | Sodium: 260mg
Cholesterol: 90mg | Fiber: 1g
Perfect Pairings
Hot Coffee or Tea – Serve with freshly brewed coffee or black tea whose slight bitterness balances the sweet cherry topping and rich cheesecake.
Whipped Cream Garnish – Add a dollop of freshly whipped cream on each slice for extra indulgence and visual appeal that makes portions look more special.
White Chocolate Curls – Garnish with white chocolate shavings or curls that add elegance and complement both the cream cheese and cherry flavors.
Sparkling Rosé – For adult gatherings, pair with chilled sparkling rosé whose bubbles and fruity notes complement the cherry topping beautifully.
Ideal Occasions
Summer Gatherings – The no-bake preparation makes this perfect for warm weather when you don’t want to heat up the kitchen but still need impressive dessert.
Holiday Celebrations – The festive red cherry topping makes this appropriate for Christmas, Valentine’s Day, or Fourth of July when red colors feel celebratory.
Potluck Contributions – This cheesecake travels well in its springform pan, serves a crowd (10-12 people), and appeals universally with familiar flavors.
Make-Ahead Dinner Parties – The overnight preparation requirement becomes an advantage when entertaining, as dessert is completely finished before guests arrive.
Storage & Serving Tips
Refrigerator Storage – Store covered cheesecake in the refrigerator for up to 5 days; the filling remains stable and delicious throughout this time.
Freezing Instructions – Freeze the cheesecake without cherry topping for up to 1 month by wrapping tightly in plastic wrap and foil; thaw overnight in refrigerator, then add fresh cherry topping before serving.
Add Topping Just Before Serving – For longest storage, keep cherry topping separate and add just before serving to maintain the filling’s perfect texture.
Serve Cold – This cheesecake tastes best when served directly from the refrigerator while cold, which maintains its proper texture and refreshing quality.
Creative Variations to Try
Mini Cheesecakes – Use muffin tins lined with cupcake liners to create individual portions; reduce chilling time to 2-3 hours for these smaller servings.
Chocolate Cherry Version – Add ½ cup of melted dark chocolate to the cream cheese filling for rich chocolate base that creates black forest cake flavors.
Oreo Crust – Replace graham crackers with crushed Oreos (including the cream filling) for cookies-and-cream style base that adds chocolate flavor.
Tropical Fruit Topping – Swap cherry topping for pineapple, mango, or passion fruit for summer variation with tropical character.
Strawberry or Blueberry – Use different pie filling flavors or make homemade topping with other berries for seasonal variations throughout the year.
Lemon Zest Enhancement – Add 1 teaspoon of lemon zest to the filling for extra citrus brightness that creates more complex flavor profile.
Troubleshooting Common Issues
Filling Won’t Thicken – If filling remains soupy after chilling, the cream wasn’t whipped enough or you used low-fat ingredients; ensure stiff peaks and always use full-fat dairy.
Cream Cheese is Lumpy – Cold cream cheese or insufficient beating creates lumps; always use room-temperature cream cheese and beat thoroughly until completely smooth before adding other ingredients.
Crust Falls Apart – Insufficient butter or not pressing firmly enough causes crumbling; ensure proper butter ratio and press mixture very firmly into pan bottom.
Whipped Cream Deflated – Overmixing when folding or under-whipping initially causes deflation; whip to stiff peaks and fold gently just until combined.
Why This Recipe Works
This No-Bake Cherry Cheesecake succeeds by combining proper no-bake technique with classic flavor combinations that have proven popular for generations. The graham cracker crust provides familiar foundation with enough butter to bind without baking while remaining stable under the filling’s weight. The cream cheese provides tangy richness and structure, while powdered sugar dissolves completely for smooth texture without graininess. The key innovation is folding stiffly whipped cream into the cream cheese, which creates light, mousse-like consistency that sets firmly when chilled without requiring gelatin, eggs, or baking. This technique produces texture that’s more sophisticated than simple cream cheese frosting while remaining stable enough to slice cleanly. The lemon juice brightens the filling and enhances the cream cheese’s natural tang, preventing it from tasting flat or overly sweet. The cherry topping provides visual drama with its glossy, ruby-red appearance while adding fruity sweetness and slight tartness that balances the rich filling. The extended chilling time allows everything to set properly and flavors to meld into cohesive whole. At approximately 410 calories per serving, this is certainly an indulgent dessert, but the richness means smaller portions satisfy, and the inclusion of real fruit in the topping provides some nutritional value alongside the treat.
Final Thoughts
This No-Bake Cherry Cheesecake proves that impressive, bakery-quality desserts don’t require ovens, water baths, or professional pastry skills—just proper technique, quality ingredients, and patience during the chilling process. The recipe honors classic American cheesecake tradition while innovating through the no-bake method that makes it accessible to anyone regardless of baking experience or equipment. While this is undeniably a rich, sweet indulgence, the controlled portion sizes and the presence of real fruit in the topping provide some balance. The make-ahead requirement transforms from limitation into advantage when entertaining, as you can prepare this completely the day before and simply slice and serve when needed. Whether you’re celebrating summer, contributing to a potluck, marking a holiday, or simply treating yourself to something special without turning on the oven, this creamy, cherry-crowned, perfectly chilled cheesecake delivers timeless appeal, elegant presentation, and crowd-pleasing satisfaction in every light, tangy, ruby-topped bite.


