
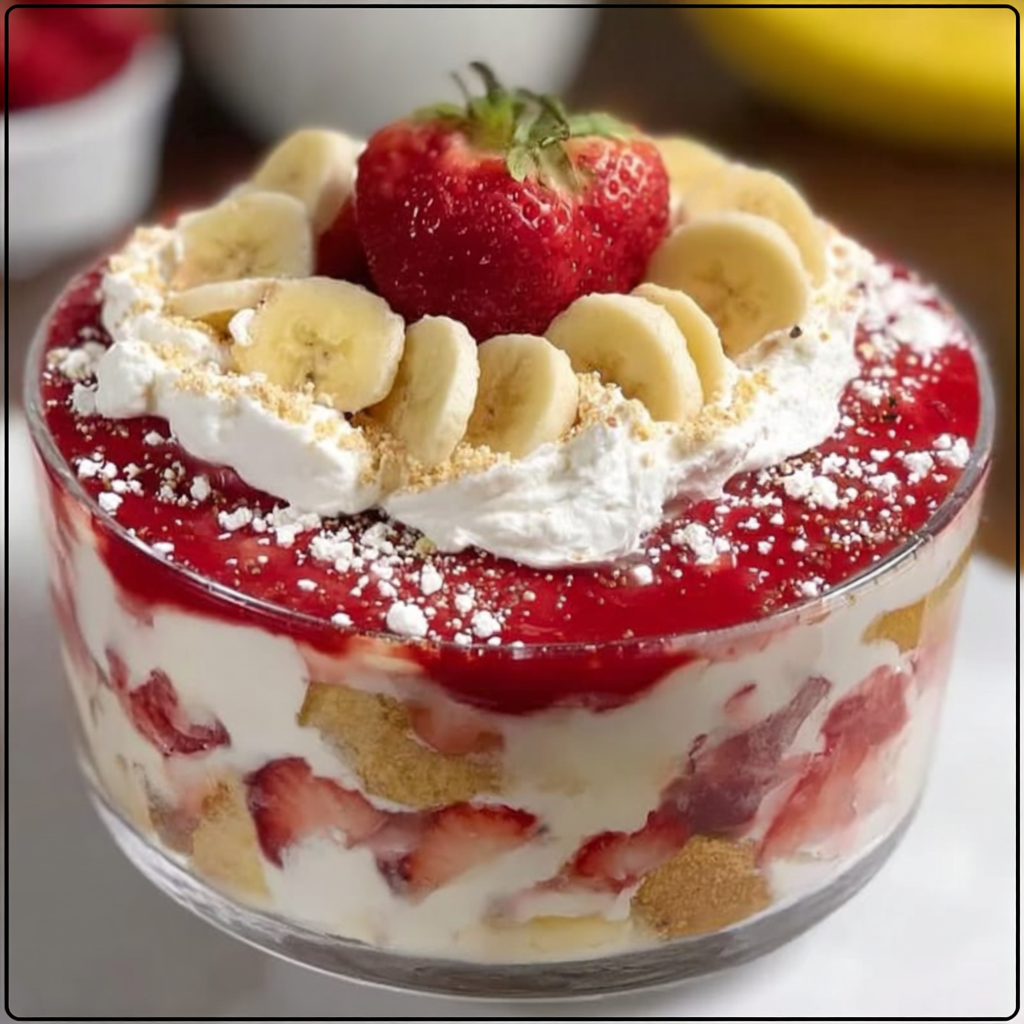
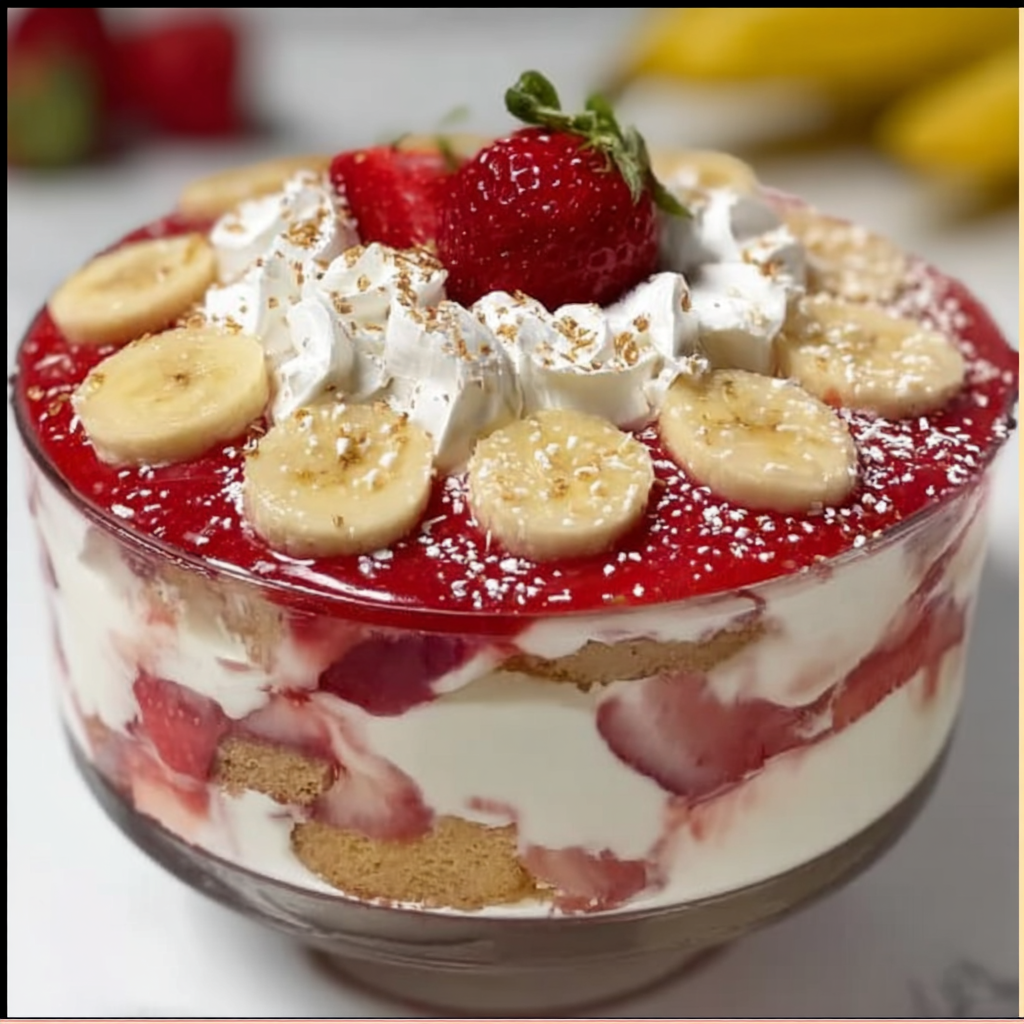
This no-bake layered dessert combines the nostalgic comfort of classic banana pudding with fresh strawberries and a buttery vanilla wafer crust. The recipe features velvety vanilla pudding mixed with cream cheese and sweetened condensed milk, folded together with whipped topping and layered with ripe bananas and juicy strawberries. The result is a light yet indulgent dessert that’s visually stunning and irresistibly creamy in every spoonful.
Why You’ll Love This Recipe
- No Baking Required – Simply mix, layer, and chill for a completely stress-free dessert that doesn’t require turning on your oven or any advanced baking skills.
- Make-Ahead Convenience – Prepare this dessert up to a day in advance and let it chill overnight, allowing flavors to meld while freeing up your time on serving day.
- Crowd-Pleasing Flavor Combination – The classic pairing of bananas and strawberries with creamy vanilla pudding appeals to all ages and tastes, making it universally loved at gatherings.
- Visually Impressive Presentation – The distinct layers of cream, fruit, and wafer crust create a gorgeous dessert that looks professionally made with minimal effort.
- Easily Customizable – Adapt the recipe with different fruits, pudding flavors, or crust options to suit dietary preferences, seasonal availability, or personal taste.
- Feeds a Crowd Affordably – Uses simple, budget-friendly ingredients to serve 10-12 people generously, making it ideal for potlucks and large family gatherings.
Ingredients You’ll Need
For the Crust
- 2 cups crushed vanilla wafers (about 60 wafers) – Creates a sweet, buttery foundation that adds pleasant crunch and holds up well under the creamy layers without becoming soggy.
- 6 tablespoons unsalted butter, melted – Binds the cookie crumbs together into a cohesive crust while adding rich, buttery flavor throughout the base.
- 1 tablespoon granulated sugar (optional) – Enhances the sweetness of the crust slightly for those who prefer a more dessert-forward base layer.
For the Filling
- 1 (5.1 oz) box instant vanilla pudding mix – Provides the classic pudding flavor and helps thicken the filling to achieve the perfect creamy, stable consistency.
- 2 cups cold milk (whole milk or 2% preferred) – Activates the instant pudding mix and creates the smooth, thick pudding base that’s essential for proper setting.
- 1 (8 oz) package cream cheese, softened – Adds rich, tangy creaminess and body to the filling while helping stabilize the layers for clean slicing.
- 1 cup sweetened condensed milk – Contributes concentrated sweetness and luxurious richness that enhances the overall dessert without requiring additional sugar.
- 1 teaspoon pure vanilla extract – Amplifies the vanilla flavor throughout the cream mixture and adds aromatic depth to complement the fruit layers.
- 1 (8 oz) container whipped topping (like Cool Whip), thawed – Lightens the dense pudding mixture into an airy, cloud-like filling that makes the dessert feel indulgent yet not heavy.
For the Layers
- 3 large ripe bananas, sliced – Provides the classic banana pudding flavor and soft, creamy texture that contrasts beautifully with the fresh strawberries.
- 2 cups fresh strawberries, sliced – Adds bright, juicy sweetness and vibrant color that elevates traditional banana pudding into something special and refreshing.
- Extra whipped topping for finishing (optional) – Creates a smooth, attractive top layer that serves as the canvas for decorative garnishes.
For Garnish (Optional but Recommended)
- Crushed vanilla wafers – Adds textural contrast and echoes the crust flavor while creating visual interest on the finished dessert.
- Fresh strawberry slices – Provides immediate visual appeal and lets guests know what delicious flavors await inside the layers.
- Banana coins – Offers fresh banana flavor and attractive garnish when added just before serving to prevent browning.
- Mint leaves – Contributes a pop of fresh green color and subtle aromatic freshness that makes the presentation elegant and restaurant-quality.
Step-by-Step Instructions
Prepare the Vanilla Wafer Crust Place the vanilla wafers in a food processor and pulse until fine crumbs form, or place them in a zip-top bag and crush with a rolling pin. Mix the crumbs with melted butter and optional sugar until well combined, then press the mixture evenly into the bottom of a 9×13-inch baking dish without compacting too firmly, and refrigerate while you prepare the filling.
Make the Pudding Base In a large mixing bowl, whisk together the instant vanilla pudding mix and cold milk vigorously for about 2 minutes until the mixture is smooth and noticeably thickened. Place the prepared pudding in the refrigerator to chill slightly while you work on the cream cheese mixture.
Create the Cream Cheese Mixture In another large bowl, beat the softened cream cheese with an electric mixer on medium speed until it becomes creamy, smooth, and completely lump-free. Add the sweetened condensed milk and vanilla extract, beating until fully combined and silky, then fold in the prepared chilled pudding mixture until evenly incorporated.
Fold in the Whipped Topping Gently fold the thawed whipped topping into the pudding and cream cheese mixture using a spatula, being careful not to overmix or deflate the airy texture. Continue folding just until everything is evenly incorporated and the mixture appears fluffy and cloud-like with no streaks remaining.
Assemble the First Layers Remove the chilled crust from the refrigerator and arrange banana slices evenly across the entire surface in a single layer. Spread half of your creamy pudding mixture over the bananas using a spatula, smoothing it gently to create an even layer that reaches all corners of the dish.
Add the Strawberry Layer Distribute the fresh strawberry slices generously and evenly over the first cream layer, ensuring good coverage throughout. Spread the remaining half of the pudding mixture over the strawberries, smoothing the top with a spatula to create a beautiful, even finish that will serve as your presentation surface.
Chill Thoroughly Cover the assembled dessert tightly with plastic wrap, ensuring the wrap doesn’t touch the surface of the cream layer, and refrigerate for at least 4 hours or ideally overnight. This extended chilling time allows the flavors to meld together beautifully and the dessert to set into a perfectly sliceable texture.
Garnish and Serve Just before serving, remove the plastic wrap and top the dessert with a final layer of whipped topping if desired. Garnish with crushed vanilla wafers for crunch, fresh strawberry slices and banana coins for decoration, and a few mint leaves for an elegant finishing touch, then slice into squares or spoon into bowls and serve chilled.
Recipe Notes & Tips
- Select Bananas Carefully – Choose ripe but firm bananas with bright yellow peels and minimal brown spots, as overripe bananas become mushy and can overpower the delicate flavor balance of the dessert.
- Dry Your Strawberries Thoroughly – After washing strawberries, pat them completely dry with paper towels since excess moisture can create watery layers that compromise the dessert’s texture and stability.
- Soften Cream Cheese Properly – Leave cream cheese at room temperature for 30-60 minutes before mixing, as cold cream cheese creates lumps that are difficult to eliminate and result in an uneven filling texture.
- Fold Gently to Maintain Airiness – When incorporating the whipped topping, use a folding motion rather than stirring to preserve the light, fluffy texture that makes this dessert feel indulgent without being heavy.
- Prevent Banana Browning – If preparing the dessert more than a few hours ahead, lightly brush banana slices with fresh lemon juice before layering to slow oxidation and maintain appealing color.
- Allow Adequate Chilling Time – Don’t rush the 4-hour minimum chill time, as this period is essential for the pudding to fully set, the flavors to develop, and the crust to maintain its structure when slicing.
Nutritional Information
- Prep Time: 25 minutes
- Chill Time: 4 hours minimum (overnight chilling recommended for best results)
- Total Time: Approximately 4 hours and 25 minutes
- Servings: 10-12 generous portions from one 9×13-inch dish
- Calories: Approximately 340 calories per slice (based on 12 servings with standard ingredient brands)
Perfect Pairings
- Hot Coffee or Tea – A cup of freshly brewed coffee or black tea provides a pleasant bitter contrast that balances the dessert’s sweetness and enhances the vanilla and fruit flavors.
- Fresh Berries on the Side – Serve additional fresh raspberries, blueberries, or blackberries alongside for guests who want extra fruit and a slightly tart counterpoint to the creamy layers.
- Sparkling Water with Citrus – Light, effervescent water with lemon or lime slices cleanses the palate between bites and provides refreshment without competing with the dessert’s delicate flavors.
- Vanilla Ice Cream – For true indulgence seekers, add a small scoop of premium vanilla ice cream that melts into the layers and creates an even more luxurious experience.
Ideal Occasions
- Summer Gatherings and Barbecues – The chilled, fruity nature of this dessert makes it perfect for hot weather entertaining, poolside parties, and outdoor picnics where a refreshing treat is welcomed.
- Holiday Dinners and Family Celebrations – The impressive presentation and crowd-pleasing flavors make it suitable for Easter, Mother’s Day, birthdays, and any special occasion requiring a show-stopping dessert.
- Potluck Contributions – This dessert travels exceptionally well in its baking dish, serves many people, and consistently receives rave reviews at church suppers, office parties, and neighborhood gatherings.
- No-Fuss Weekend Treats – When you want something special for Sunday dinner or a casual get-together without spending hours in the kitchen, this easy recipe delivers maximum impact with minimal effort.
Storage & Serving Tips
- Refrigerate Properly – Keep the dessert covered tightly with plastic wrap or aluminum foil in the refrigerator for up to 3 days, though note that bananas will gradually darken after the second day while remaining delicious.
- Freeze Individual Portions – Wrap individual slices tightly in plastic wrap and aluminum foil to freeze for up to 1 month, then thaw overnight in the refrigerator for a quick, ready-made dessert.
- Add Fresh Garnishes Last – If making ahead, prepare the entire dessert except for the final whipped topping and fresh fruit garnish, adding these elements just before serving for the most attractive presentation.
- Use a Sharp, Clean Knife – For the cleanest slices, dip your knife in hot water and wipe it clean between cuts to prevent the cream layers from smearing and maintain distinct, beautiful layers.
Creative Variations to Try
- Chocolate Strawberry Banana Dream – Swap vanilla pudding for chocolate instant pudding and drizzle chocolate syrup between the layers for a richer, more decadent chocolate-covered strawberry experience.
- Tropical Coconut Version – Add 1/2 cup shredded coconut to the pudding mixture and sprinkle toasted coconut on top for island-inspired flavors reminiscent of a tropical vacation.
- Mixed Berry Medley – Replace strawberries with a combination of blueberries, raspberries, and blackberries for a colorful, antioxidant-rich variation that works beautifully for Fourth of July celebrations.
- Graham Cracker or Biscoff Crust – Substitute crushed graham crackers or Biscoff cookies for the vanilla wafers to create a different flavor foundation that adds spice notes or honey sweetness.
Troubleshooting Common Issues
- Runny Pudding Layer – Ensure you’re using instant pudding mix with cold milk and whisking for the full 2 minutes; if using cook-and-serve pudding instead, it must be completely cooled before incorporating into the recipe.
- Overly Sweet Dessert – Reduce the sweetened condensed milk to 3/4 cup or substitute half of the whipped topping with unsweetened whipped cream to cut the sweetness without sacrificing creaminess.
- Bananas Turned Brown – Prevent oxidation by brushing banana slices with fresh lemon juice before layering, or consider adding banana slices only to the garnish layer rather than within the dessert itself.
- Soggy Crust – Allow the pressed crust to chill for at least 30 minutes before adding layers, and ensure your fruit is thoroughly dried to prevent excess moisture from seeping into the base.
Why This Recipe Works
The magic of Strawberry Banana Pudding Dream lies in its perfectly balanced combination of textures and flavors achieved through strategic ingredient pairing. The instant pudding mix provides a thick, stable base that sets properly when combined with cold milk, while the cream cheese adds tanginess and richness that prevents the dessert from tasting one-dimensionally sweet. The sweetened condensed milk contributes concentrated sweetness and helps bind the layers together, while the whipped topping lightens the dense pudding-cream cheese mixture into an airy, mousse-like filling that feels indulgent without being heavy. The vanilla wafer crust maintains its structure during chilling because the butter content creates a barrier against moisture from the fruit layers, while the strategic layering order—bananas directly on the crust, then cream, then strawberries, then more cream—ensures even distribution of flavors and prevents the wetter strawberries from making the crust soggy. The extended 4-hour (or overnight) chill time allows the dessert to set completely, the flavors to meld harmoniously, and the crust to maintain its pleasant textural contrast against the creamy filling. At approximately 340 calories per serving when divided into 12 portions, this dessert offers a reasonable indulgence that balances rich cream and sweet fruit.
Final Thoughts
Strawberry Banana Pudding Dream delivers on every promise its name suggests—it’s truly a dreamy combination of nostalgic banana pudding flavors elevated with fresh strawberries and elegant layered presentation. This recipe proves that impressive desserts don’t require baking expertise or hours of labor; with simple ingredients and straightforward assembly, you can create a stunning centerpiece that draws compliments at any gathering. The no-bake nature makes it perfect for summer entertaining when you want to avoid heating up the kitchen, while the make-ahead friendly format means you can prepare it stress-free the day before your event. The light, fruity character appeals to those who find traditional puddings too heavy, yet it maintains enough richness to satisfy serious dessert lovers. Whether served in a classic 9×13-inch pan for family-style portions or assembled in individual trifle cups for elegant presentation, this versatile dessert adapts beautifully to any occasion from casual picnics to holiday dinners.


