
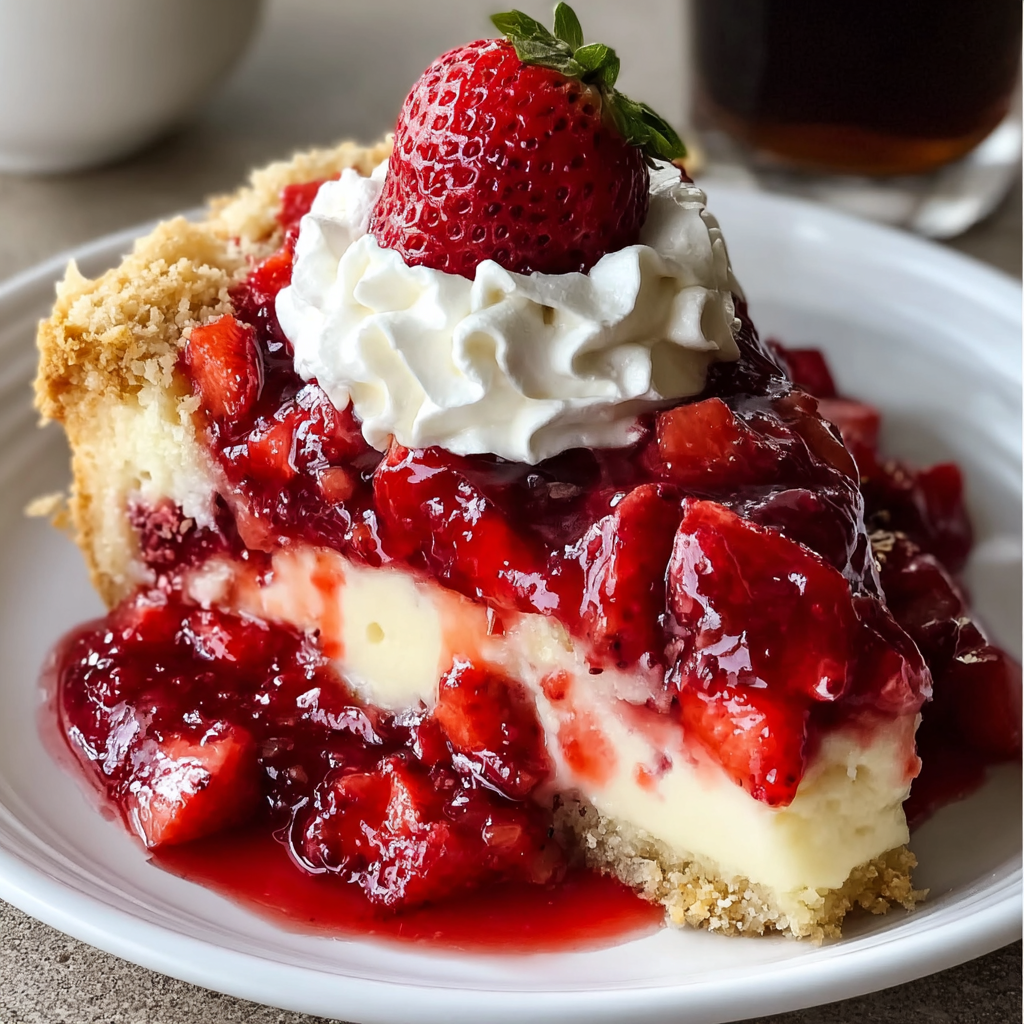
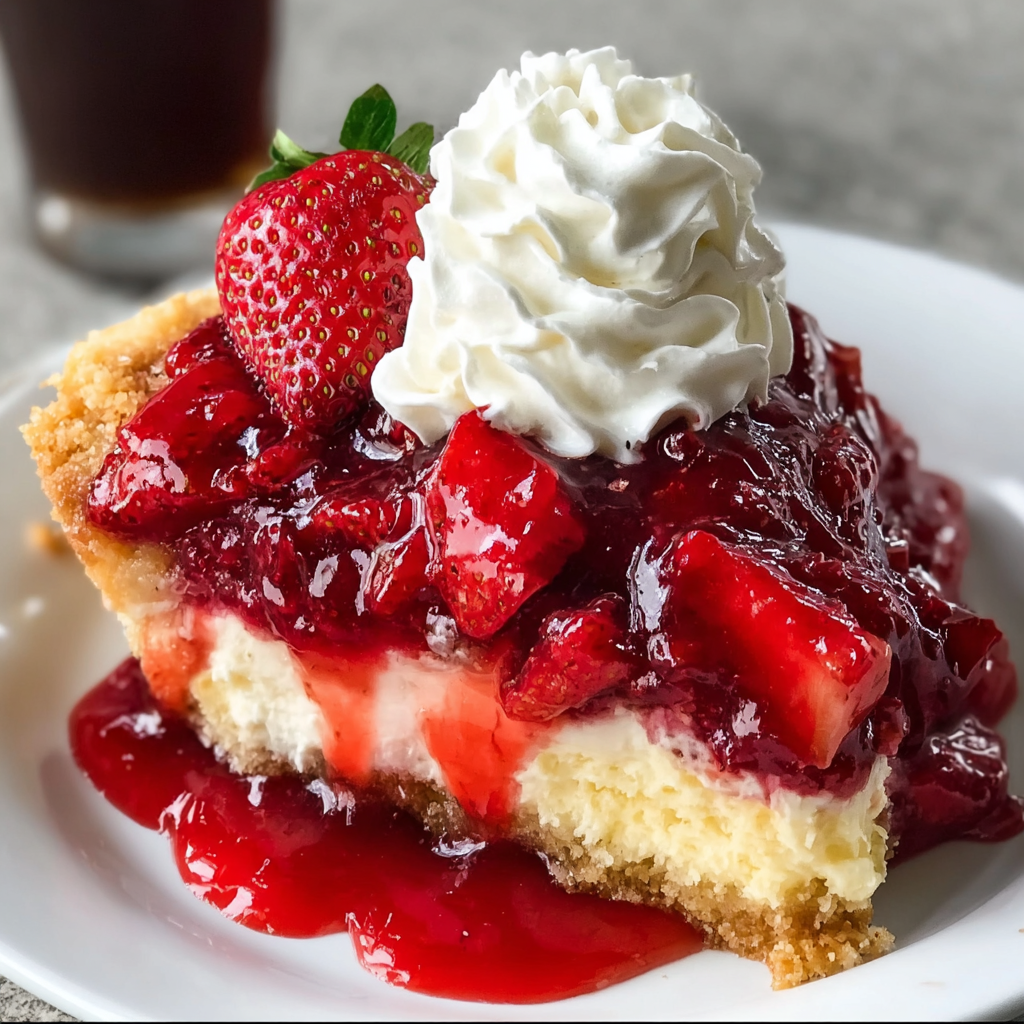
This gloriously simple dessert lives up to its name by requiring nothing more than dumping layers into a pan and letting the oven work its magic. The genius of dump cake lies in its effortless transformation: sweet strawberry pie filling forms a jammy base, pockets of tangy cream cheese create cheesecake flavor, and dry cake mix magically bakes into a golden, crispy-edged topping with tender cake pockets underneath. No mixing bowls full of batter, no complicated techniques, just layer and bake for a dessert that tastes like you spent hours crafting a strawberry cheesecake when you actually invested just 15 minutes of hands-on time.
Why You’ll Love This Recipe
Ultimate beginner-friendly dessert – With only three main components and zero mixing of cake batter required, this recipe is foolproof for novice bakers, busy parents, or anyone who’s intimidated by traditional baking but craves homemade dessert.
Minimal cleanup required – Say goodbye to multiple mixing bowls, electric mixers covered in batter, and measuring cups for every ingredient; this dump cake uses a single baking dish and just one bowl for the cream cheese mixture, making cleanup a breeze.
Potluck and picnic perfect – Transport easily in its baking dish, serves a crowd of 12, requires no special plating, and can be eaten warm or cold, making it the ideal contribution to gatherings where simplicity and crowd-pleasing flavors matter most.
Impressive results with zero skill – Guests will never believe you when you explain how easy this was; the golden, crispy top and gooey strawberry-cheesecake interior look and taste like a dessert that required far more effort than the actual 15 minutes of prep.
Endless flavor variations – Once you master the basic technique, swap strawberry for cherry, blueberry, or apple pie filling, try different cake mix flavors like chocolate or lemon, and customize to match any season or preference.
Budget-friendly indulgence – Using affordable pantry staples and canned pie filling, this entire dessert costs a fraction of bakery prices while feeding a dozen people, making it perfect for families watching grocery budgets without sacrificing treats.
Ingredients You’ll Need
For the Easy Base Layers
1 box yellow or white cake mix (approximately 15.25 oz) – The dry mix creates the magical topping that transforms into cake texture during baking; yellow offers buttery richness while white provides lighter, more neutral flavor that lets strawberries shine
1 can strawberry pie filling (21 oz) – Pre-sweetened and thickened strawberry filling provides consistent results and eliminates the need for fresh fruit prep; look for varieties with visible fruit pieces for best texture
½ cup unsalted butter, melted – Essential moisture that activates the dry cake mix, creating golden, crispy edges and tender cake pockets; the butter seeps down into layers, enriching everything it touches
For the Creamy Cheesecake Layer
8 ounces cream cheese, softened – Full-fat cream cheese at room temperature (leave out 1-2 hours) ensures smooth mixing and provides authentic cheesecake tang that balances the sweet strawberries
½ cup granulated sugar – Sweetens the cream cheese layer to dessert-appropriate levels while maintaining that signature tangy profile that distinguishes cheesecake from plain sweet cream
1 teaspoon vanilla extract – Enhances the cream cheese flavor, adds warmth and depth, and rounds out the overall taste profile; use pure vanilla extract rather than imitation for best results
Step-by-Step Instructions
Oven preparation and pan setup Preheat your oven to 350°F (175°C) and thoroughly grease a 9×13-inch baking dish with butter or cooking spray, paying special attention to the corners where dessert tends to stick. This standard pan size creates the perfect layer proportions and serves 12 people generously.
Create the strawberry base layer Open the can of strawberry pie filling and pour the entire contents into the prepared baking dish. Using a spoon or spatula, spread the filling evenly across the bottom, creating a uniform layer that extends to all edges—this fruity foundation will bubble up around the edges during baking, creating that irresistible jammy texture.
Prepare and add the cream cheese layer In a medium mixing bowl, combine the softened cream cheese, granulated sugar, and vanilla extract. Using an electric mixer on medium speed (or vigorous whisking by hand), beat for 2-3 minutes until the mixture is smooth, fluffy, and no sugar granules or cream cheese lumps remain. Drop dollops of this cream cheese mixture randomly over the strawberry layer—about 10-12 spoonfuls distributed evenly—then use the back of a spoon to gently spread the dollops, creating an imperfect, swirled layer; don’t worry about complete coverage as pockets of pure strawberry add character.
Add the dry cake mix topping Here’s where the “dump” happens: open your cake mix box and evenly sprinkle the entire contents over the cream cheese and strawberry layers below. Resist every urge to stir or mix—the dry powder should remain as a separate layer covering the surface as completely as possible. Use a spoon to distribute any large piles evenly, but leave it dry and powdery.
Drizzle with melted butter Pour the melted butter slowly and evenly over the dry cake mix layer, moving your spoon or measuring cup in zigzag patterns to cover as much surface area as possible. Some dry spots will remain, and that’s perfectly fine—they’ll create delightful texture variations, with some areas becoming crispy and others forming tender cake pockets as moisture from below rises during baking.
Bake to golden perfection Place the baking dish in the preheated oven and bake for 40-45 minutes, until the top is golden brown with darker, crispy edges, the butter has created a beautiful toasted crust, and you can see bubbling strawberry and cream cheese mixture around the edges. The cake mix will have transformed from powder into actual cake texture through the magic of baking moisture and butter.
Cool and serve Remove from the oven and let the dump cake cool for 10-15 minutes to allow the layers to set slightly and prevent burning mouths on molten strawberry filling. Serve warm for gooey, melty indulgence with ice cream, or refrigerate for 2-3 hours and serve cold for firmer, more cheesecake-like texture—both ways are absolutely delicious.
Recipe Notes & Tips
Cake mix brand matters – Use standard 15.25 oz boxes; some brands now sell 13-14 oz “family size” boxes which contain less mix and may not provide adequate topping coverage, resulting in too much exposed filling.
Cream cheese softening – Never microwave cream cheese to soften as it creates hot spots that won’t mix smoothly; instead, leave it at room temperature for 1-2 hours, or cut into small cubes to speed softening to 30-45 minutes.
Butter distribution technique – For most even coverage, melt butter and let it cool slightly, then use a spoon to drizzle rather than pour directly, which tends to create puddles; alternatively, use a pastry brush to distribute melted butter more evenly.
Dry spots are desirable – Don’t stress about achieving 100% butter coverage; the dry spots absorb moisture from below during baking and create delightful crispy, streusel-like pockets that provide textural contrast to the gooey underneath.
Pan size precision – A 9×13 pan is essential; using a smaller pan creates layers that are too thick and may not bake through properly, while a larger pan spreads layers too thin, resulting in dry, overcooked dessert.
Make-ahead and storage – This dessert can be assembled (through the dry cake mix layer) and refrigerated up to 4 hours before baking; add butter and bake when ready. Baked dump cake keeps covered in the refrigerator for 3-4 days and reheats beautifully.
Nutritional Information
Prep Time: 15 minutes
Cook Time: 40-45 minutes
Total Time: 55-60 minutes (plus 10-15 minutes cooling)
Servings: 12 generous portions (cut 9×13 pan into 12 squares, approximately 3×3 inches each)
Calories per serving: Approximately 320 kcal (based on standard cake mix and full-fat cream cheese; using sugar-free pie filling and reduced-fat cream cheese can lower to approximately 260-280 calories per serving)
Perfect Pairings
Vanilla ice cream or whipped cream – The classic pairing that takes warm dump cake to the next level; cold, creamy ice cream melts into the warm dessert, creating an irresistible temperature and texture contrast.
Fresh sliced strawberries – Add a handful of fresh berries on top of each serving for bright color, fresh flavor, and a touch of elegance that elevates this simple dessert visually and nutritionally.
Hot coffee or cold milk – Rich coffee complements the sweet, fruity dessert and cuts through the richness, while cold milk offers nostalgic comfort and appeals to all ages, especially kids.
Mint leaves for garnish – A small sprig of fresh mint adds a pop of color and a hint of refreshing aroma that makes individual servings look more sophisticated for company.
Ideal Occasions
Last-minute entertaining – When guests call to say they’re coming over in an hour, this dump cake saves the day, providing a impressive homemade dessert with minimal time investment and no advanced baking skills required.
Potluck dinners and church suppers – Everyone loves this crowd-pleaser, it travels beautifully in its baking dish, serves many people, and requires no special serving equipment beyond a spatula and plates.
Weeknight family desserts – Easy enough for busy Tuesday nights when you want something homemade and special but don’t have energy for complicated baking; kids can even help assemble the layers.
Summer picnics and barbecues – Serve at room temperature or chilled, making it perfect for outdoor gatherings where refrigeration may be limited and guests appreciate easy, portable, no-fuss desserts.
Storage & Serving Tips
Room temperature serving – If serving within 2-3 hours of baking, dump cake can sit at room temperature covered loosely with foil; the warm-to-room-temperature serving style maximizes the gooey, comforting qualities.
Refrigerated storage – Once cooled, cover tightly with plastic wrap or foil and refrigerate for up to 4 days; the cold firms up the cream cheese layer, creating more distinct cheesecake flavor and sliceable texture.
Reheating individual portions – Microwave single servings for 30-45 seconds to restore that warm, gooey texture; or reheat the entire pan covered with foil at 300°F for 15-20 minutes until warmed through.
Freezing possibility – While not ideal due to texture changes in the cream cheese and fruit, you can freeze portions wrapped tightly for up to 2 months; thaw overnight in refrigerator and reheat before serving for best results.
Creative Variations to Try
Cherry chocolate dump cake – Replace strawberry filling with cherry pie filling and use chocolate cake mix for a Black Forest-inspired version; add a tablespoon of cocoa powder to the cream cheese for even more chocolate intensity.
Blueberry lemon version – Use blueberry pie filling and lemon cake mix, add lemon zest to the cream cheese mixture, and garnish with lemon slices for a bright, summery variation that’s perfect for spring gatherings.
Apple cinnamon autumn cake – Substitute apple pie filling, use spice cake mix or add 2 teaspoons cinnamon to yellow cake mix, reduce sugar in cream cheese to ¼ cup, and top with chopped pecans before adding butter for fall perfection.
Triple berry extravaganza – Mix strawberry, blueberry, and raspberry pie fillings (or use a mixed berry variety), pair with white cake mix, and add almond extract to the cream cheese layer for a berry-lover’s dream dessert.
Troubleshooting Common Issues
Top is too dark but inside isn’t done – Your oven runs hot or the rack was too close to the top heating element; tent loosely with foil after 30 minutes of baking and continue until bubbling, or move to a lower oven rack next time.
Cake mix stayed powdery in spots – Not enough butter was used or distribution was uneven; next time, use a full ½ cup butter and drizzle more thoroughly, or spray exposed dry spots with cooking spray before baking.
Dessert is too runny – The cream cheese wasn’t mixed with sugar (it needs the sugar to thicken) or the dessert didn’t cool long enough; refrigerate for 2-3 hours to firm up the layers, which will slice more cleanly when chilled.
Cream cheese layer disappeared – The cream cheese was spread too thin or the dollops were too small; next time, use more generous spoonfuls and create thicker pockets of cream cheese that won’t completely melt away into the strawberry layer.
Why This Recipe Works
Strawberry Cheesecake Dump Cake succeeds through a brilliant understanding of how ingredients behave during baking. The strawberry pie filling, already thickened with cornstarch, maintains its jammy consistency while providing moisture that rises through the layers. The cream cheese mixture, sweetened and enriched with sugar and vanilla, creates pockets of tangy flavor reminiscent of actual cheesecake but without the fussy water bath or risk of cracking. The dry cake mix is the true genius—when layered dry and topped with melted butter, the powder absorbs moisture from below (rising steam from the fruit) and above (melting butter), essentially self-mixing during baking through steam and heat to create actual cake texture. The butter not only provides fat necessary for cake formation but also creates the golden, crispy topping through browning reactions (Maillard and caramelization) at the surface. The 350°F temperature is precisely calibrated to bake the layers through without burning the top, allowing adequate time for the cake mix transformation. The layers remain somewhat distinct rather than fully homogenizing because the cream cheese firms up during baking while the strawberry stays jammy and the cake develops structure—three different textures that create interest with each bite. The cooling period allows the interior to thicken slightly as the fruit filling’s pectin sets and the cream cheese firms, transforming what emerges as a bubbling, loose mixture into a sliceable dessert. At 320 calories per serving, this dump cake is comparable to or lighter than traditional cheesecake slices (400-500 calories) or strawberry shortcake (350-400 calories), while providing the satisfying combination of fruit, cream, and cake that defines American comfort desserts.
Final Thoughts
Strawberry Cheesecake Dump Cake represents the best of American home baking—practical, unfussy, and designed for real people who want homemade desserts without culinary school training or hours of free time. This recipe proves that “easy” doesn’t mean “inferior”; sometimes the simplest methods produce the most craveable results, especially when they combine universally loved flavors like strawberries and cheesecake in an accessible format. The beauty of dump cakes lies not just in their simplicity but in their forgiving nature—small variations in technique or slight measurement differences rarely result in failure, making them perfect confidence-builders for nervous bakers. While 320 calories per serving is indulgent, desserts are meant to be treats enjoyed in moderation, and this recipe’s built-in portion control (cut into 12 squares) helps prevent overindulgence that often happens when slicing freeform cakes. For those watching calories more strictly, you can reduce each serving to approximately 260-280 calories by using sugar-free pie filling, reduced-fat cream cheese, and cutting smaller portions, or serve with fresh fruit instead of ice cream. The versatility means you’ll never tire of this recipe—change the filling with the seasons, match cake mix to holiday themes, or customize to family preferences, creating endless variations from one master technique. Whether you’re a working parent rushing to get dinner and dessert on the table, a novice baker building confidence, or an experienced cook who simply wants something easy and delicious, this Strawberry Cheesecake Dump Cake delivers maximum satisfaction with minimal effort, proving that sometimes the best recipes are the ones that get out of your way and let you enjoy the results.


