
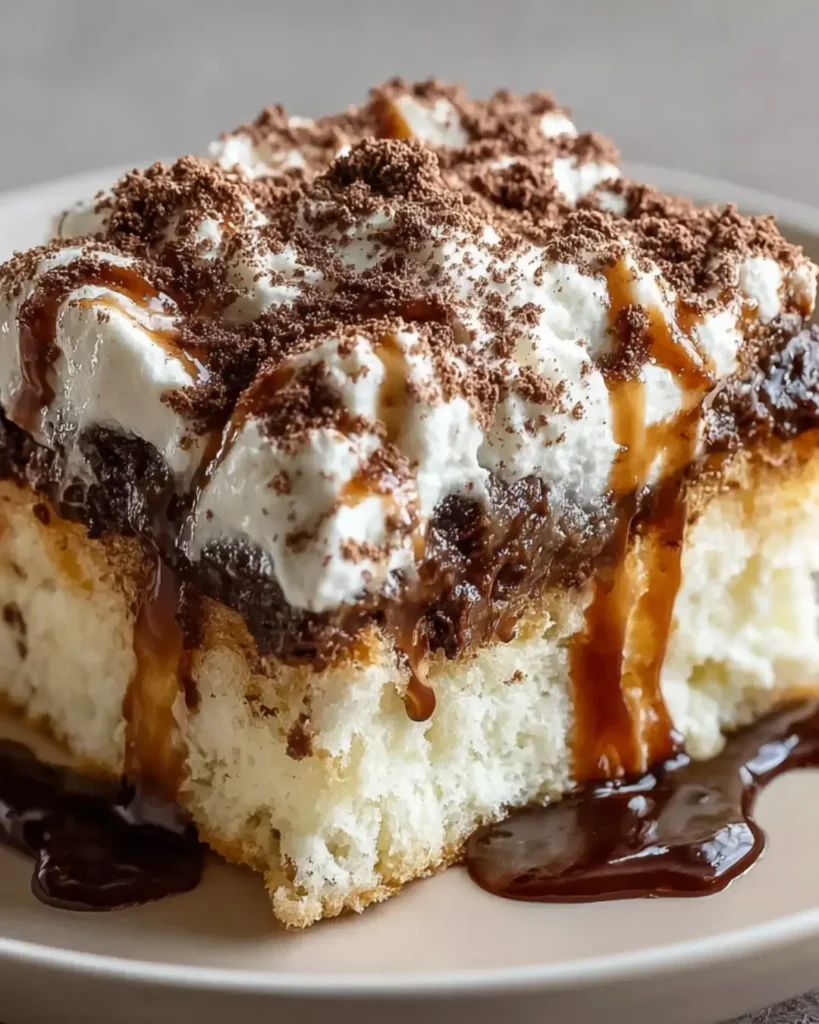
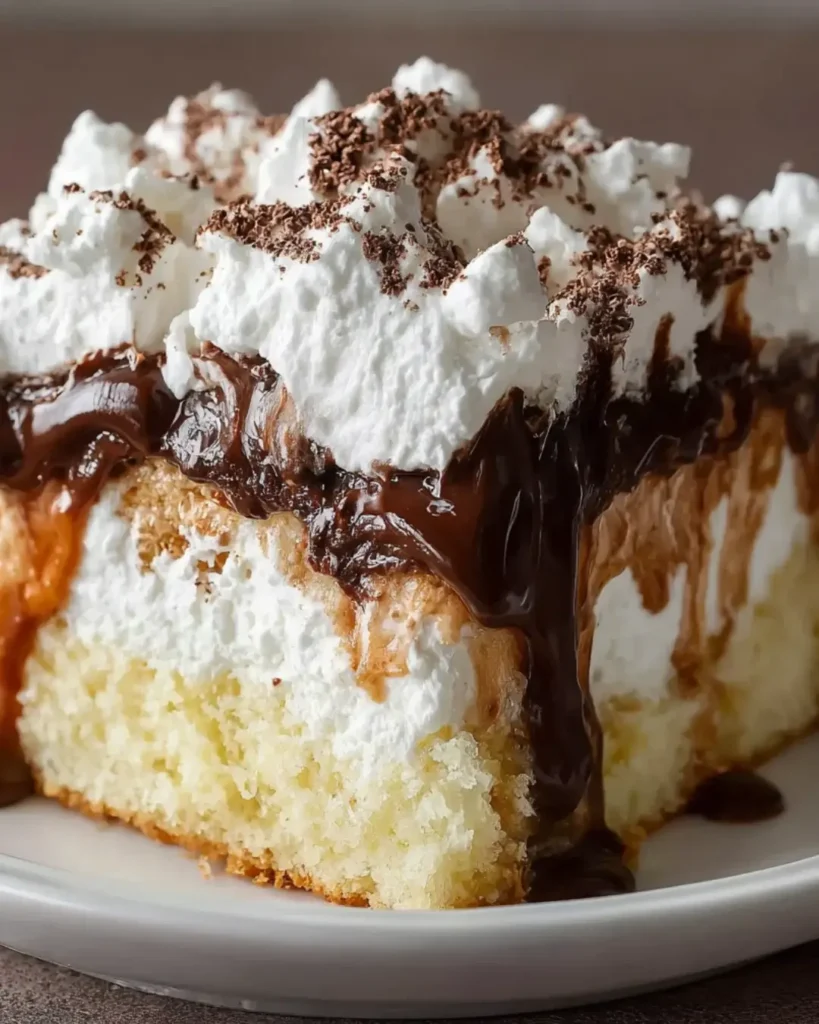
This decadent dessert reimagines the classic cocktail as a rich, moisture-infused chocolate cake. By utilizing the “poke” technique, a robust blend of brewed coffee and coffee liqueur seeps deep into the crumb, transforming a standard sponge into a fudgy, aromatic delight. Topped with a cloud of freshly whipped cream, it captures the essence of a White Russian—creamy, boozy, and deeply satisfying—in every forkful.
Why You’ll Love This Recipe
- Infused Moisture – The soaking liquid penetrates the cake after baking, guaranteeing a texture that stays impossibly moist and tender for days.
- Deep Coffee Flavor – It goes beyond simple chocolate cake; the combination of brewed coffee and Kahlúa amplifies the cocoa notes for a sophisticated profile.
- Make-Ahead Friendly – This cake actually tastes better after sitting for a few hours or overnight, making it a stress-free option for entertaining.
- Simple Technique – Despite its complex taste, it uses a straightforward batter and the easy “poke and pour” method, suitable for bakers of all levels.
- Elegant Presentation – The stark contrast between the dark, soaked cake and the snowy white whipped cream creates a visually striking slice.
- Adult Twist – The addition of liqueur adds a mature kick, making it a perfect conversation piece for dinner parties and adult gatherings.
Ingredients You’ll Need
The Chocolate Cake Base
- All-Purpose Flour (2 cups) – Provides the necessary structure and crumb stability to hold up against the liquid soak without disintegrating.
- Granulated Sugar (1 ½ cups) – Sweetens the cocoa and aids in creating a tender texture by retaining moisture during the baking process.
- Unsweetened Cocoa Powder (½ cup) – Delivers the foundational chocolate flavor; use high-quality cocoa for a richer color and taste.
- Baking Powder (1 tbsp) – The leavening agent that ensures the cake rises and stays fluffy, creating the air pockets needed to absorb the liquid later.
- Whole Milk (1 cup) – Adds richness and fat to the batter, contributing to a velvety mouthfeel.
- Vegetable Oil (½ cup) – A neutral oil ensures the cake remains soft even when chilled in the refrigerator (unlike butter, which creates a firmer crumb).
- Eggs (2 large) – Acts as a binder to provide structure and richness.
- Vanilla Extract (2 tsp) – Enhances the chocolate flavor and adds aromatic depth.
The Soak
- Brewed Coffee (1 cup) – Strong, cooled coffee acts as the primary liquid vehicle, intensifying the chocolate notes without adding excessive sweetness.
- Coffee Liqueur (½ cup) – Such as Kahlúa; this provides the signature “White Russian” flavor profile and a subtle boozy warmth.
The Topping
- Heavy Cream (1 cup) – Whipped to soft peaks, this mimics the cream layer of the cocktail and balances the dense cake.
- Powdered Sugar (2 tbsp) – Sweetens the cream and contains a small amount of cornstarch to help stabilize the whip.
- Vanilla Extract (1 tsp) – Rounds out the flavor of the cream topping.
Step-by-Step Instructions
- Prepare the Oven and PanPreheat your oven to 350°F (175°C). Thoroughly grease a 9×13-inch baking pan with butter or cooking spray, then dust with a small amount of flour (or cocoa powder) to prevent sticking.
- Combine Dry IngredientsIn a large mixing bowl, whisk together the all-purpose flour, granulated sugar, unsweetened cocoa powder, baking powder, and salt. Ensure there are no large lumps of cocoa or baking powder remaining.
- Mix the BatterIn a separate medium bowl, whisk the whole milk, vegetable oil, eggs, and vanilla extract until fully emulsified. Gradually pour these wet ingredients into the dry mixture, stirring gently with a spatula or whisk until just combined—do not overmix, or the cake will be tough.
- Bake the CakePour the batter into the prepared pan, smoothing the top with a spatula. Bake for 30–35 minutes. Test for doneness by inserting a toothpick into the center; it should come out clean or with just a few moist crumbs attached.
- Create the Absorption HolesRemove the cake from the oven and let it cool in the pan for about 10 minutes. While still warm, take the handle of a wooden spoon, a chopstick, or a large fork and poke holes all over the surface of the cake, spacing them about 1 inch apart.
- Infuse with FlavorIn a small pitcher or bowl, combine the brewed coffee and coffee liqueur. Slowly pour this mixture evenly over the entire surface of the warm cake. Focus on the edges and corners as well to ensure consistent flavor distribution.
- Chill and SetAllow the cake to cool completely at room temperature. Once cool, cover and refrigerate for at least 2 hours. This resting period is crucial for the cake to absorb the liquid and for the flavors to meld.
- Whip and FrostJust before serving, place the heavy cream, powdered sugar, and remaining vanilla extract in a chilled bowl. Beat with an electric mixer until soft-to-medium peaks form. Spread the whipped cream in an even, luscious layer over the cold cake.
Recipe Notes & Tips
- Hole Size Matters – If you use a fork, the holes might be too small to let the liquid seep in quickly. Using the handle of a wooden spoon creates larger reservoirs that hold more of the coffee mixture.
- Coffee Strength – For a more intense flavor, use espresso or strongly brewed dark roast coffee. Avoid weak or watery coffee, as it will dilute the chocolate impact.
- Cooling is Key – Do not attempt to frost the cake until it is completely cold. If the cake is even slightly warm, the whipped cream topping will melt into a greasy mess.
- Cocoa Bloom – If you have time, you can bloom the cocoa powder in the hot coffee (part of the soak) instead, but following the recipe as written ensures the structural integrity of the cake crumb first.
- Alcohol Content – The alcohol in the soak is not cooked off. If serving to a crowd that avoids alcohol, see the variations section below.
Nutritional Information
- Prep Time: 20 minutes
- Cook Time: 35 minutes
- Chilling Time: 2 hours
- Total Time: 2 hours 55 minutes
- Servings: 12 slices
- Calories: Approximately 320 kcal per serving
Perfect Pairings
- Espresso or Cappuccino – Echoes the coffee notes in the cake and provides a warm contrast to the chilled dessert.
- White Russian Cocktail – For a themed dinner party, serve the drink alongside the dessert for the ultimate experience.
- Fresh Berries – Tart raspberries or strawberries cut through the richness of the cream and chocolate.
- Salted Caramel Sauce – A drizzle on the plate adds a salty-sweet dimension that elevates the chocolate.
Ideal Occasions
- New Year’s Eve – The cocktail-inspired flavor profile fits perfectly with celebratory, late-night vibes.
- Adult Birthday Parties – A sophisticated step up from standard chocolate birthday cake.
- Dinner Parties – Since it must be made ahead, it frees up the host to focus on the main course.
- Office Potlucks – It yields a large number of servings (12) and transports easily in the baking pan.
Storage & Serving Tips
- Refrigeration Required – Because of the dairy in the whipped cream and the moisture content of the cake, this must be stored in the refrigerator.
- Shelf Life – The cake keeps well for up to 3–4 days. In fact, the texture often becomes fudgier on day two.
- Freezing – You can freeze the soaked cake (without the whipped cream topping) for up to 3 months. Thaw in the fridge and top with fresh cream before serving.
- Clean Cuts – For bakery-style slices, wipe your knife clean with a warm, damp cloth between each cut.
Creative Variations to Try
- Non-Alcoholic Version – Swap the ½ cup coffee liqueur for an equal amount of coffee-flavored syrup or simply more strong brewed coffee mixed with a teaspoon of sugar.
- Mocha Mudslide – Drizzle chocolate ganache or fudge sauce over the whipped cream and sprinkle with crushed chocolate-covered espresso beans.
- Baileys Twist – Substitute Irish Cream for the Kahlúa in the soak for a creamier, slightly different liqueur profile.
- Spiced Coffee – Add a pinch of cinnamon or cardamom to the dry ingredients for a Mexican Coffee vibe.
Troubleshooting Common Issues
- Soggy Bottom – Solution: This happens if too much liquid is poured into one spot. Pour slowly and evenly, or reduce the liquid amount slightly if you prefer a drier cake.
- Cake Falls Apart – Solution: Poking the cake too aggressively while it is piping hot can tear the crumb. Let it cool for just 10 minutes to stabilize before poking.
- Whipped Cream is Runny – Solution: Ensure you whipped the cream to at least soft peaks and that the cake was fully chilled. Warm cake melts cream instantly.
- Bland Flavor – Solution: Usually due to weak coffee or low-quality cocoa. Ensure your coffee is strong/espresso-strength to stand up to the sugar.
Why This Recipe Works
This recipe leverages the culinary science of hydration and flavor layering. Standard cakes rely on fat and sugar for moisture, but a “poke cake” introduces a secondary hydration source (the coffee mixture) after the structure is set. The porous nature of the sponge cake acts like a sponge, drawing the liquid into the center of the crumb. Coffee is naturally acidic and bitter, which pairs chemically with chocolate to mask the bitterness of the cocoa while amplifying its richness—a process known as “blooming” the flavor. The fat in the heavy cream then coats the palate, softening the intensity of the coffee and chocolate for a balanced finish.
Final Thoughts
The White Russian Poke Cake is a testament to how simple techniques can yield professional-quality results. It transforms pantry staples into a dessert that feels luxurious and intentional. With its perfect balance of bitter coffee, sweet cream, and rich chocolate, it satisfies multiple cravings at once. At 320 calories per slice, it is an indulgent treat, but the richness means a small square is often enough to satisfy. Whether you are a baking novice or a seasoned pro, this recipe promises high impact with minimal stress.


